
Welcome to the four part blog series on the web-based network device monitoring tool – “johann”. Part one of the series serves as an introduction to johann. In part 2, you got a look behind the scenes of how I implemented the south-bound communication between the application and the network device with the network device API RESTCONF. Part 3 of the series focuses on the web-based application itself, with a focus on the Python Web-Framework Django. In part 4 of the series, we focus on johann deployment to production.
Deploying to production
In this final part, I will cover one important topic: Deploying to production. Imagine you just finished the first release of your Django (or any Python-based web application), and now you would like to deploy it to production so other users can access it. In our case, if you are thinking about just running the command you were using for testing…
Computer$ python3 manage.py runserver
… Do not do this! As written in the Django documentation, this command only starts a lightweight development Web server. It should not be used in production settings. We will get into more detail, but let’s start with the application first!
Leaving the testing environment
You need to ask yourself: Who are the users of my application and what’s the best and most popular way for them to consume it? johann is a simple application. The intention was to install it as a client-server application on a server on-prem or in a lab environment where a handful of users can access the dashboard. But I also wanted to make it possible to install it as a “standalone” application locally on Linux, mac OS and Windows. The installation process should be as easy and fast as possible and also combability is very important to the users. That’s why I containerized johann.
Containerize, Containerize, Containerize
Independent from our Django project, containerizing your web-based applications is the way to go. It gives you a lot of benefits such as rapid deployment, isolated environments, portability, flexibility and simplifies your testing. When you put your application inside of containers, you as the developer can know exactly what happens inside from a code perspective as the container environment is the same on any platform where you are deploying your application. You need to make your application aware of it and also have your containers and container engine properly configured.
Django in Production Environments
Alright, we know that we would like to deploy our Django application inside a container, but how do we do that in a production setting? Django itself is a web-framework where you can build web-applications with Python, but it needs a web-server to serve the content in the most scalable and performant way. However, the web-server (for example nginx) doesn’t “speak” Python natively and therefore needs an interface to request and receive the content from our Django application. There are two popular specifications for how this interface should look like:
- Web Server Gateway Interface (WSGI) specified in the PEP 3333. It basically describes how web-servers should communicate with Python applications
- Asynchronous Server Gateway Interface (ASGI). It is the “spiritual successor to WSGI” and also supports asynchronous requests (= WebSockets support) which WSGI can’t.
johann in a Production Environment
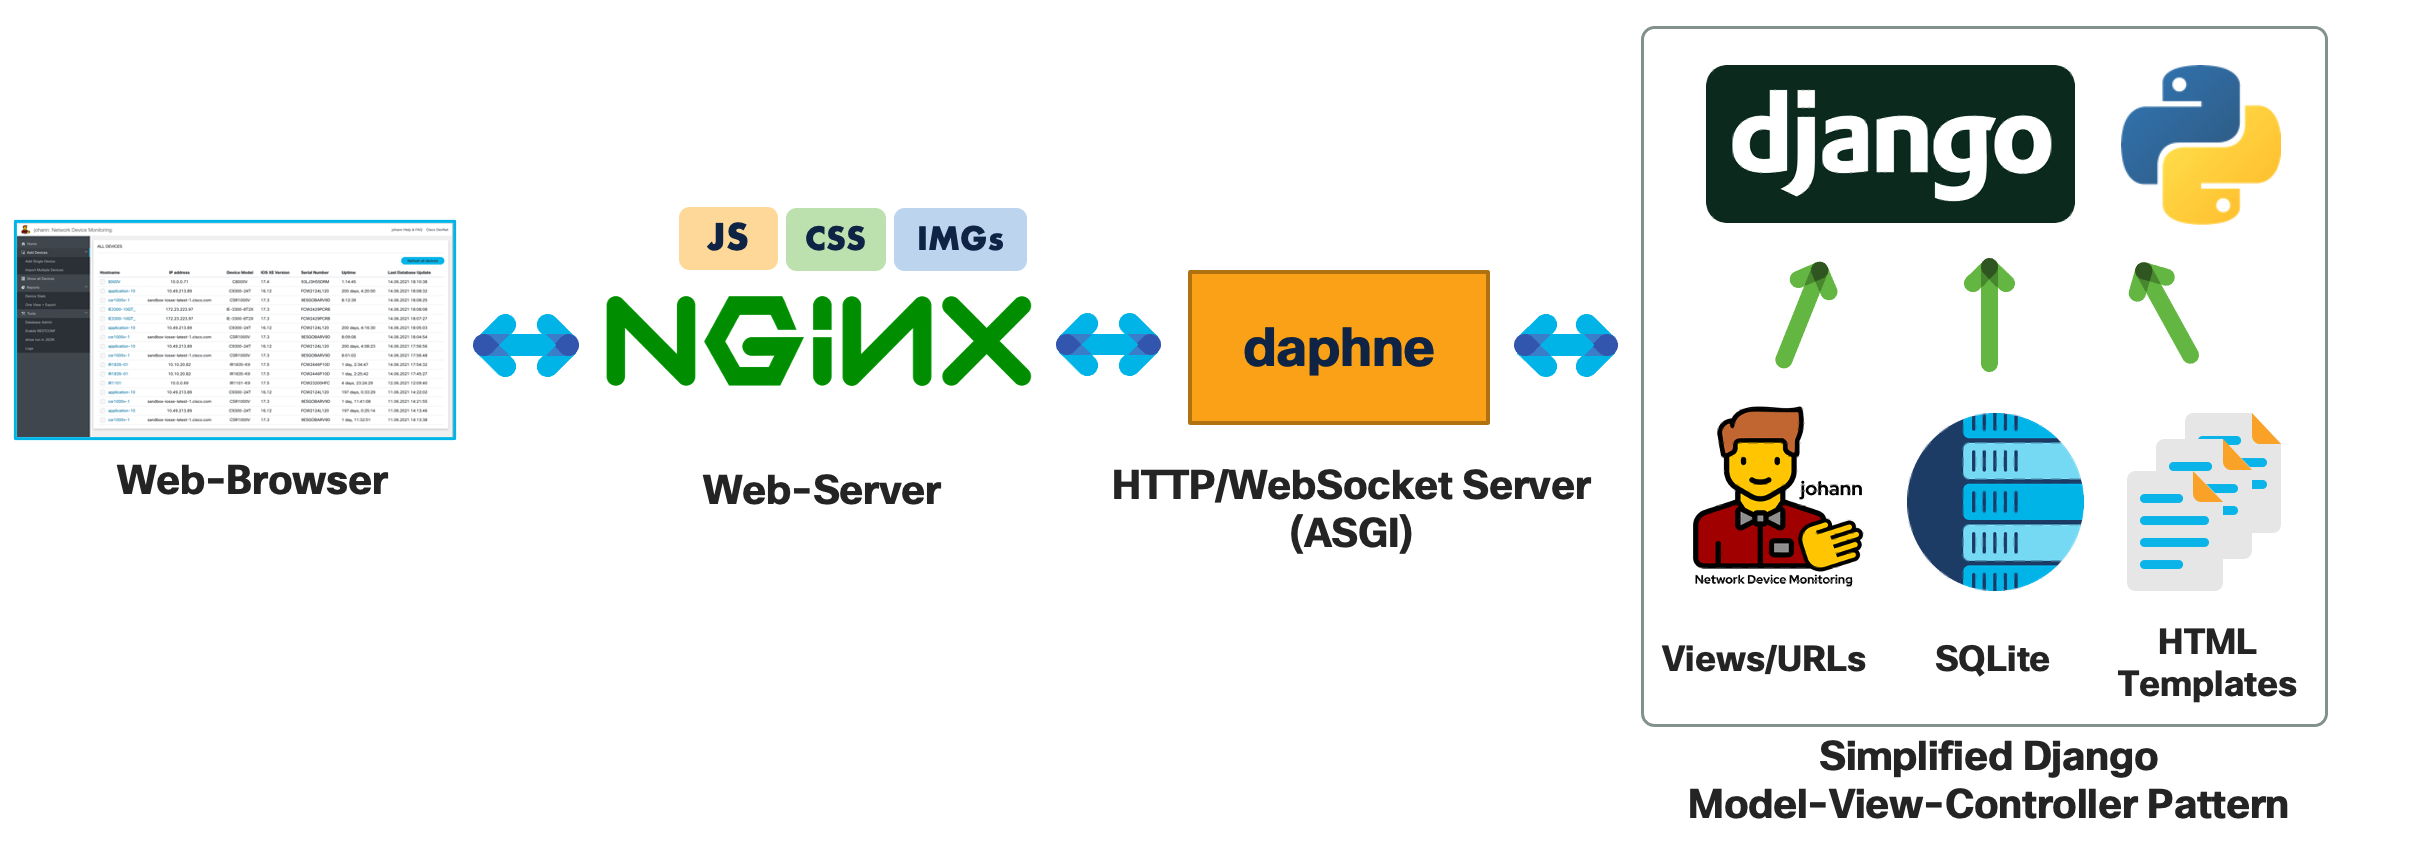
After the general overview, let’s get in detail with johann as an example. As you see in the request architecture above, I chose nginx as the web-server. This was my personal preference. You can use Apache as well. On this web-server the static files (javascript and CSS files, images, downloads) of johann are being stored. You can see in the nginx configuration file that nginx is acting as a reverse proxy to the ASGI interface when the user is requesting any files (except when the files are stored in the “/static/” location). Because johann is using WebSockets, I chose the ASGI capable daphne server for HTTP and Websockets requests. This is also the go-to server when using Django Channels. Other popular WSGI servers are gunicorn and uWSGI, but they do not support WebSockets. So an alternative would be using daphne only for WebSockets and uWSGI for HTTP requests.
Let’s play this out now
When the user is requesting the network devices overview page, for example, it receives the static content directly from the nginx web-server. The HTML page and database results request is routed via nginx and daphne to the johann Django application where Django is assembling the response with its model-view-controller pattern: based on the URL, the pre-defined view will be called which will merge data from the database and the pre-defined HTML template. And that’s how the user is getting the content.
Finally, don’t forget to make your Django application ready for the production environment. I would recommend using two separate settings.py files where you can configure folder paths, database, and broker information for each environment (testing and production). Furthermore, when starting johann inside a container the database must be synced. The static content will be collected and put into a shared Docker volume for the nginx web-server and a new superuser will be created. You can see the commands in the start_johann.sh-bash script. You can also find a deployment checklist in the Django documentation.
Counting the Components
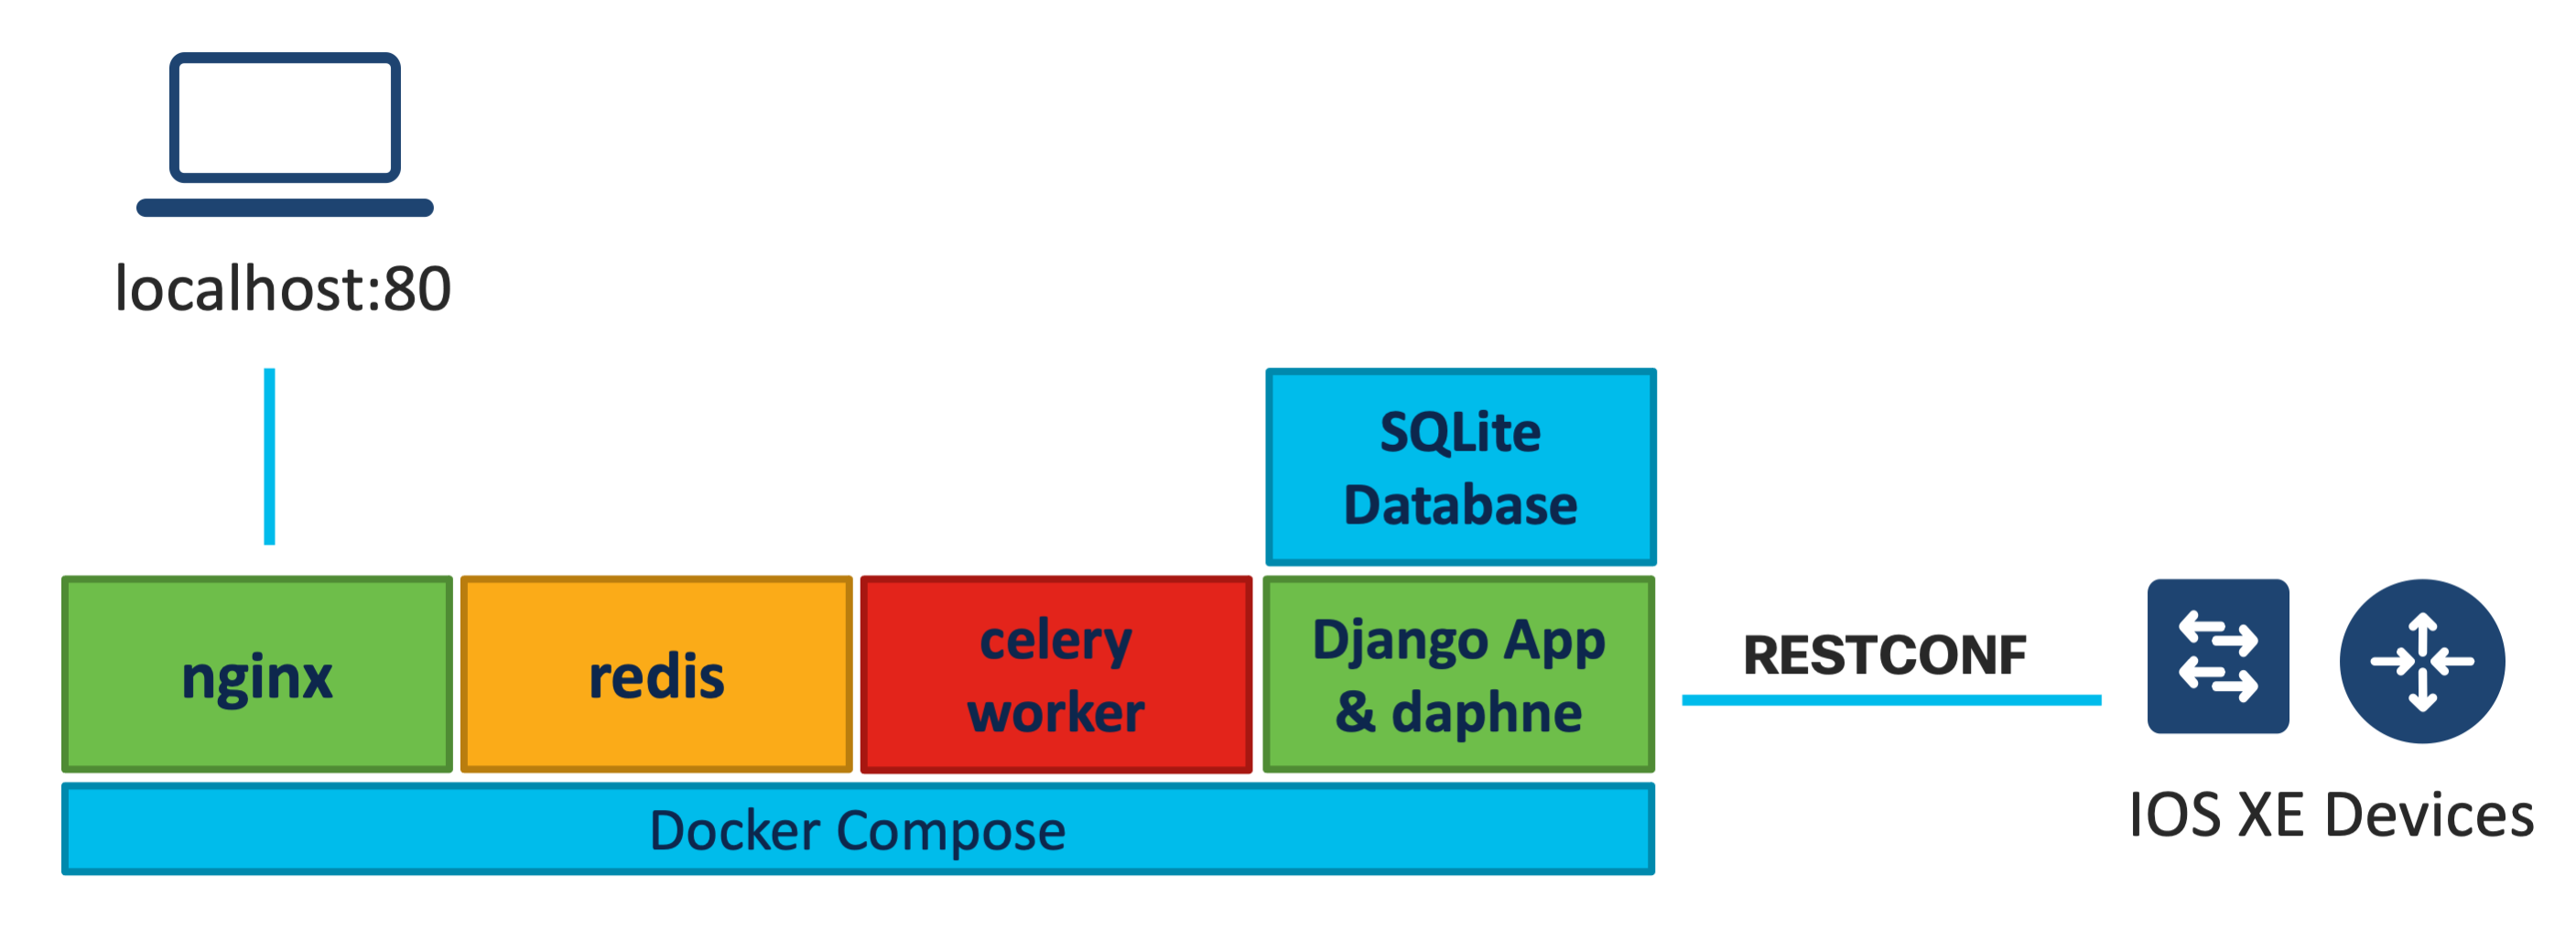
We are nearly there! Now we know what components we need to deploy:
- Django application johann with daphne
- nginx web-server for serving and caching (especially for the static files)
- Celery worker which is handling our tasks
- redis message broker used by the celery worker and Django Channels (WebSockets)
For the containerization of those components I chose Docker Compose. It’s a powerful and easy-to-use tool for running multiple containers at once. The whole configuration is defined in a single YAML-file, and you can simply start and stop all containers with a single command.
Do you have a question or comment?
And that’s it! And it has been a blast! I hope this blog series was helpful to you in your NetDevOps / Device API journey. And that johann inspired you, and was useful to you! Please leave me a comment in the section below. What do you want to see next!
Resources
- Flexing the Network Device API Muscles with johann – Part 1: Introduction
- Getting Data via RESTCONF – Flexing the Network Device APIs Muscles with “johann” Part 2
- Using Django with Celery & WebSockets – Flexing the Network Device APIs Muscles with “johann” Part 3
- Learn to program the network with DevNet IOS XE
- Cisco IOS XE Sandboxes
- Download, Test and view the source code of johann
- Model-Driven-Programmability
- Django
- Docker-Compose
We’d love to hear what you think. Ask a question or leave a comment below.
And stay connected with Cisco DevNet on social!
Twitter @CiscoDevNet | Facebook | LinkedIn
Visit the new Developer Video Channel


