
If you haven’t already seen the Introduction to Terraform posts, please have a read through. Here are links to the first four posts:
- Introduction to Terraform
- Terraform and ACI
- Explanation of the Terraform configuration files
- Terraform Remote State and Team Collaboration
- Terraform Providers – How are they built?
So far we’ve seen how Terraform works, ACI integration, and remote state. Although not absolutely necessary, sometimes it’s useful to understand how the providers work in case you need to troubleshoot an issue. This section will cover at a high level how Terraform Providers are built, using the ACI provider as an example.
Code Example
https://github.com/conmurphy/intro-to-terraform-and-aci-remote-backend.git
For explanation of the Terraform files see Part 3 of the series. The backend.tf file will be added in the current post.
Lab Infrastructure
You may already have your own ACI lab to follow along with however if you don’t you might want to use the ACI Simulator in the Devnet Sandbox.
Terraform File Structure
As we previously saw, Terraform is split into two main components, Core and Plugins. All Providers and Provisioners used in Terraform configurations are plugins.
Data sources and resources exist within a provider and are responsible for the lifecycle management of the specific endpoint. For example we will have a look at the resource, “aci_bridge_domain“, which is responsible for creating and managing our bridge domains.

The code for the Terraform ACI Provider can be found on Github
https://github.com/CiscoDevNet/terraform-provider-aci
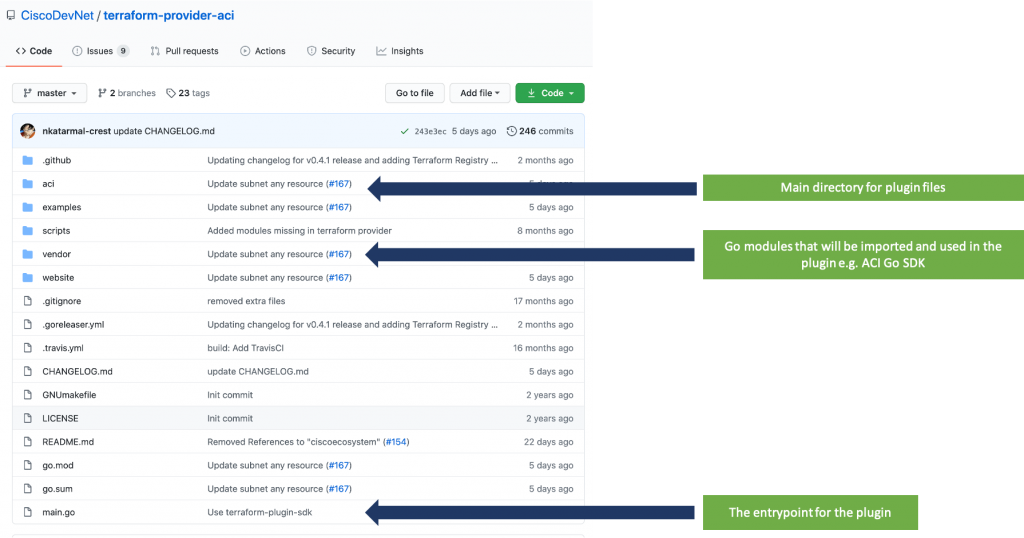
There are a number of files in the root directory of this repo how the ones we are concerned with are “main.go“, the “vendor” folder, and the “aci” folder.
- main.go: This file creates a valid, executable Go binary that Terraform Core can consume.
- vendor: This folder contains all of the Go modules which will be imported and used by the provider plugin. The key module for this provider is the ACI Go SDK which is responsible for making the HTTP requests to APIC and returning the response.
- aci: This is the important directory where all the resources for the provider exist.

Within the ACI folder you’ll find a file called “provider.go“. This is a standard file in the Terraform providers and is responsible for setting the properties such as username, password, and URL of the APIC in this case.
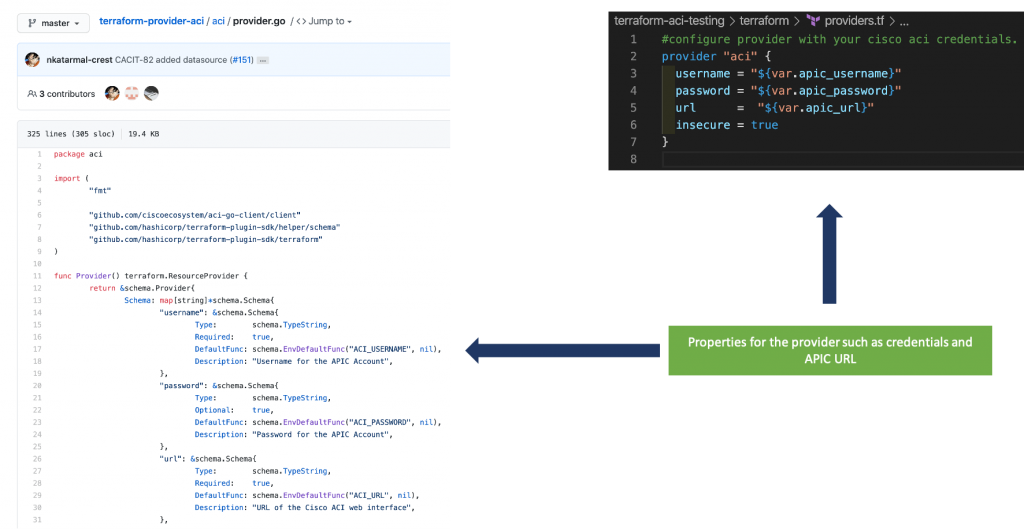
It’s also responsible for defining which resources are available to configure in the Terraform files, and linking them with the function which implements the Create, Read, Update, and Delete (CRUD) capability.

In the aci folder you’ll also find all the data sources and resources available for this provider. Terraform has a specific structure for the filename and should start with data_source_ or resource_

Let’s look at the resource, “resource_aci_fvbd“, used to create bridge domains.
- On lines 10 and 11 the ACI Go SDK is imported.
- The main function starts on line 16 and is followed by a standard Terraform configuration
- Lines 18 – 21 define which operations are available for this resource and which function should be called. We will see these four further down the page.
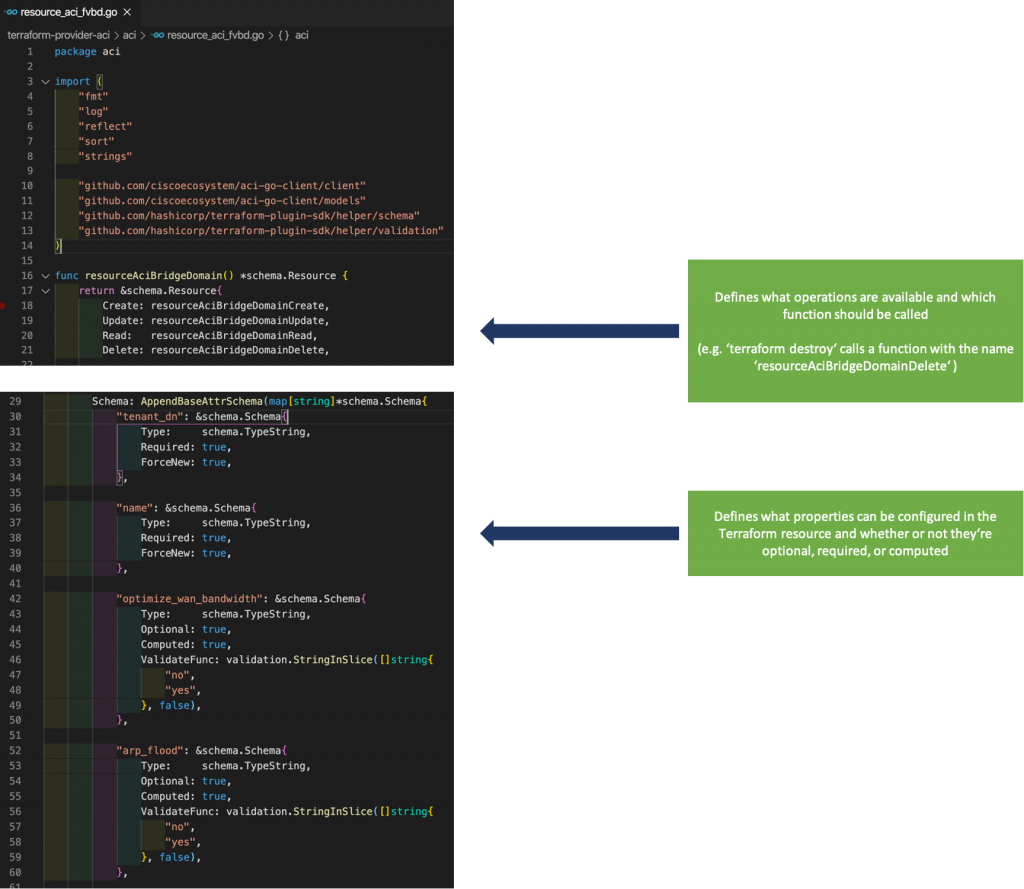
- Lines 29 – 59 in the screenshot are setting the properties which will be available for the resource in the Terraform configuration files.
TROUBLESHOOTING TIP: This is an easy way to check exactly what is supported/configurable if you think the documentation for a provider is incorrect or incomplete.
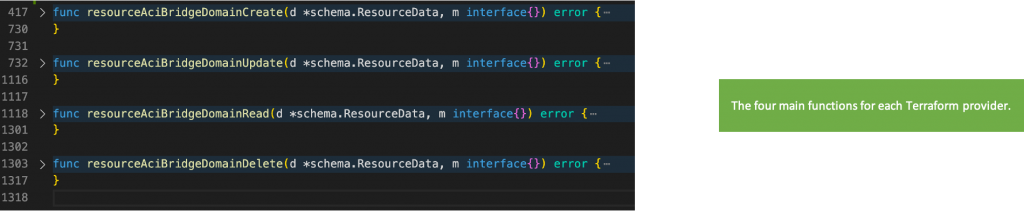
We’ve now reached the key functions in the file and these are responsible for implementing the changes. In our case creating, reading, updating, and destroying a bridge domain.
If you scroll up you can confirm that the function names match those configured on lines 18-21
Whenever you run a command, e.g. “terraform destroy“, Terraform will call one of these functions.
Let’s have a look at what it’s creating.

First the ACI Go SDK has to be setup on line 419
Following on from that the values from your configuration files are retrieved so Terraform can take the appropriate action. For example in this screenshot the name we’ve configured, “bd_for_subnet“, will be stored in the variable, “name“.
Likewise for the description, TenantDn, and all other bridge domain properties we’ve configured.

Further down in the file you’ll see the ACI Go SDK is called to create a NewBridgeDomain. This object is then passed to a Save function in the SDK which makes a call to the APIC to create the bridge domain
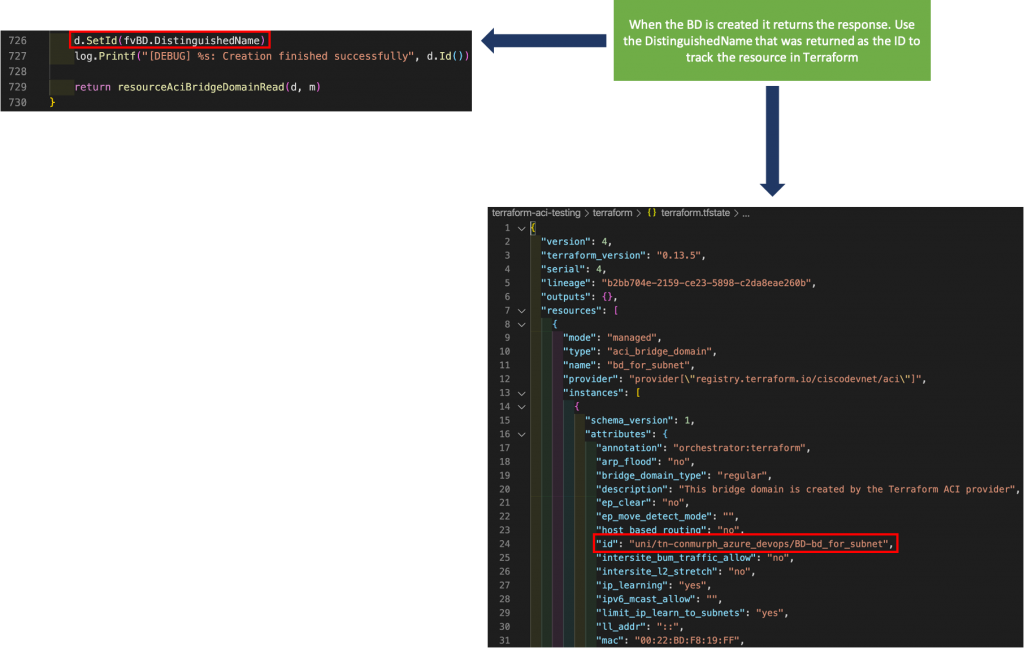
Continuing down towards the end of the create function you’ll see the ID being set on line 726. Remember when Terraform manages a resource it keeps the state within the terraform.tfstate file. Terraform tracks this resource using the id, and in the case of ACI the id is the DistinguishedName.
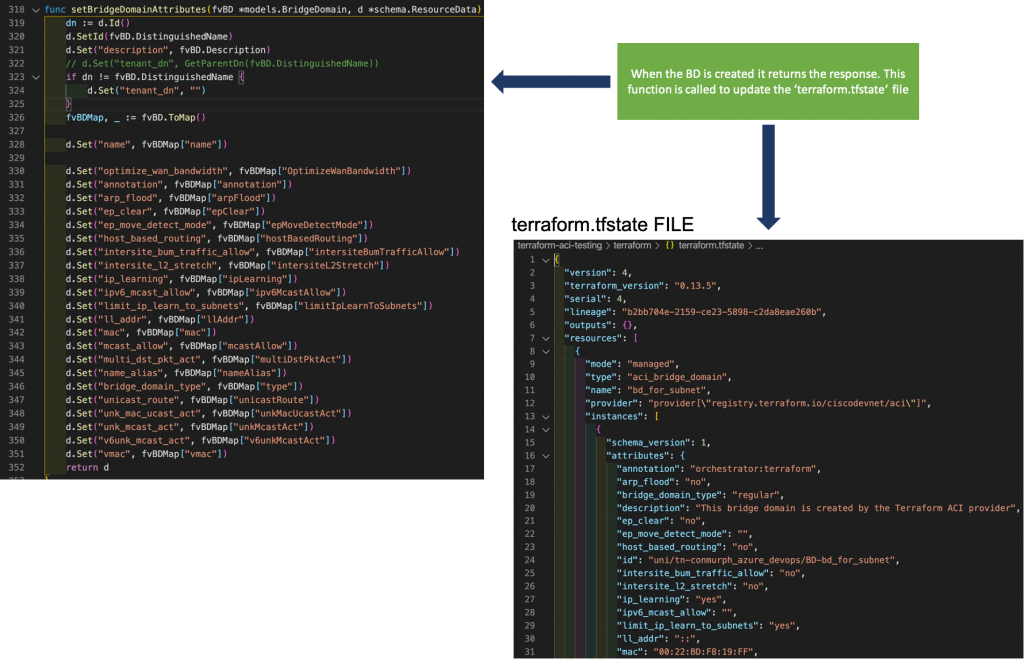
It’s not only the id that Terraform tracks though, all the other properties for the resource should also be available in the state file. To save this data there is another function, setBridgeDomainAttributes, which sets the properties in the state file with the values that were returned after creating/updating the resource.
So when Terraform creates our bridge domain, it saves the response properties into the state file using this function.
TROUBLESHOOTING TIP: If resources are always created/updated when you run a terraform apply even though you haven’t changed any configuration, you might want to check the state file to ensure that all the properties are being set correctly.
We’d love to hear what you think. Ask a question or leave a comment below. And stay connected with Cisco DevNet on social!
Twitter @CiscoDevNet | Facebook | LinkedIn
Visit the new Developer Video Channel


