
If you haven’t already seen the Introduction to Terraform post, please have a read through. This section will cover the Terraform Remote Backend using Terraform Cloud.
- Introduction to Terraform
- Terraform and ACI
- Explanation of the Terraform configuration files
- Terraform Remote State and Team Collaboration
- Terraform Providers – How are they built?
Code Example
https://github.com/conmurphy/intro-to-terraform-and-aci-remote-backend.git
For explanation of the Terraform files see the following post. The backend.tf file will be added in the current post.
Lab Infrastructure
You may already have your own ACI lab to follow along with however if you don’t you might want to use the ACI Simulator in the Devnet Sandbox.
Terraform Backends
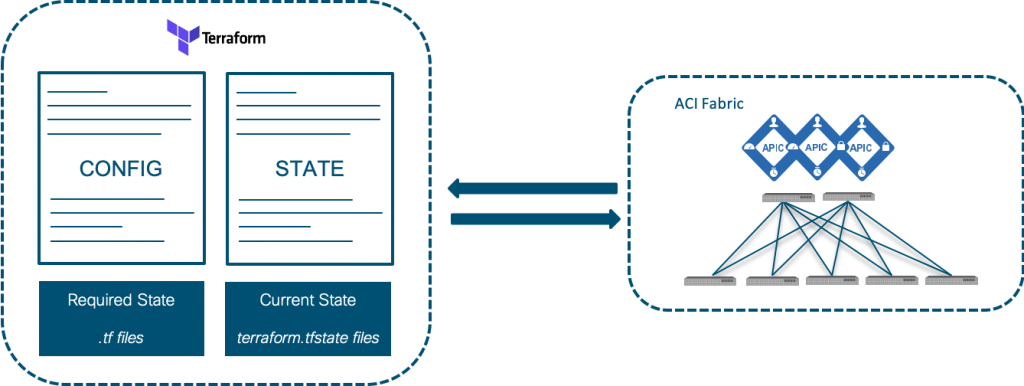
An important part of using Terraform is understanding where and how state is managed. In the first section Terraform was installed on my laptop when running the init, plan, and apply commands. A state file (terraform.tfstate) was also created in the folder in which I ran the commands.
It’s fine when learning and testing concepts however does not typically work well in shared/production environment. What happens if my colleagues also want to run these commands? Do they have their own separate state file?
These questions can be answered with the concept of the Terraform Backend.
“A backend in Terraform determines how state is loaded and how an operation such as apply is executed. This abstraction enables non-local file state storage, remote execution, etc.
Here are some of the benefits of backends:
- Working in a team: Backends can store their state remotely and protect that state with locks to prevent corruption. Some backends such as Terraform Cloud even automatically store a history of all state revisions.
- Keeping sensitive information off disk: State is retrieved from backends on demand and only stored in memory. If you’re using a backend such as Amazon S3, the only location the state ever is persisted is in S3.
- Remote operations: For larger infrastructures or certain changes, terraform apply can take a long, long time. Some backends support remote operations which enable the operation to execute remotely. You can then turn off your computer and your operation will still complete. Paired with remote state storage and locking above, this also helps in team environments.”
https://www.terraform.io/docs/backends/index.html
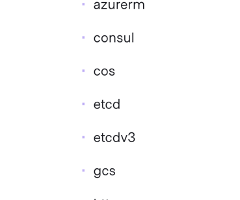
As you can see from the Terraform documentation, there are many backend options to choose from.
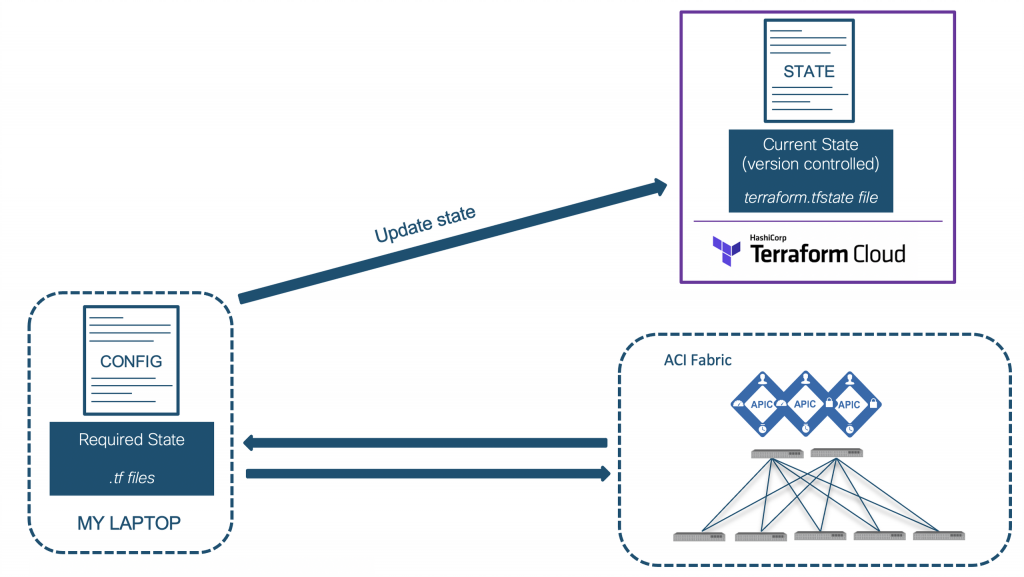
In this post we’ll setup the Terraform Cloud Remote backend.
https://www.terraform.io/docs/backends/types/remote.html
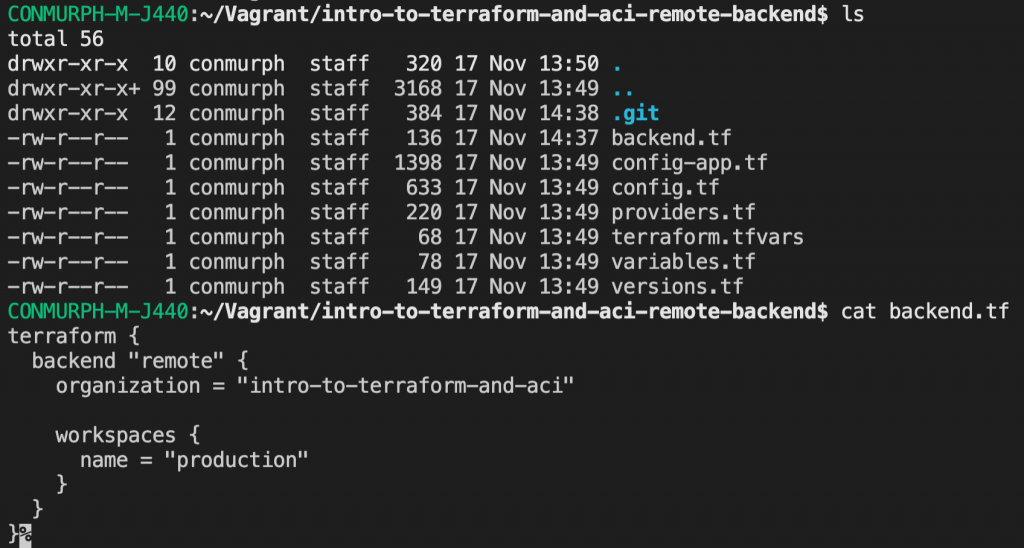
We will use the same Terraform configuration files as we saw in the previous posts, with the addition of the “backend.tf “ file. See the code examples above for a post explaining the various files.
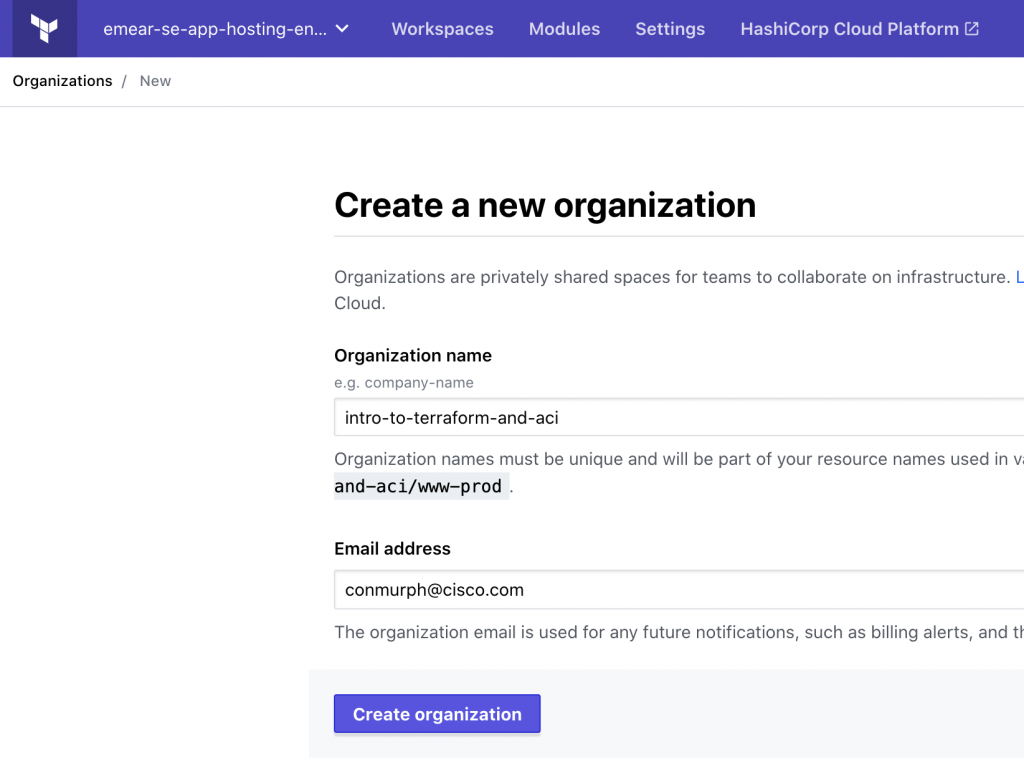
For this example you will need to create a free account on the Terraform Cloud platform
- Create a new organization and provide it a name
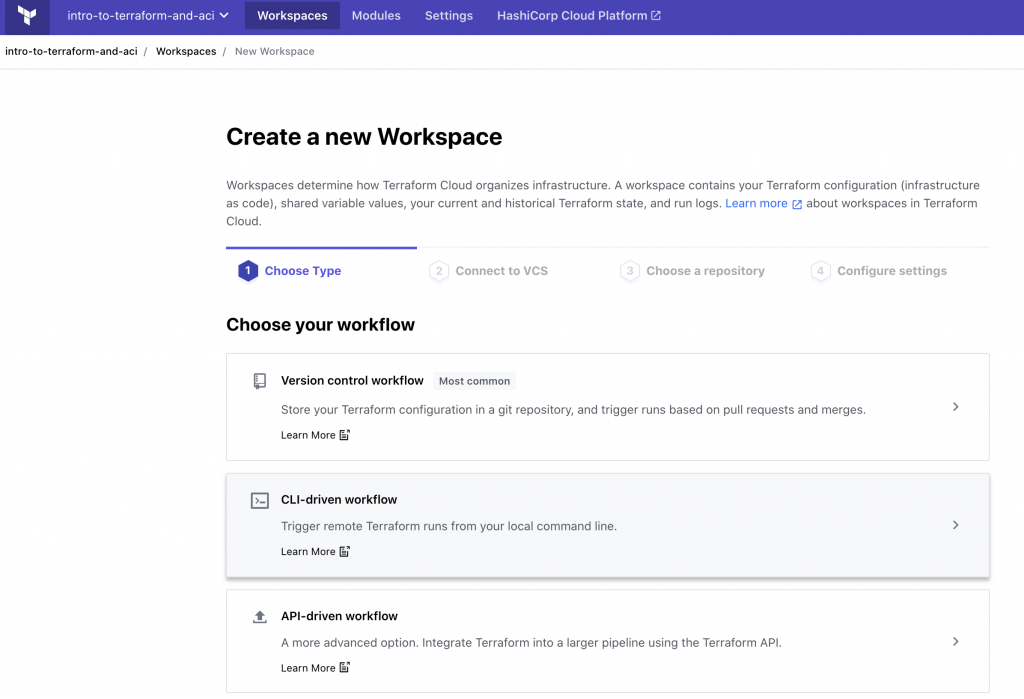
- Create a new CLI Driven workspace

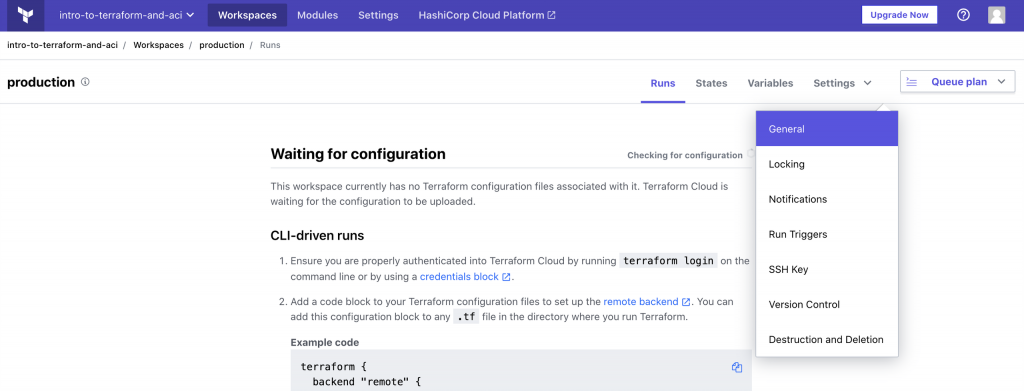
- Once created, navigate to the “General” page under “Settings”
- Change the “Execution Mode” to “Local”
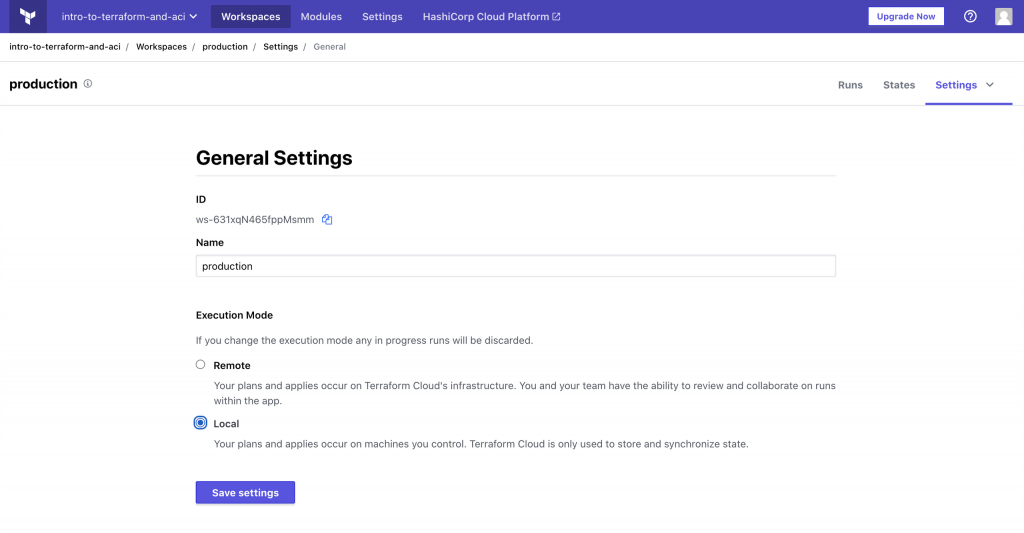
You have two options with Terraform Cloud
- Remote Execution – Let Terraform Cloud maintain the state and run the plan and apply commands
- Local Execution – Let Terraform Cloud main the state but you run the plan and apply commands on your local machine
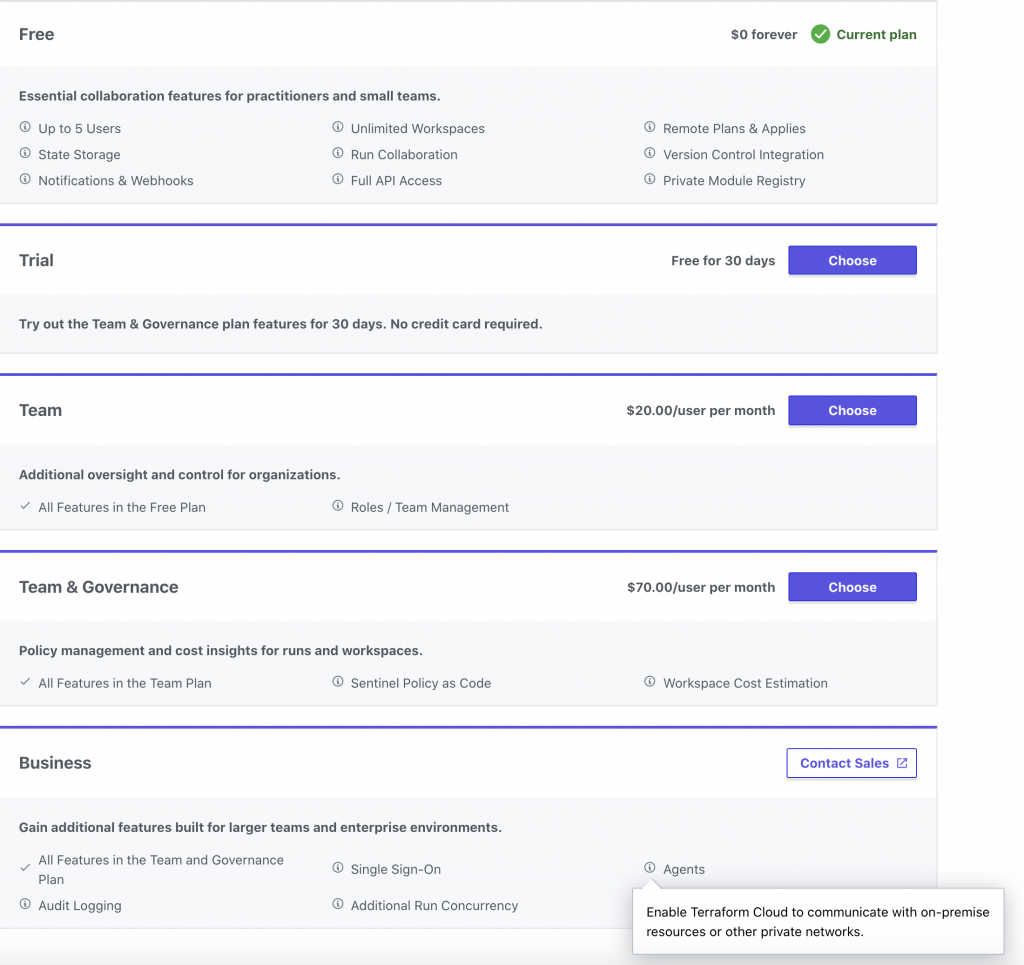
In order to have Terraform Cloud run the commands you will either need public access to the endpoints or run an agent in your environment (similar to Intersight Assist configuring on premises devices)
Agents are available as part of the Terraform Cloud business plan. For the purposes of this post Terraform Cloud will manage the state while we will run the commands locally.
- Navigate back to the production workspace and you should see that the queue and variables tabs have been removed.
- Copy the example Terraform code and update the backend.tf file (the Terraform files can be found in the Github repo above)
- Navigate to the Settings link at the top of the page and then API Tokens
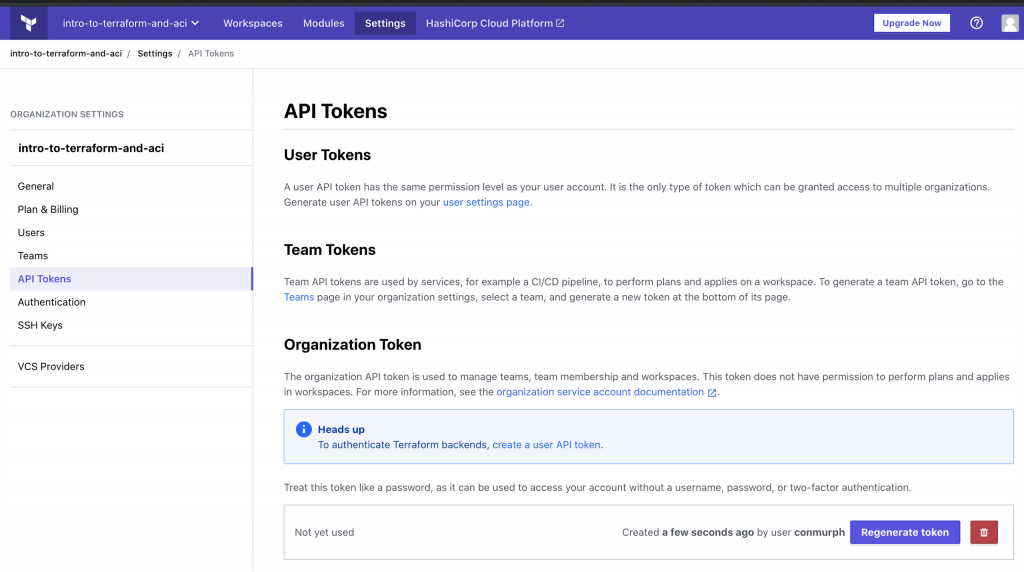
- Create an authentication token
- Copy the token
- On your local machine create a file (if it doesn’t already exist) in the home directory with the name .terraformrc
- Add the credentials/token information that was just create for your organization. Here is an example
CONMURPH:~$ cat ~/.terraformrc
credentials "app.terraform.io" {
  token="<ENTER THE TOKEN HERE> "
}- You should now have the example Terraform files from the Github repo above, an updated backend.tf file with your organization/workspace, and a .terraformrc file with the token to access this organization
- Navigate to the folder containing the example Terraform files and your backend.tf file
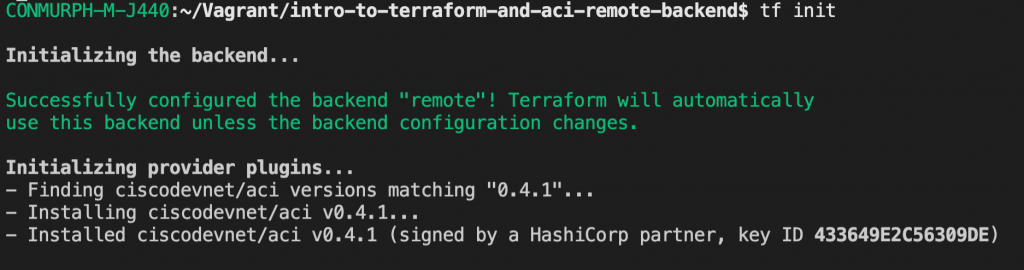
- Run the terraform init command. If everything is correct you should see the remote backend initialised and the ACI plugin installed
- Run the terraform plan and terraform apply commands to apply to configuration changes.
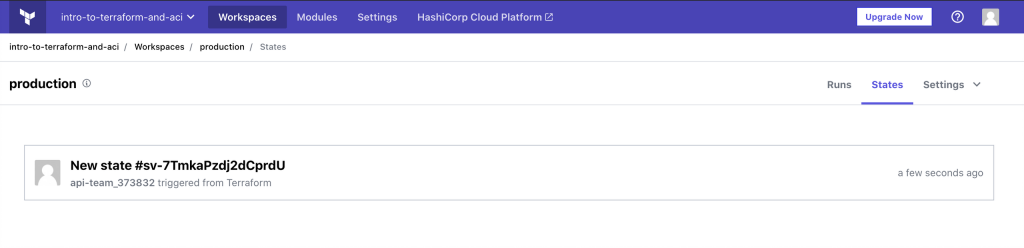
- Once complete, if the apply is successful have a look at your Terraform Cloud organization.
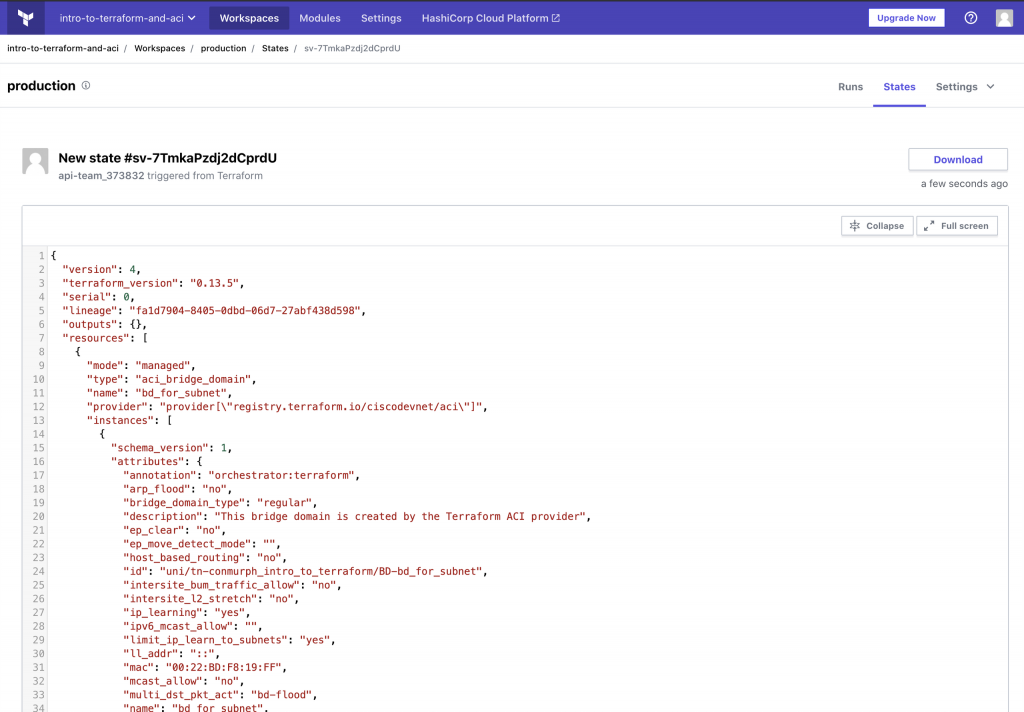
- In the States tab you should now see the first version of your state file. When you look through this file you’ll see it’s exactly the same as the one you previously had on your local machine, however now it’s under the control of Terraform Cloud
- Finally, if you want to collaborate with your colleagues, you can all run the commands locally and have Terraform Cloud manage a single state file. (May need to investigate locking depending on how you are managing the environment)
We’d love to hear what you think. Ask a question or leave a comment below. And stay connected with Cisco DevNet on social!
Twitter @CiscoDevNet | Facebook | LinkedIn
Visit the new Developer Video Channel


