
As I’m sure some others did, I partook of too much pie over the holiday break. Besides my wife’s wonderful pecan pie, I had my hands on many Raspberry Pis, the inexpensive single-board computers that have transformed IoT and enabled many to learn programming and simple circuitry.


My project with the Raspberry Pis
Let’s consider it an adjacency to observability, but in the home. I’ll call it ‘Full Abode Observability’ (in a nod to Cisco’s Full Stack Observability?).
The home is in a rather cold climate, and we lower the heating temperature on the thermostats to save energy when it is unoccupied. I wondered “How cold does it get inside, outside, and in the crawl space? Could I set temperatures even lower without risking freezing pipes?”. Well, if you don’t measure it, you can’t tell and anything else would-be conjecture.
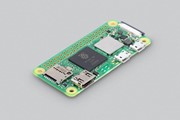
So, I set off to build a set of Raspberry Pis with temperature and humidity sensors. I’ve done many projects over the years with the traditional ‘Altoids box sized’ Raspberry Pis, like the Pi 4 shown above. I knew I wanted to couple this with a temperature and humidity sensor and run a small Python script to read the sensor and push the results to InfluxDB for database retention and graphing. Since this was going to be so function specific, I didn’t even need the power of a Pi 4, so I decided to give the newly released Raspberry Pi Zero 2 W a try. It is shown in the third picture above.
Something you’ll note is no ethernet port… OK then, I can use wireless – it supports 2.4 GHz WiFi 802.11b/g/n and Bluetooth 4.1 through its Broadcom BCM43438 chip. However, I still need to get power to it. Do I want to run a power cable to it outside, in the basement and in the crawlspace just to use an AC-to-DC 5V transformer to power the Pi? A wall-wart? No way! Time for Power over Ethernet (PoE)! It was appealing to run power and data over the same cable. Since these are such low-powered devices, no problem! So, the next consideration was, “is there a ‘Hat’ – a pluggable module that could provide that ethernet and PoE capability?” And there is!
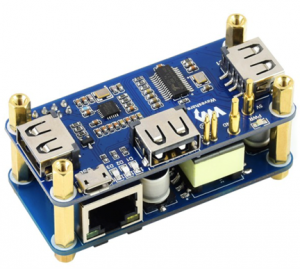
Waveshare PoE Ethernet USB HUB HAT
I wanted to use a pretty accurate temperature and humidity sensor that could connect to the Raspberry Pis GPIO pins seen in the top edge of the Pi 2 W image. There are analog and digital options. I settled on a digital option that used the I2C (Inter-Integrated Circuit) bus which provides a synchronous, serial communication function common on IoT devices.
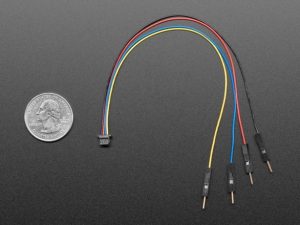
The sensor of choice came from Adafruit, the SHT40.
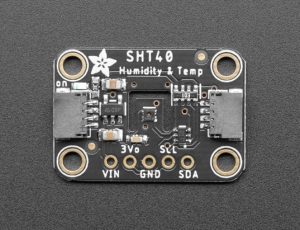
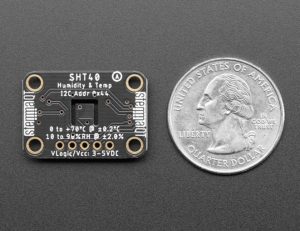
Adafruit SHT40 Temperature and Humidity Sensors
The sensor came with pinholes to solder jumpers to, but it also has STEMMA QT connectors which combine the pins in an easy-to-use modular connector – no soldering! Well, I still needed to solder 4 pins on the Pi Zero 2W, as seen below.
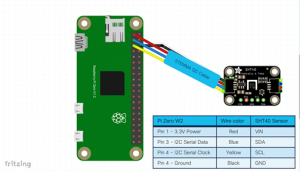
So, then it was Cat-5e cable run time! Once the cables were run, it’s White-Orange, Orange, White-Green, Blue, White-Blue, Green, White-Brown and Brown time! Yes, terminating ethernet cables – no big deal!
Now the physical stuff is done, on to the programming. I need to read the sensor data from the I2C bus, format it slightly, then punt it off to my home Intel NUC that is running InfluxDB v2.1.1 with the new embedded visualization. In a future blog I’ll tell you the plans for the CiscoLive NOC in Las Vegas June 2022. We plan a full TIG (Telegraph, Influx and Grafana) Stack there.
Check out the simple Python code in my GitHub repo.
What’s next?
My next enhancement to the code will be to retain the sensor measurements local to the Pi’s flash filesystem if the InfluxDB service is unreachable. Then I can add the missed data back into the time-series database once it returns to operation.
With the Python script being triggered by the Raspberry Pi’s crontab every 10 minutes, this is the graph I created for inside, outside and crawlspace temperature and humidity monitoring.
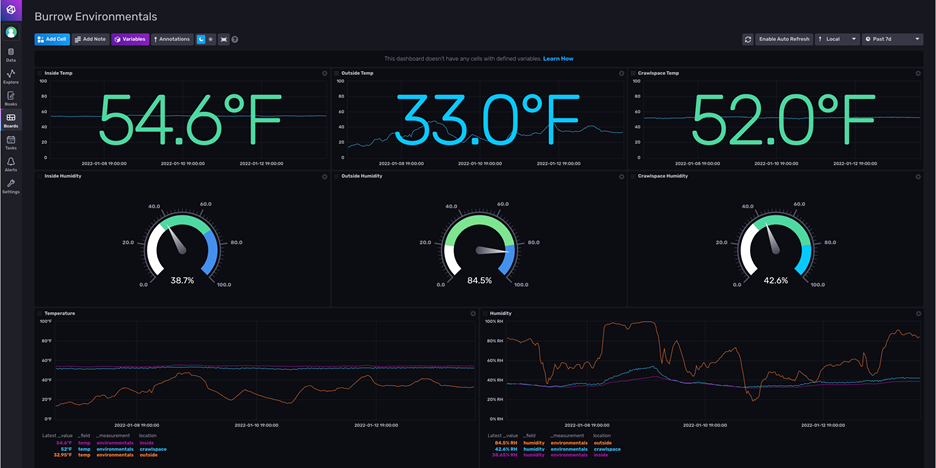
So, collecting this data now I can see when the home is unoccupied the crawlspace temperature (right-most panel at 52 °F) tracks closely to the inside, basement temperature (left-most panel at 54.6 °F). This is confirmed by the lower-left historical measurements where the violet (inside) and crawlspace (light blue) track very closely and the outside (brown) does whatever nature provides. It was also interesting to me to see how the humidity tracks. When the outside temperature goes gets below 40 degrees, my heating system kicks in. The home dries out a bit and causes the humidity to drop inside.
At this point I’m confident I could run a bit lower heating temperature and not risk freezing pipes in the crawlspace. Full Abode Observability!
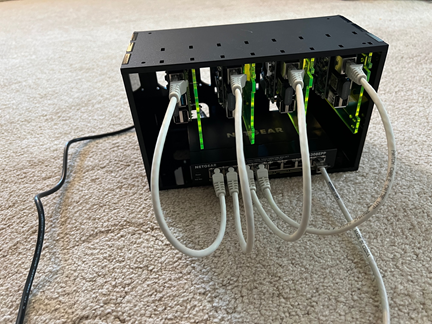
Stay tuned for the result of the OTHER Raspberry Pi project over the holidays. A cluster of Raspberry Pi 4s that runs microk8s (Kubernetes).
Related resources
- Visit the DevNet IoT Dev Center to learn about Cisco developer resources for IoT
We’d love to hear what you think. Ask a question or leave a comment below.
And stay connected with Cisco DevNet on social!
LinkedIn | Twitter @CiscoDevNet | Facebook | Developer Video Channel


Great article!
😉Nice!!!