


Cisco Nexus Hyperfabric is the cloud-managed operating model for Cisco Nexus One.
Building a fabric with Cisco Nexus Hyperfabric involves a series of easy-to-follow steps that guide you from initial login to fabric deployment and management. The process is streamlined to simplify complex network fabric design, ordering, and deployment, enabling IT teams with varying expertise to efficiently build scalable, validated fabrics.
It includes logging in to a cloud-managed portal, designing a validated fabric blueprint—either manually or through templates—generating an accurate bill of materials (BOM) for ordering, collaborating with Cisco partners for procurement, and deploying the fabric on-site with guided assistance. The system’s automation and integration reduce complexity, speed up deployment, and enable ongoing fabric management with minimal network expertise required.
This blog explains step-by-step how to build a fabric with Cisco Nexus Hyperfabric.
VXLAN EVPN simplified
Cisco Nexus Hyperfabric is built on a Virtual Extensible LAN (VXLAN) Ethernet VPN (EVPN) architecture. While it is a cloud-managed fabric as a service (FaaS), the underlying technology that powers the data plane and control plane is VXLAN with EVPN. The key difference in using Nexus Hyperfabric is that it abstracts the complexity of configuring these protocols manually using a CLI, greatly simplifying the process.
In a traditional VXLAN EVPN deployment, you manually configure Border Gateway Protocol (BGP) neighbors, Route Distinguishers (RDs), Route Targets (RTs), and VXLAN Tunnel Endpoints (VTEPs). In Nexus Hyperfabric, the Cloud Controller automates all of that. Nexus Hyperfabric was designed to make the power of a VXLAN EVPN fabric available to IT generalists without the complexity and risk of misconfiguration.
Building a network fabric
Step 1: Log on to Nexus Hyperfabric
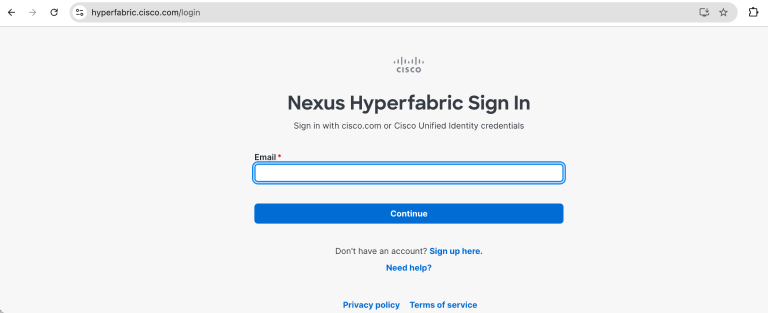
Begin by accessing the Nexus Hyperfabric portal at hyperfabric.cisco.com using your Cisco ID (CCO ID) and credential (Figure 1). Logging in provides you with access to the cloud-managed environment where you will design, order, and manage your fabric. This centralized cloud controller is essential because it offers a globally distributed, multi-tenant service that simplifies fabric lifecycle management without requiring local controller deployment.
Step 2: Set up a fabric design
Once logged in, you can create a fabric design either manually or by using a predefined template. Using a template is recommended for faster deployment and to leverage Cisco-validated topologies tailored for specific use cases such as AI clusters.
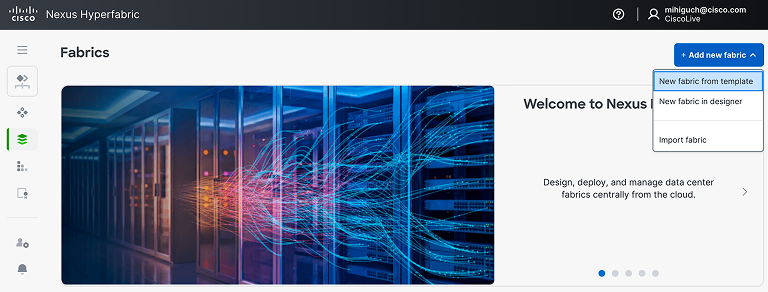
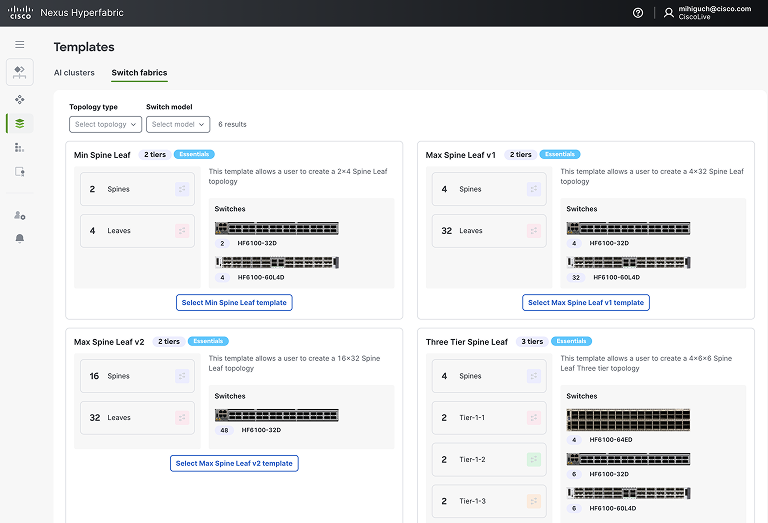
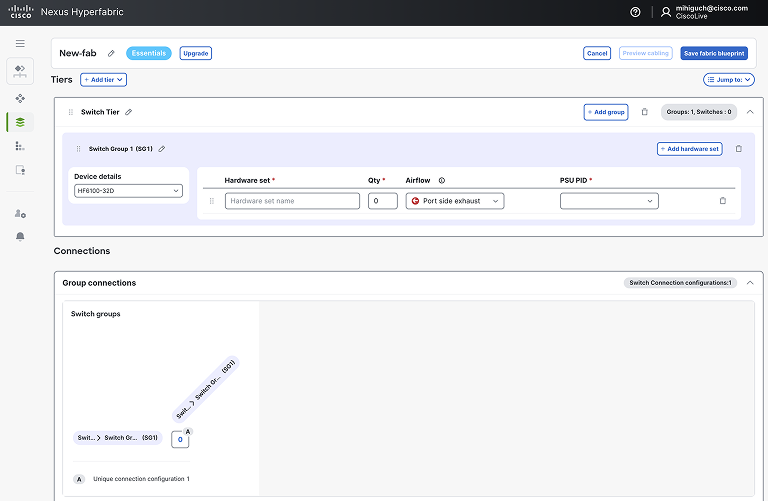
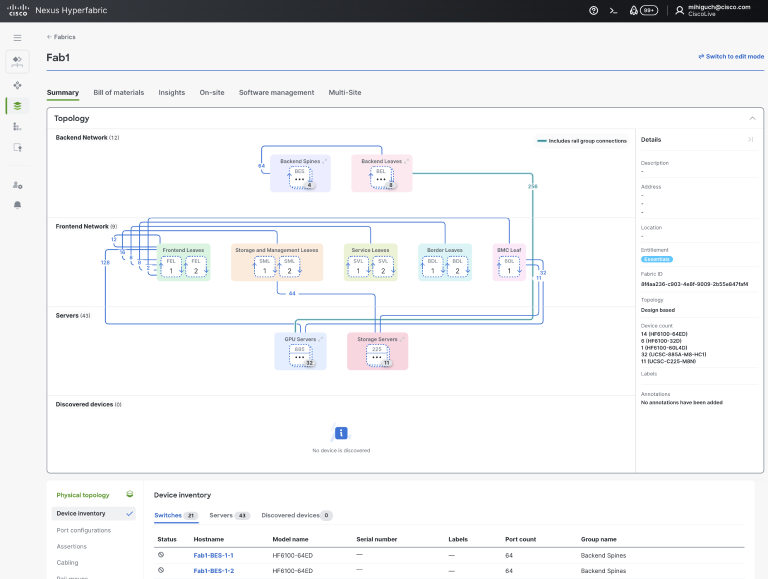
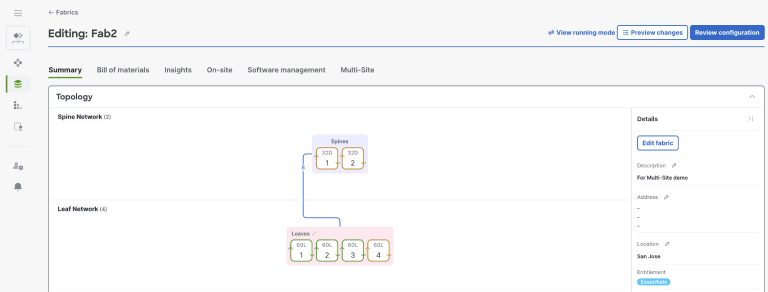
To create a fabric from a template (Figures 2–3), select “New fabric from template” and choose a template that matches your required size and topology. You can then customize the fabric design by adjusting parameters like GPU nodes, storage nodes, and fabric topology. Alternatively, for more granular control, you can create a fabric manually (Figures 4–5) by selecting “New fabric in designer” and defining switch tiers, switch groups, and hardware sets by using the fabric designer. This manual approach allows you to specify device models, number of spine and leaf switches, server tiers, and port connections.
The rationale for this step is to build a fabric design also called fabric blueprint that defines both physical and logical aspects of the network, ensuring the design meets your capacity, oversubscription, and environmental requirements.
Step 3: Build the bill of materials
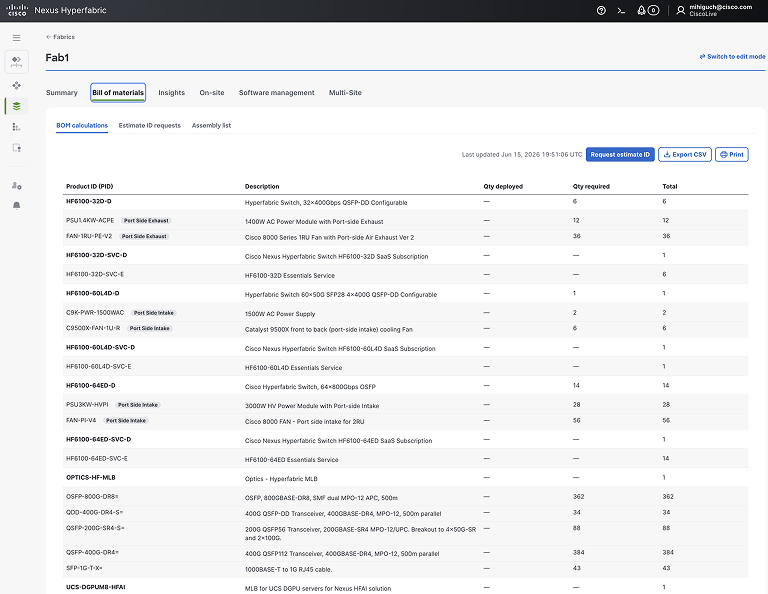
After finalizing the fabric design, the portal automatically generates a complete BOM that includes all necessary hardware components such as switches, optics, cables, and subscriptions (Figure 6). This integration with Cisco Commerce Workspace (CCW) ensures the BOM is error-free and ready for ordering.
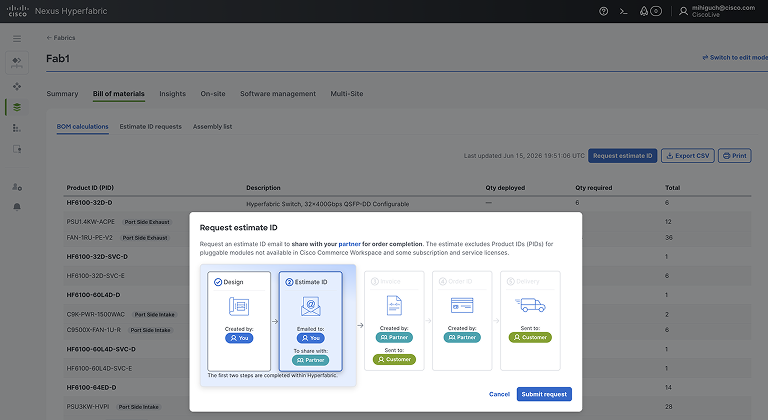
You can request an estimate ID from the portal, which you then share with your Cisco partner or distributor (Figure 7). The partner uses this estimate ID to create a quote and process the order. This step is crucial because it eliminates common ordering errors, ensures all required components are included, and streamlines procurement.
Step 4: Purchase through a Cisco partner
With the estimate ID, engage your Cisco partner or distributor to finalize the purchase. The partner accesses the estimate in CCW, applies any applicable discounts or programs, and converts it into a formal quote and order. This collaboration ensures that the order aligns with your design and that you receive the correct hardware and software subscriptions. Purchasing through a partner also provides access to professional services for deployment and support, which can be critical for successful fabric implementation.
Step 5: On-site deployment using the mobile-friendly assistant
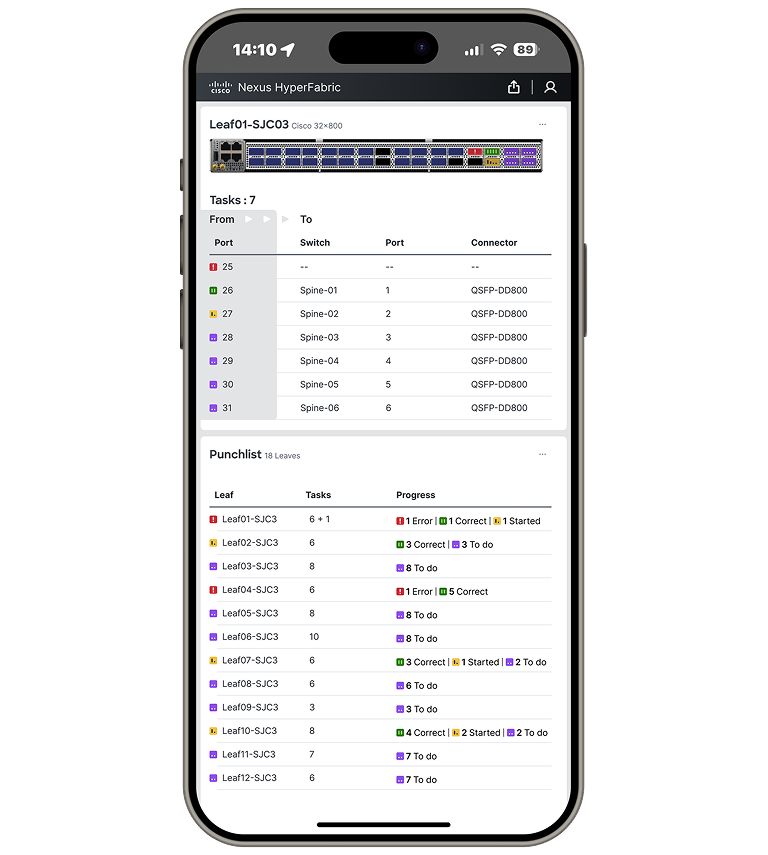
Once the hardware arrives, use the Nexus Hyperfabric On-site page to deploy the fabric. The mobile-friendly assistant provides a step-by-step guide for on-site tasks such as inspecting equipment, claiming and binding devices, inserting pluggables (optics), and cabling the fabric according to the fabric blueprint (Figure 8).
Each task’s status is tracked in real time, turning green upon completion, which helps ensure accuracy and completeness. The fabric switches automatically connect to the cloud controller for zero-touch provisioning, enabling rapid and error-free deployment. This step-by-step guidance is vital because it reduces manual errors, accelerates deployment, and provides visibility into the deployment progress. It can be accessed on a laptop, tablet, or phone.
Step 6: Validate and manage the fabric
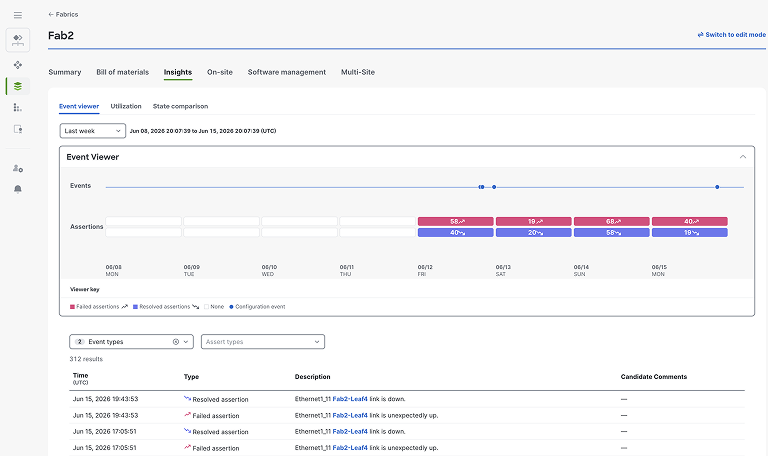
After deployment, Nexus Hyperfabric continuously monitors the fabric’s availability and reliability using assertion-based monitoring (Figures 9–10). It identifies root causes of any detected issues instantly, simplifying troubleshooting. If you need to scale or modify the fabric, you can update the design in the portal, approve changes, and redeploy with guidance on physical changes such as cabling adjustments. This dynamic management capability ensures your fabric remains optimized and resilient over time.
Cisco Cloud Control
Cisco Nexus Hyperfabric is fully integrated into the upcoming General Availability release of Cisco Cloud Control. This platform provides a unified entry point into the Cisco portfolio, combining single sign-on with agentic operations that create one seamless, consistent experience across the portfolio.
From login to live deployment, Cisco Nexus Hyperfabric transforms fabric building from a complex, expertise-driven task into a guided, scalable journey any IT team can master. As it converges with Cisco Cloud Control’s unified, agentic experience, the future of network fabric management isn’t just simplified—it’s redefined.
Build your fabric now
Additional resources:


