A deployment guide for wireless ThousandEyes agents deployed to monitor the Black Hat 2023 conference by Adam Kilgore & Ryan MacLennan
ThousandEyes (TE) Black Hat 2023 Deployment Guide
This guide documents the setup and installation procedures used to deploy ThousandEyes at Black Hat 2023. This document covers configuration of the TE agent on Raspberry Pi 4, including both wired and wireless configurations. Needed hardware for the various setup functions are also listed.
Limitations of Deploying ThousandEyes Enterprise Agents on Raspberry Pi
Please note that TE Enterprise Agents will only show data for layer 3 hops, and will not show wireless access point data. This applies to deploying the TE Enterprise Agent on the Raspberry Pi and configuring it for wireless. The only TE agent that can provide wireless AP data is the TE Endpoint Agent, which is intended to be installed on laptops and personal devices.
Hardware Checklist for the Conference
There are several different hardware contingencies that must be accounted for before conference setup can take place.
- A keyboard that can connect to the USB port on the Raspberry Pi
- Laptops that can connect to the Pi Micro SD for TE agent provisioning. We used several different solutions for this:
- An SD card to Micro SD adapter, which connected to the SD reader on a Mac laptop (the SD reader is not available on all models)
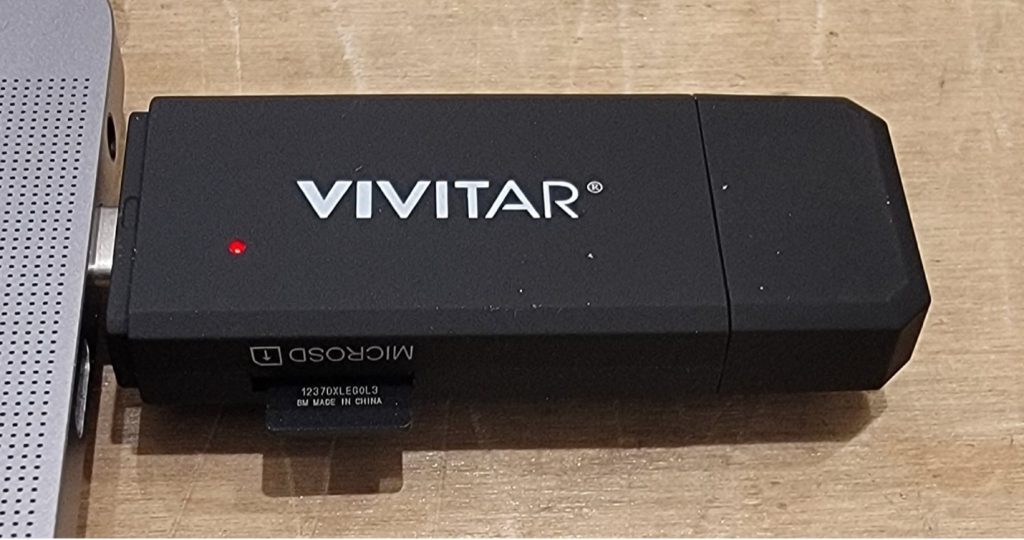
- A Vivitar Micro SD to USB-C adapter, which connected to the USB-C port on a Mac laptop
- A Micro SD to USB adapter that came with the Raspberry Pi 4 Cana Kit. This was connected to a USB to USB-C Mac adapter
- Screens that can connect to the Raspberry Pi Micro HDMI port. This can be as simple as a normal HDMI monitor that connects to the Pi via HDMI to Micro HDMI, but these were not available during the setup days of the conference. We used two solutions:
- A portable monitor that connected to the Pi via an HDMI to Micro HDMI cable
- An adapter that connected to the Pi via Micro HDMI, connected to a Mac HDMI adapter, with the Mac HDMI adapter connected to a USB-C port on the Mac laptop
Pi Hardware Assembly
Black Hat 2023 Pi 4 Kits
10x Raspberry Pi 4 Cana Kits, each with the following:
- 32GB Micro SD card
- Micro SD to USB adapter
- Case
- Heatsink
- Fan
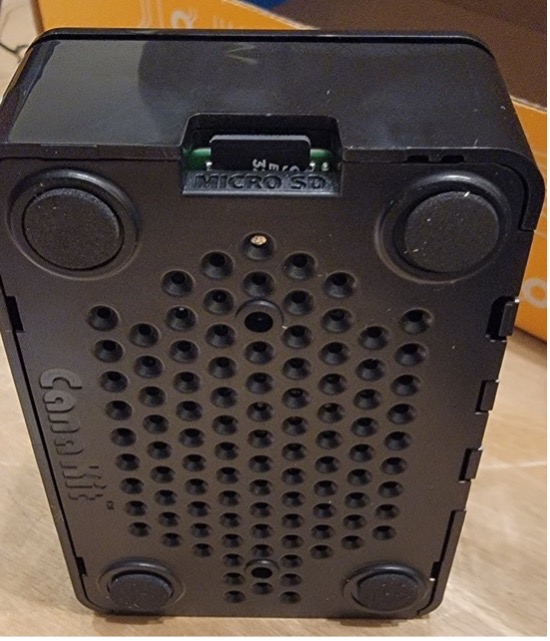
Example of built Pi with heatsinks and fan attached:
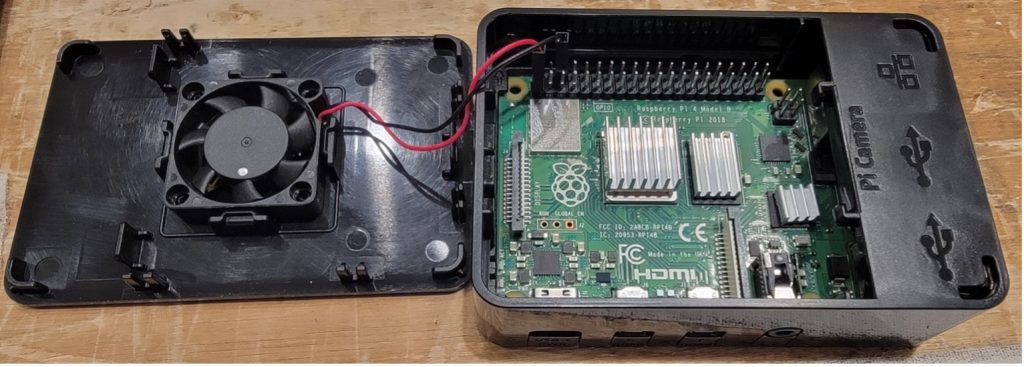
Note that we had overheating issues with the fan set to pull air out of the case. Orienting the fan to blow into the Pi case was more effective for our deployment.
Provision the ThousandEyes Image onto the Pi Micro SD
The Raspberry Pi can read Micro SD cards. The installation procedure is to download the TE Pi installer from the TE GUI, connect the Micro SDs to the provisioning laptops, and then use balenaEtcher to install the TE image to the Micro SD.
Retrieving the TE Agent Image & Documentation
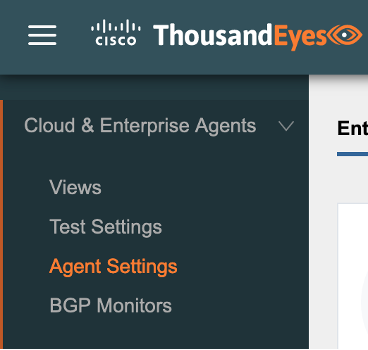
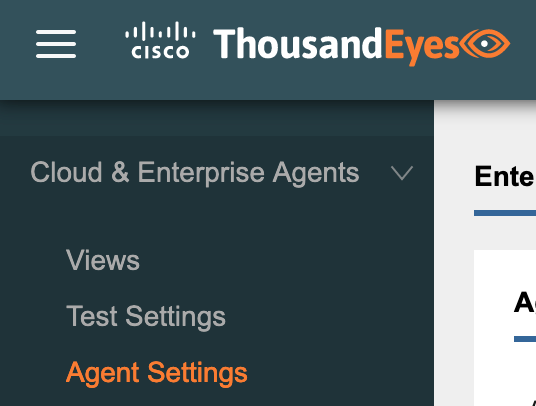
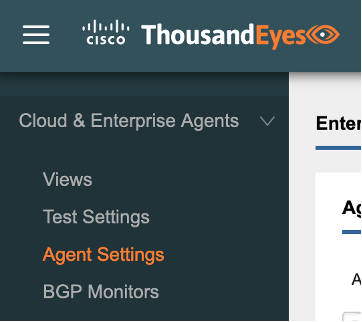
From the ThousandEyes GUI, navigate to Cloud & Enterprise Agents > Agent Settings.
Click on Add New Enterprise Agent.

Locate the entry for Raspberry Pi 4 and click the Download – IMG button. The Installation Guide for the Pi install is also available from this page.

Connect the Micro SD(s) to Provisioning Laptops
If the provisioning laptops do not have a Micro SD card reader then adapter solutions will be needed to install the TE image to the Micro SD. For Black Hat 2023, we used a combination of the following hardware with Mac laptops.
2x Vivitar Mac USB-C to Micro SD adapter
1x Mac USB-C to USB adapter + 1x USB Micro SD Card Reader (included with some Pi bundles—the USB has an additional slot for the Micro SD card, which then plugs into a USB port—in this case, the Mac adapter shown).

1x Micro SD to SD adapter

Install the TE Image to Micro SDs
We used balenaEtcher to write the TE images to Micro SD, as covered in the TE Pi deployment guide.
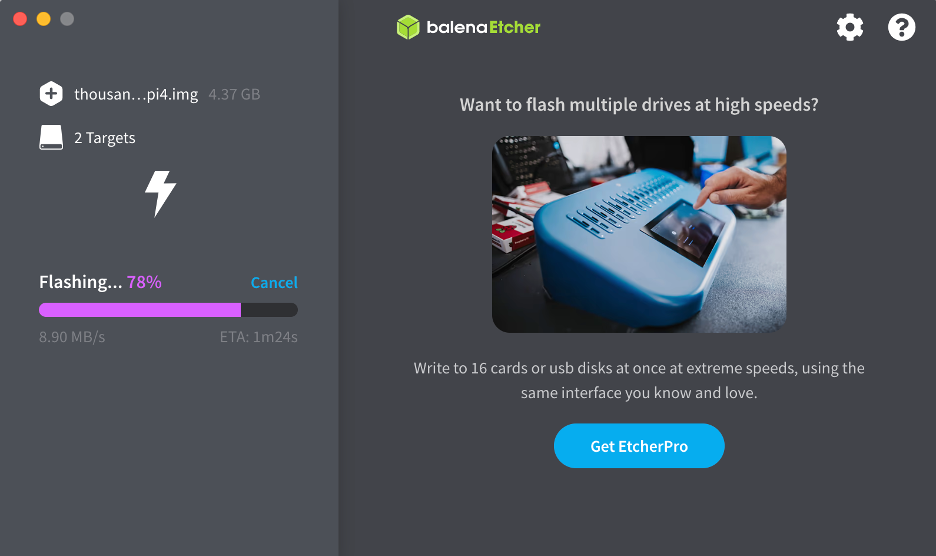
Note that Etcher can write multiple images to multiple Micro SDs at once, your only limit is the number of Micro SD cards that can be connected to the provisioning laptops (USB-C, Micro SD card reader, USB port, etc.) at once.
Optional: Use Scripts to Provision Wireless that will Persist Across Reboots
Creating the wireless configuration for the Pi can occur either before or after booting the Pi for the first time with the Micro SD image that was configured in the prior section. If you would like to create the wireless configuration before booting the Pi, please follow the steps in this section. Alternatively, if wireless is not being used or wireless configuration can occur after booting the Pi, this section can safely be skipped. Please note that configuring wireless after booting the Pi will require enabling SSH on the TE agent, along with any requisite firewall rules to reach the Pi over port 22.
Also note that this section requires specific hardware and software, as covered in the next paragraphs. If the needed hardware and software is not available, the wireless configuration can still be accomplished using manual procedures given in later sections.
Before beginning the configuration, note that the SSID and SSID password must be hard coded. If the TE agent cannot connect to the hardcoded SSID after reboot, the wireless connection will fail. If the hardcoded SSID and password need to be changed after the initial setup, it will be necessary to (re)enable SSH on the TE agent.
Also note that the TE agent file system must be mounted onto a laptop to perform these steps. At Black Hat 2023, we were only able to accomplish this step using a Linux OS. Attempts to mount the Micro SD on Mac did not correctly mount the TE agent partitions.
- Log in to a Linux system and connect a Micro SD with the TE agent installed (this procedure was covered in the prior section). Use the Micro SD connection methodology provided at the start of the guide.
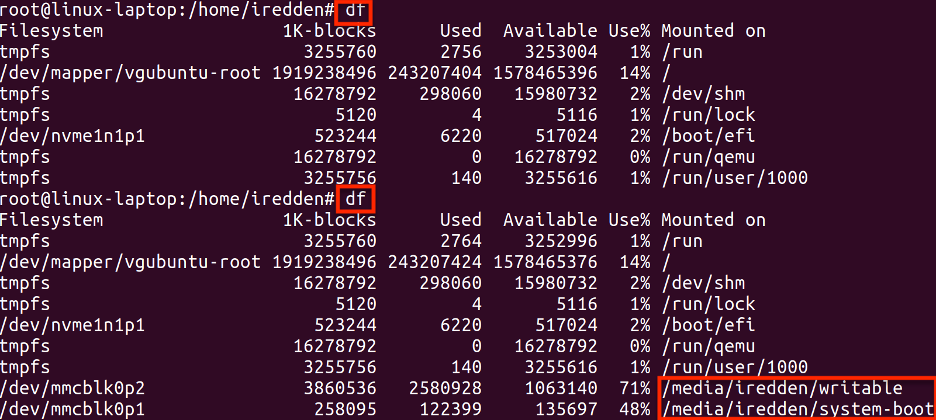
- Run the df command to verify the mounted partitions. The below screenshot shows the df output before and after connecting the Micro SD card, with the two mounted partitions visible after running the 2nd df command. Note the partition paths highlighted in red, as they will be needed to create the doit.sh script in Step 5.
- Create a file named rc.local in a chosen directory. The specific name ‘rc.local’ is necessary for the script to run during the TE agent bootup process.
- Create the script file:
# vim rc.local
- Type ‘i’ to edit, and type or paste the following:
#!/bin/bash
/configure_te_pi.sh
exit 0
- Type ‘:’ then ‘wq!’ to save the changes and exit the file.
- Create the configure_te_pi.sh script in the same directory as the rc.local file. Replace the <SSID> and <SSID password> fields in the below script with the SSID and PSK that the Pi will connect to. The SSID and PSK can also be changed later, but this will require enabling SSH on the TE agent and then connecting to it.
- Create the script file:
# vim configure_te_pi.sh
- Type ‘i’ to edit, and type or paste the following:
#!/bin/bash
apt-get update -y
apt-get install te-va-unlock -y
apt-get install net-tools ifmetric wireless-tools -y
ifconfig wlan0 up
wpa_passphrase <SSID> <SSID password> > /etc/wpa_supplicant.conf
wpa_supplicant -B -i wlan0 -c /etc/wpa_supplicant.conf -D wext
ifmetric eth0 200
sed -i ‘1iauto wlan0\niface wlan0 inet dhcp’ /etc/network/interfaces
dhclient wlan0
systemctl mask apt-news.service
systemctl mask esm-cache.service
- Type ‘:’ then ‘wq!’ to save the changes and exit the file.
- Create the doit.sh script in the same directory as the prior two scripts. Note that the paths to the /writeable and /system-boot mounts will need to be filled in with the paths collected in Step 1.
- Create the script file:
# vim doit.sh
- Type ‘i’ to edit, and type or paste the following, modifying the paths to match the output in Step 1:
#!/bin/bash
cp rc.local /media/<username>/writeable/etc
cp configure_te_pi.sh /media/<username>/writeable/etc
chmod +x /media/<username>/writeable/configure_te_pi.sh
chmod +x / media/<username>/writeable/etc/rc.local
umount /media/<username>/system-boot
umount /media/<username>/writable
- Type ‘:’ then ‘wq!’ to save the changes and exit the file.
An example of the script created for the output in Step 1 is provided below.
#!/bin/bash
cp ~iredden/rc.local /media/iredden/writable/etc
cp ~iredden/configure_te_pi.sh /media/iredden/writable
chmod +x /media/iredden/writable/configure_te_pi.sh
chmod +x /media/iredden/writable/etc/rc.local
umount /media/iredden/system-boot
umount /media/iredden/writable
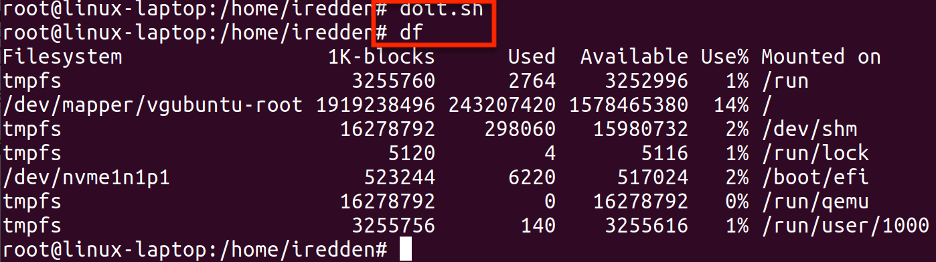
- Run the doit.sh script. The doit.sh script will perform the configuration and then unmount the partitions, as shown below.
With the above steps complete, the Micro SD card can be removed from the laptop and connected to the Raspberry Pi. The Pi will execute the scripts during bootup and connect to wireless, if the SSID configured is reachable and the PSK is correct. Please see the next section for setup instructions and other considerations.
Also note that a wired connection to the Pi is still recommended for initial setup. Although the Pi TE agent can successfully pull a wireless IP address during initial bootup, the TE agent will not display a wireless IP address on a connected monitor, only a wired one.
Initial Setup of TE Agent
The Provision the ThousandEyes (TE) Image onto the Pi Micro SD section of this guide covered how to provision TE agents onto Micro SD cards. An optional section covering how to script wireless capability onto the TE agent image was also provided in the Use Scripts to Configure Wireless that will Persist Across Reboots section. This section will cover how to use the TE agent on the Micro SD card to perform initial setup.
Connect Micro SD to Raspberry Pi
Once the TE image has been installed on the Micro SD, connect the Micro SD to the Raspberry Pi.
Connect an Ethernet Cable to the Pi
It is necessary to know the IP address assigned to a TE agent after initial boot in order to complete initial registration. While a Pi with a wireless configured TE agent can pull a wireless IP during its initial bootup, it will not display the wireless IP on a connected monitor, only a wired IP address. For this reason, it is still recommended to connect an ethernet cable to a wireless Pi before initial power on and use the assigned eth0 IP to perform initial setup. The only alternative to a wired connection on initial boot is to identify the wireless IP address of the TE agent by means other than a connected monitor, such as via direct access to the wireless AP that the TE agent connects to.
Connect Keyboard and Monitor to Raspberry Pi
Two pieces of hardware are used to perform the initial setup of the Raspberry Pi TE agent: (1) a keyboard that can connect to the Pi via USB, and (2) a screen that can connect to the Pi via Micro HDMI. Initial setup can be performed without the keyboard if (a) an IP address is assigned to the TE agent via DHCP, and (b) the DHCP address can be identified via the connected screen or by other means. Similarly, initial setup can be completed without the screen if there is another way to identify the DHCP IP address assigned to the TE agent, such as admin access to the switch connected to the TE agent.
Despite the above alternatives, a connected keyboard and monitor are recommended for ease of deployment and any needed troubleshooting.
For the keyboard, we used a Bluetooth keyboard with a detached USB fob, but any keyboard that can connect to the Pi via USB will work.

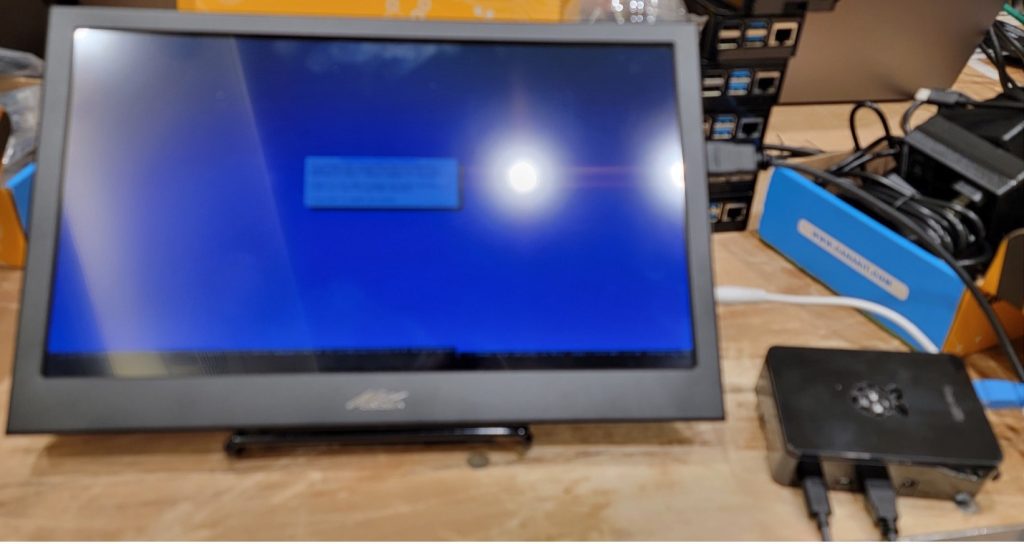
For the screen, we used two separate hardware solutions.
The first solution is a Kenowa portable monitor with an HDMI to Micro HDMI cable. The HDMI side of the cable connects to the Kenowa, and the Micro HDMI side of the cable connects to the Raspberry Pi.
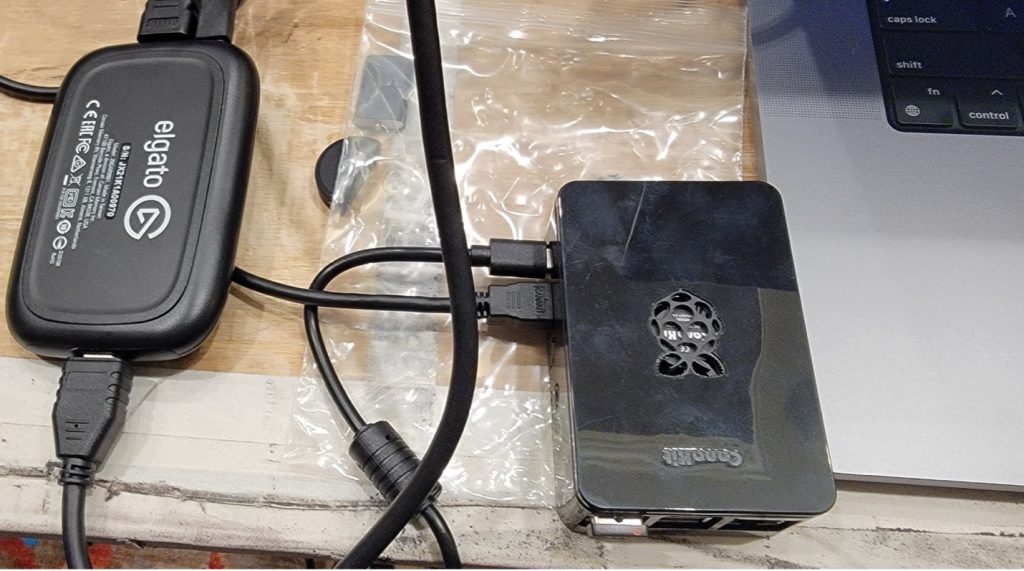
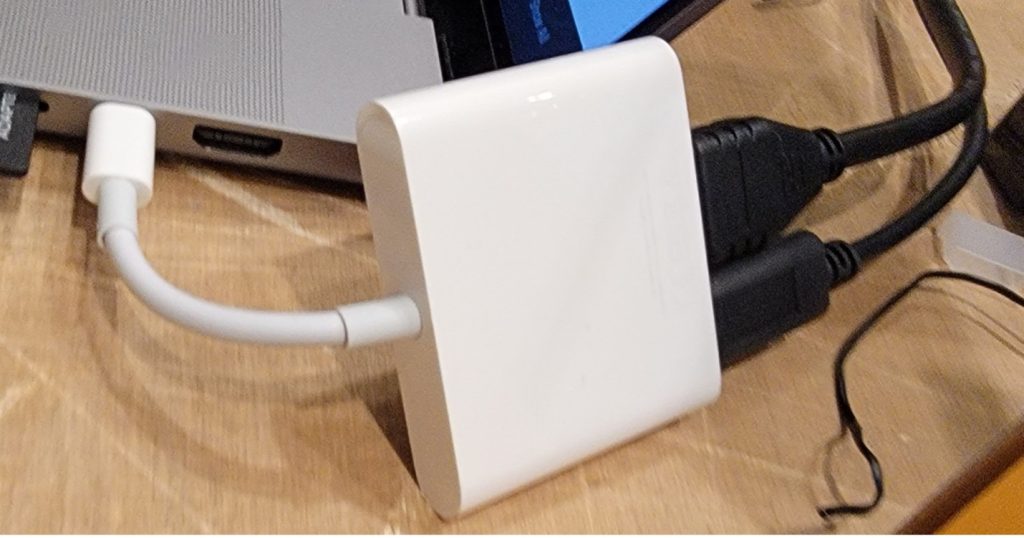
The second solution we used is an Elgato adapter that sits between the Raspberry Pi and a Mac laptop. The Pi connects to the Elgato via a micro HDMI to HDMI cable. The Elgato uses a regular HDMI cable to connect to the HDMI side of a Mac HDMI to USB-C adapter, with the USB-C side of the Mac adapter connecting directly to a Mac laptop.
Confirm Pi Hardware Connections
With the hardware configurations in the prior sections complete (i.e. the Pi is connected to an ethernet port, monitor, and keyboard), connect the Pi power adapter to begin initial boot.
Connect to the TE Agent GUI
Once the Pi is powered on, the TE agent install will take a few minutes to run (more if internet access is not available). Once the bootup is complete, the Pi will display a message if an IP address was assigned to the ethernet port via DHCP.

If no IP address was assigned to the ethernet port via DHCP, the TE agent will display a different message stating no IP address is configured. If this is the case, it will be necessary to either manually assign an IP address to the ethernet port using a keyboard, or identify the IP address of the wireless interface using admin access to the connected wireless AP.
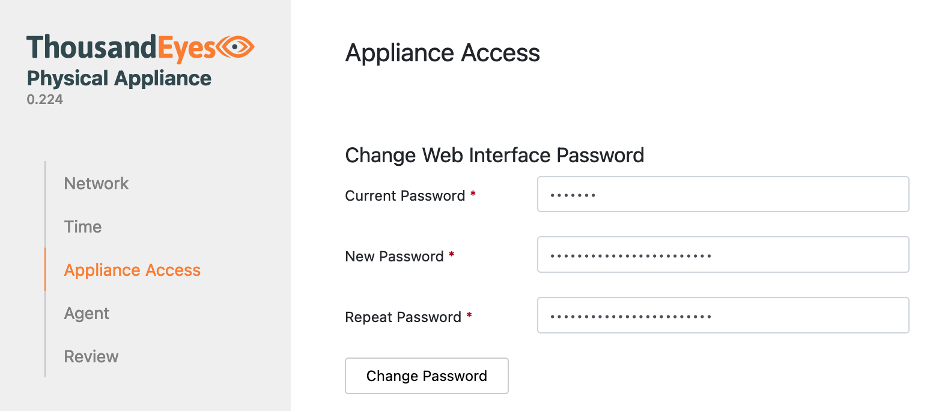
- Once the IP address of the TE agent is known, connect to the IP via HTTPS and sign in with username admin and password welcome.


- Change the default password to something more secure and click Change Password.
- The GUI should automatically take you to Agent in the left menu.

- Keeping the ThousandEyes Physical Appliance GUI open, create a new tab in your browser and connect to the ThousandEyes web GUI, then click on Cloud Enterprise Agents > Agent Settings.
- Click on the Add New Enterprise Agent
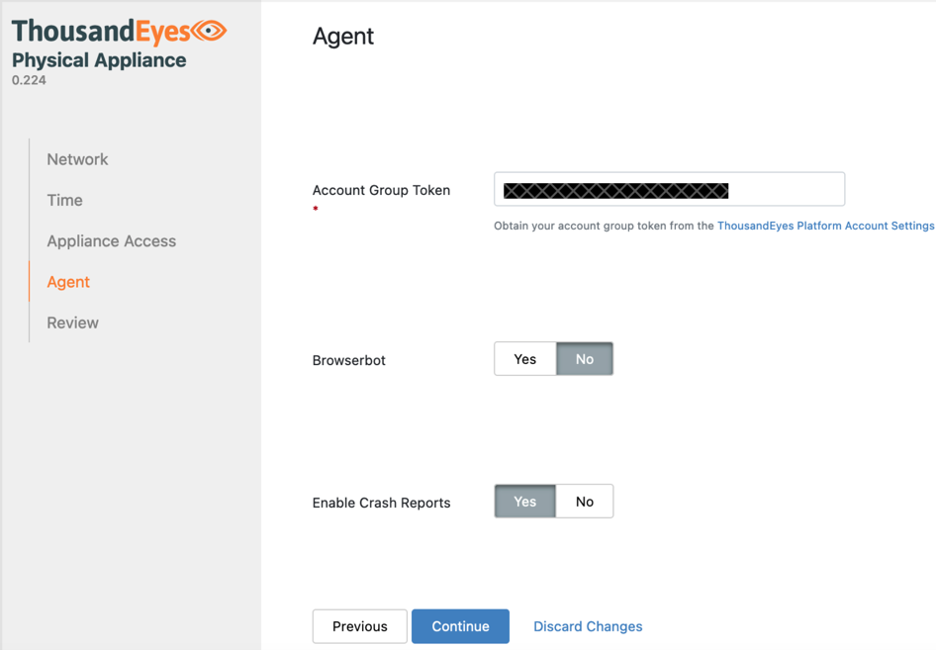
- Copy the Access Group Token. Note: the Copy button may not work, in which case click the eye icon to show the token and copy it manually.

- Return to the TE agent GUI and paste the Account Group Token into the Agent Click Continue.
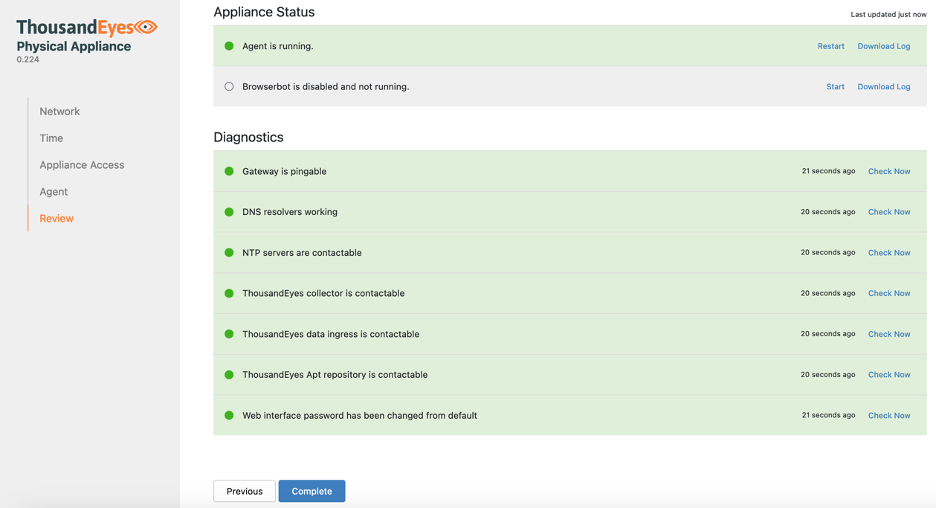
- The GUI will automatically load the Review Appliance Status and Diagnostics fields should change to green as the registration completes. Click the Complete button.
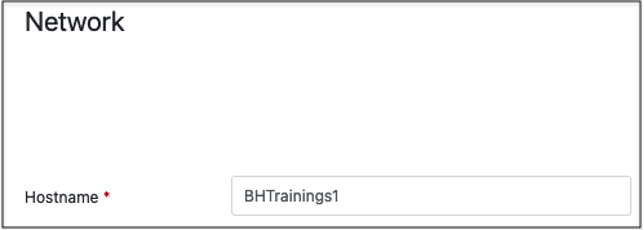
- Click on the Network tab.

- Configure the hostname for the agent.
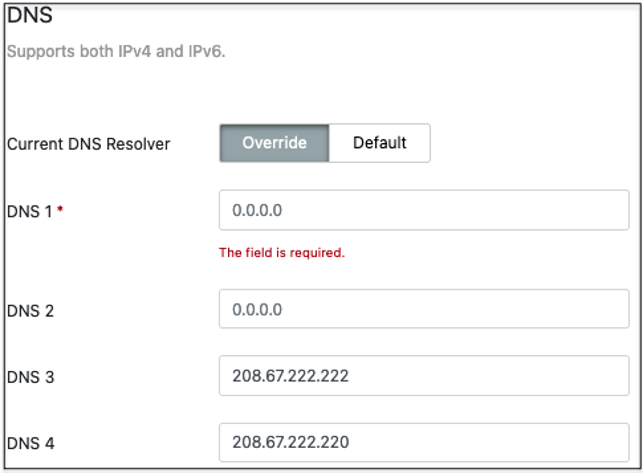
- Scroll down to the DNS configuration and enter the internal and External DNS servers. By Default, the agent will use the 208.67.222.222 and 208.67.222.220 external Umbrella DNS servers. These can be moved to DNS server 3 and 4 if internal DNS servers are preferred.
- Scroll down and click on the Save Changes Note that the Applying network settings pop-up may get stuck. Reload the page to clear it.
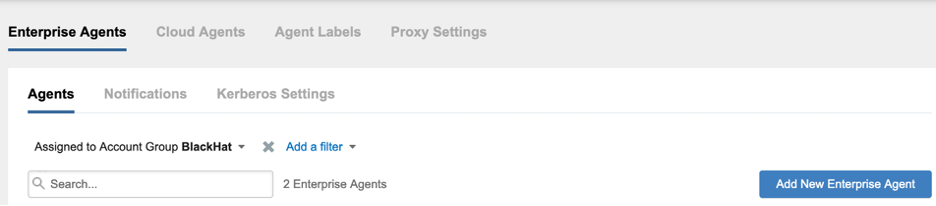
- Connect to the ThousandEyes web GUI and confirm that the agent shows as active under Enterprise Agents. For additional guidance, please see the section Validate Wireless Interface in the ThousandEyes Web GUI.
Manual Wireless Config Track
The Raspberry Pi TE agent can only connect via a wired connection using the default installation. If wireless is needed for the deployment but the necessary hardware/software was not available for the Optional: Use Scripts to Configure Wireless that will Persist Across Reboots section, or if the TE agent has already been deployed, the series of manual configuration steps starting in this section can be used to configure persistent wireless on a Pi TE agent.
Manual Wireless Config Track: Connect to the TE Agent via SSH
Documentation for connecting to a Pi TE agent via SSH can be found in this guide.
Manual Wireless Config Track: Jailbreak the TE Agent (to allow Wireless config)
Jailbreaking the TE agent is necessary for escalating to root and performing the commands necessary to build the scripts for the wireless configuration.
We should update the Ubuntu OS before running the jailbreak command. Connect to the TE agent via SSH, then run the following two commands to first update the OS and then jailbreak the install:
$ sudo apt-get update
$ sudo apt-get install te-va-unlock
With the TE agent successfully jailbroken, we can now escalate to root and perform the rest of the configuration.
Manual Wireless Config Track: Configure Wireless that will Persist Across Reboots using only the Pi
Before beginning this section, note that the SSID and SSID password must be hard coded. If the TE agent cannot connect to the hardcoded SSID after reboot, the wireless connection will fail. If the hardcoded SSID and password need to be changed after the initial setup, it will be necessary to (re)enable SSH on the TE agent and connect to it over SSH.
- Escalate to root and create a file named rc.local in the /etc directory. The name is necessary for the script to run during the TE agent bootup process.
Create the script file:
$ sudo su
# cd /etc
# vim rc.local
- Type ‘i’ to edit, and type or paste the following:
#!/bin/bash
/configure_te_pi.sh
exit 0
- Type ‘:’ then ‘wq!’ to save the changes and exit the file.
- Run the following to set the script permissions:
# chmod +x /etc/rc.local
- Create the configure_te_pi.sh script in the top level / directory. Replace the <SSID> and <SSID password> fields in the below script with the correct values. The SSID and password can also be changed later, but this will require a later SSH connection to the agent.
- Create the script file:
# cd /
# vim configure_te_pi.sh
- Type ‘i’ to edit, and type or paste the following, replacing the <SSID> and <SSID password> fields with the correct values:
#!/bin/bash
apt-get update -y
apt-get install te-va-unlock -y
apt-get install net-tools ifmetric wireless-tools -y
ifconfig wlan0 up
wpa_passphrase <SSID> <SSID password> > /etc/wpa_supplicant.conf
wpa_supplicant -B -i wlan0 -c /etc/wpa_supplicant.conf -D wext
ifmetric eth0 200
sed -i ‘1iauto wlan0\niface wlan0 inet dhcp’ /etc/network/interfaces
dhclient wlan0
systemctl mask apt-news.service
systemctl mask esm-cache.service
- Type ‘:’ then ‘wq!’ to save the changes and exit the file.
- Run the following to set the script permissions:
# chmod +x /configure_te_pi.sh
Reboot the Pi and test to confirm that the wireless NIC can connect to the ThousandEyes web account.
Validate Wireless Interface in the ThousandEyes Web GUI
Confirm Wired and Wireless IPs
- From the ThousandEyes web GUI, navigate to Cloud & Enterprise Agents > Agent Settings.
- Identify a registered TE agent with a wireless interface, then click on it.
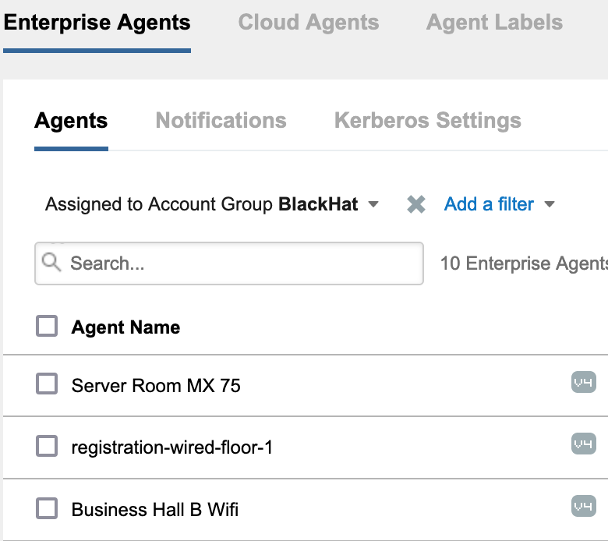
- Locate the General Information The private IP address of the TE agent will be displayed, which is the IP address that the TE agent used to connect to the ThousandEyes web manager. If the TE agent has both an ethernet and wireless port, you can click the System Information link to confirm which IP address is assigned to each interface.

Confirm Wired and Wireless Interfaces for Tests
- Navigate to Cloud & Enterprise Agents > Test Settings.

- Expand one of the tests and then expand the Agents
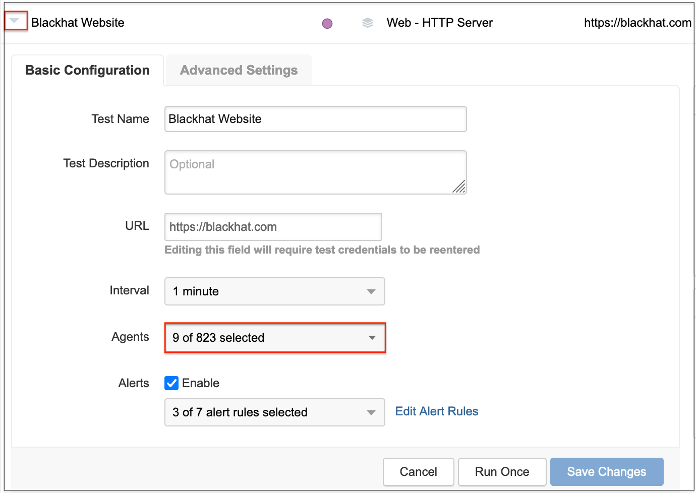
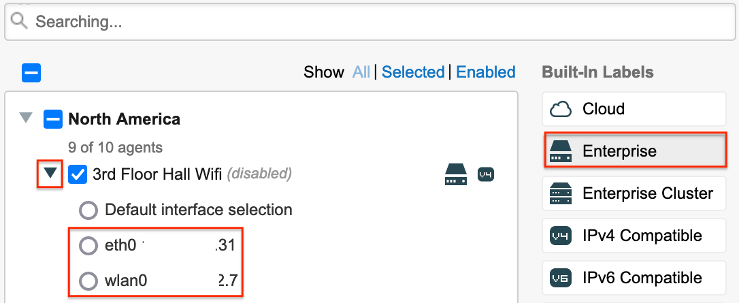
- Click on the Enterprise button and expand the dropdown next to an agent with wireless enabled. If the agent has both a wired and a wireless interface enabled, they will both be displayed as in the screenshot below.
About Black Hat
For 26 years, Black Hat has provided attendees with the very latest in information security research, development, and trends. These high-profile global events and trainings are driven by the needs of the security community, striving to bring together the best minds in the industry. Black Hat inspires professionals at all career levels, encouraging growth and collaboration among academia, world-class researchers, and leaders in the public and private sectors. Black Hat Briefings and Trainings are held annually in the United States, Europe and USA. More information is available at: BlackHat.com. Black Hat is brought to you by Informa Tech.
Appendix
GitHub with scripts
ThousandEyes Wireless Setup GitHub
ThousandEyes Ports and Protocols
For TE agents to operate correctly, they will need to both connect to ThousandEyes over the internet and have firewall ACL access to perform any configured tests. Refer to the following document for lists of ports and protocols per region.
Script Functions Explained
Scripts to enable wireless functionality of the Raspberry Pi TE agent on startup are included in the Optional: Use Scripts to Provision Wireless that will Persist Across Reboots and Manual Wireless Config Track sections of this guide. This appendix section explains the script functionality line by line.
rc.local – this script will run as part of the TE agent startup process.
#!/bin/bash – initialize the script to run using bash
/configure_te_pi.sh – run the configure_te_pi.sh script
exit 0 – exit
configure_te_pi.sh – this script will configure the TE agent for wireless functionality
#!/bin/bash – initialize the script
apt-get update -y – update the underlying Ubuntu OS
apt-get install te-va-unlock -y – jailbreak the TE agent to allow additional sudo access
apt-get install net-tools ifmetric wireless-tools -y – install tools to allow wireless functionality
ifconfig wlan0 up – bring up a wireless LAN interface
wpa_passphrase <SSID> <SSID password> > /etc/wpa_supplicant.conf – configure SSID and PSK values for the wireless connection and write them to the wpa_supplicant.conf file
wpa_supplicant -B -i wlan0 -c /etc/wpa_supplicant.conf -D wext – imports the wpa_supplicant file and configures the wireless LAN interface to use the wext driver
ifmetric eth0 200 – set the wired interface to have a lower priority than the wireless interface
sed -i ‘1iauto wlan0\niface wlan0 inet dhcp’ /etc/network/interfaces – configure DHCP for the wireless interface
dhclient wlan0 – enable DHCP for the wireless interface
systemctl mask apt-news.service – prevent apt-news.service from running. See the Wireless TE Agent Update Failure section for more information
systemctl mask esm-cache.service – prevent the esm-cache.service from running. See the Wireless TE Agent Update Failure section for more information
Wireless TE Agent Update Failure
During testing of the wireless TE agent for Raspberry Pi, it was noticed that the agents lost connectivity with the ThousandEyes web manager after a variable amount of time. Troubleshooting multiple failed agents identified logs associated with updates to the apt-news.service and esm-cache.service processes immediately before failure of the wlan:
syslog
Aug 6 02:17:04 registration-wireless systemd[1]: Started PackageKit Daemon.
Aug 6 02:17:20 registration-wireless systemd[1]: Starting Update APT News…
Aug 6 02:17:20 registration-wireless systemd[1]: Starting Update the local ESM caches…
Aug 6 02:17:21 registration-wireless systemd[1]: apt-news.service: Succeeded.
Aug 6 02:17:21 registration-wireless systemd[1]: Finished Update APT News.
Aug 6 02:17:22 registration-wireless systemd[1]: esm-cache.service: Succeeded.
Aug 6 02:17:22 registration-wireless systemd[1]: Finished Update the local ESM caches.
Aug 6 02:18:38 registration-wireless systemd-networkd[667]: wlan0: Lost carrier
More information on the two services can be found here:
Masking the services so they are not run by systemd resolved the failure of wlan0:
$ sudo systemctl mask apt-news.service
$ sudo systemctl mask esm-cache.service
The above commands were then added to the startup scripts.
We’d love to hear what you think. Ask a Question, Comment Below, and Stay Connected with Cisco Secure on social!
Cisco Secure Social Channels