
Building Networks in Meraki
Meraki’s Dashboard is a robust platform for network provisioning. With that comes a full range of features, functions, and capabilities to be configured. Creating a baseline network in Meraki is an easy task, minimally requiring a name and claiming Meraki devices to the network. After that, how complicated the network depends on the policy of the organization requiring the network’s creation. Completing and deploying a single Meraki network can be a very involved endeavor:
- VLANs can be created and IP address ranges assigned.
- Malware and content filtering rules can be put in place.
- NAT configurations, traffic shaping, and group policies can be defined.
- SSIDs and wireless access features can be configured.
- Dozens and dozens of network and device configurations can be set.
Automating these tasks through code
As the number of needed networks scale to the hundreds, or even thousands, repeating the provisioning of networks can become a challenging task. This is where Meraki’s Dashboard API comes into play. Automating the aforementioned tasks through code, REST APIs, and configuration files allow for repeatable and robust network creation and configuration. Further, embracing DevOps practices allow for easy mass configuration changes, backup of existing/historical configurations, and rollback opportunities should any problems arise. The benefits of automation, however, does open up a host of other decisions that need to be made by an organization.
Automating Meraki with Cisco Action Orchestrator
As engineers delve into the network programmability world, a number of different options on automation start to arise. Platforms like Ansible, Puppet, Chef, and Terraform emerge as viable solutions. Pure developers may want to build their own solutions in a programming language like Python, Go, Java, or Javascript (amongst a myriad of others). These options, however, require a certain learning curve or expertise that can take days, weeks, or years to ascertain and even master. The same end result of flexibility and control in automation can be achieved in an arguably shorter amount of time using a building block workflow tool. Enter Cisco Action Orchestrator (CAO).
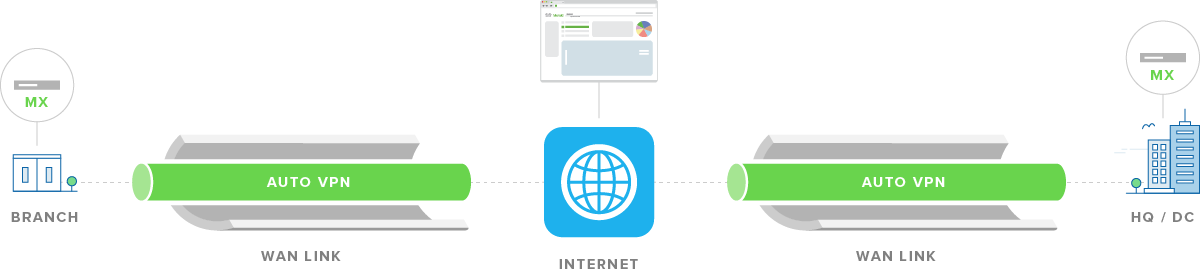
As covered in my previous blog, we’ve built out a Multi-Domain Automation solution using CAO. The baseline solution deploys a branch network with Cisco Catalyst Access Points and supporting wireless LAN controller using Cisco SD-WAN’s vManage APIs and Cisco DNA Center APIs (See Stuart Clark’s blog on the SD-WAN solution). However, another viable option would be to replace those portions with Meraki. Using Meraki’s MX appliance and it’s Auto-VPN features, a headquarters/branch SD-WAN deployment can be achieved.
You can register for my April 23 webinar, “Implementing Meraki Deployments” where we’ll dive into the details. For now please read on.
Steps to Automation Success
Meraki networks are organized hierarchically. Some actions can be taken in parallel if necessary, but some activities require the result of a previous call to be successful. In this scenario, we’re going to add a branch network, create VLANs for that network, add site-to-site VPN settings, and, finally, configure the wireless SSID settings. This will all be self-contained in one workflow in CAO that can then be reused as necessary.
Configuration in CAO

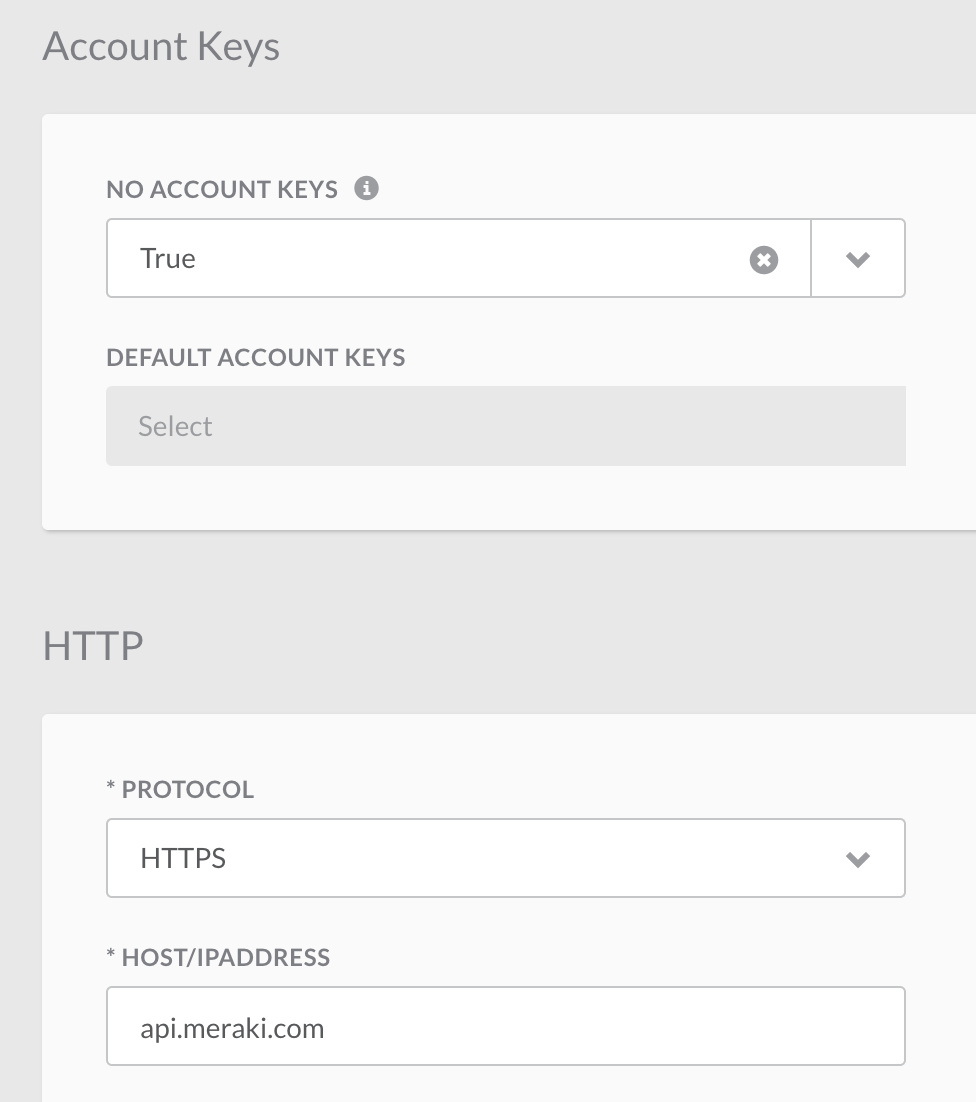
Before we get into the actual steps in the workflow, we need to set up Meraki as a Target within CAO. There is a pre-built Meraki family of activities in CAO, but it only covers a subset of the API calls that we need so in this instance we will set up an HTTP Endpoint. Unfortunately, that also requires us to set the X-Cisco-Meraki-API-Key authorization header as a Global Variable rather than an Account Key so we can access it in our workflow. Therefore the No Account Keys setting is set to True and the HTTP section will have HTTPS set with the HOST/IP ADDRESS set to api.meraki.com.
To complete the setup, in the Variables section we will set up a Global Variable for the X-Cisco-Meraki-API-Key and Organization ID* to be used in our API calls. Both variables should be scoped globally.
*Note: The organization ID can be found by making an API call to https://api.meraki.com/api/v0/organizations. We are using a static organization in this example but it can be grabbed dynamically in the workflow as well.
Creating the Network
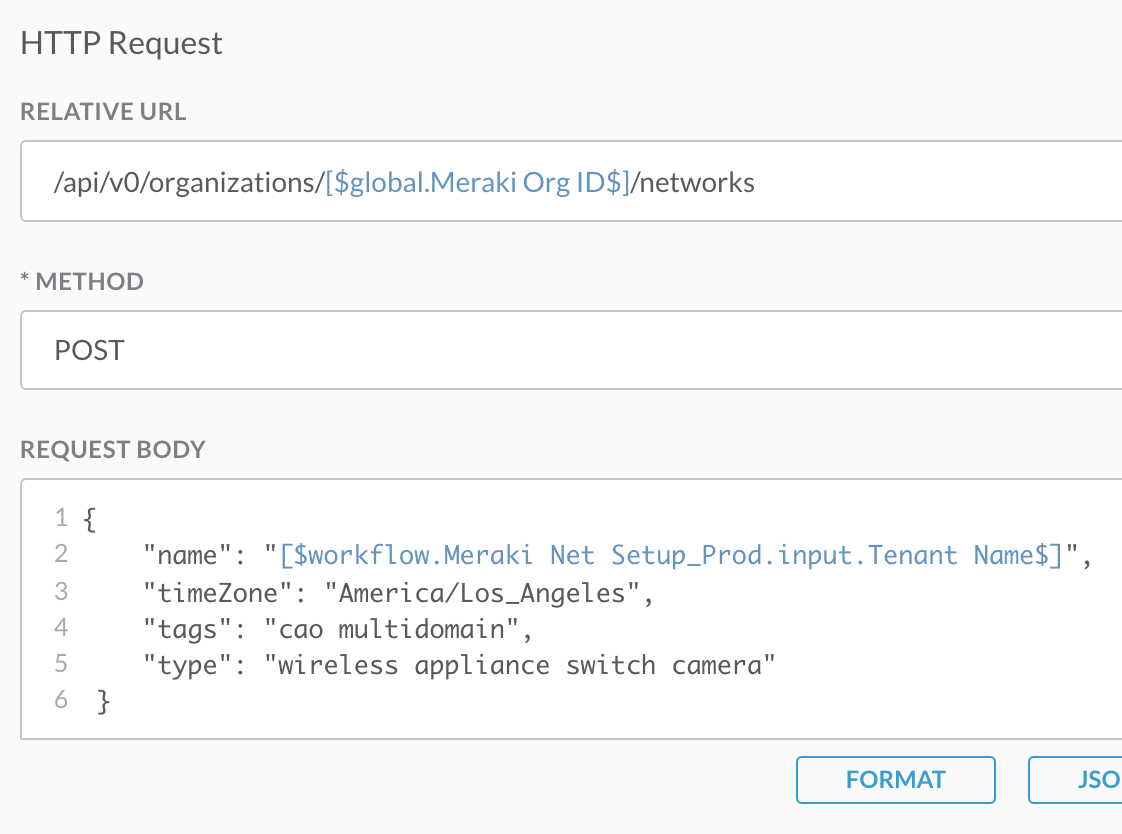
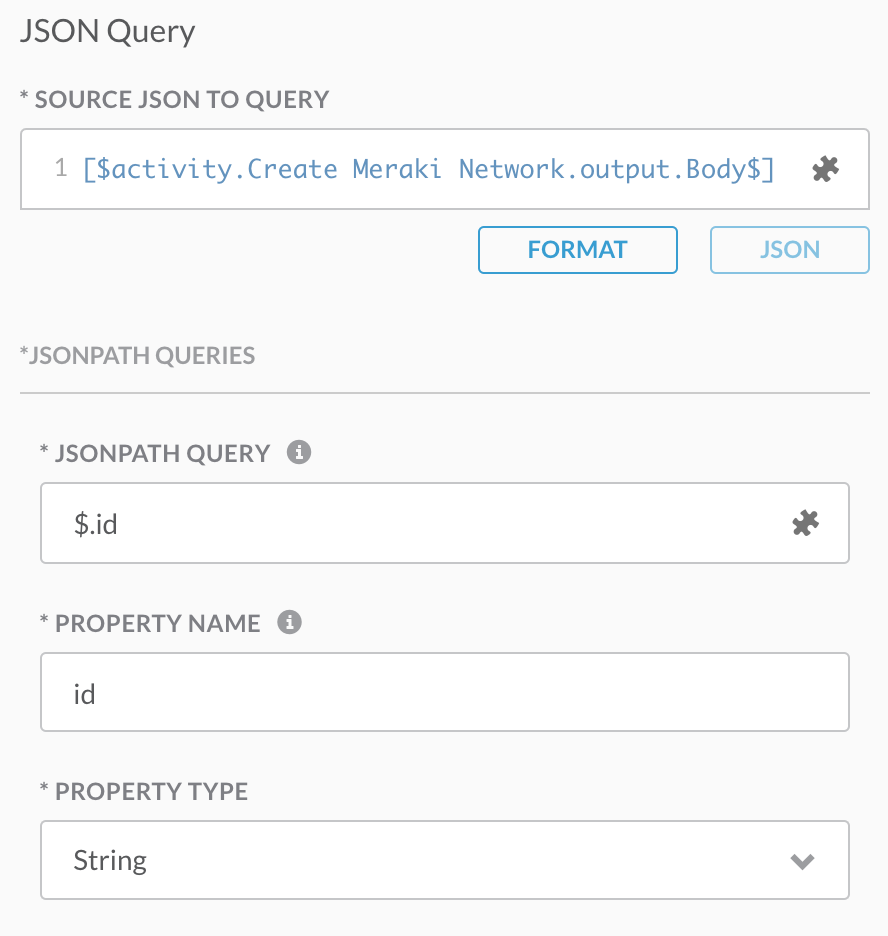
Now that CAO is ready to go we can build out the workflow. The first step is creating our new network in our organization. This is done by calling the /networks endpoint with a method of POST using a Web Service core (pre-built) activity in CAO. Note that the organization ID in the url is set by the global variable mentioned above using the notation “[$global.Meraki Org ID$]”. A similar variable reference is made in the payload as the name of the network is being set dynamically through run-time input and is referenced as “[$workflow.Meraki Net Setup_Prod.input.Tenant Name]”. Meraki Net Setup_Prod is the name of the workflow being created. Creating a network generates a network ID that is needed in the following steps, so another CAO Core activity called JSONPath Query is used to parse the resulting JSON response body. This can then be referenced in later actions.
Claiming Devices
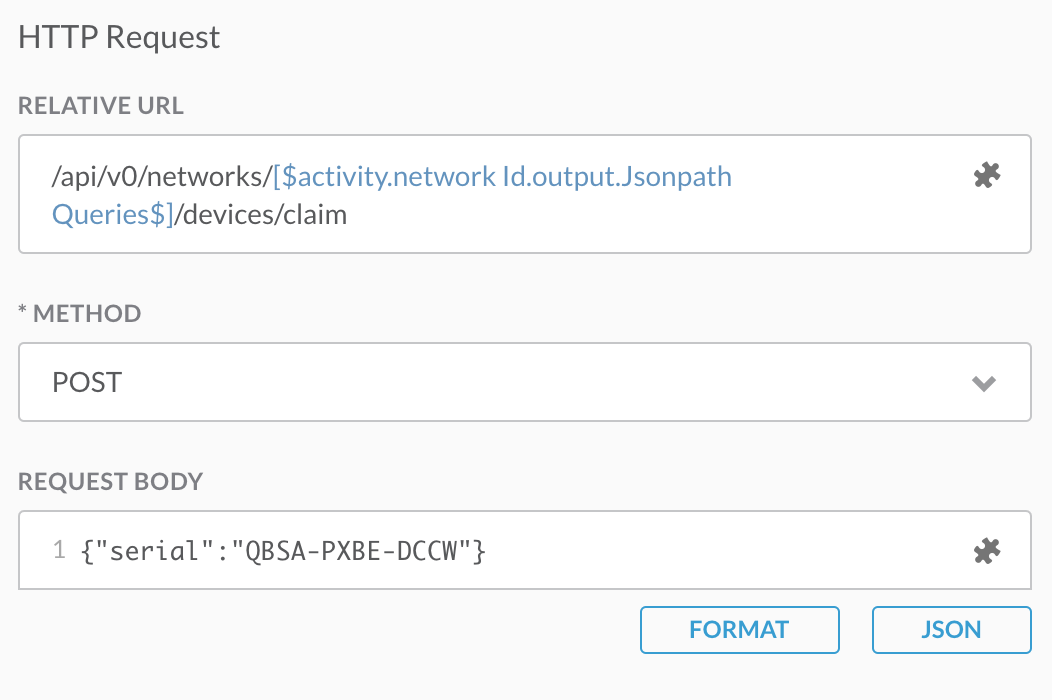
Once the network is created, we need to claim the MX security appliance and MR access point that will be set up for the branch network. This is also done using the Web Service activity but now pointing to the /devices/claim endpoint. The network ID is pulled from the previously mentioned JSONPath Query activity and the serial numbers are statically passed in the body for this example.
Creating VLANs
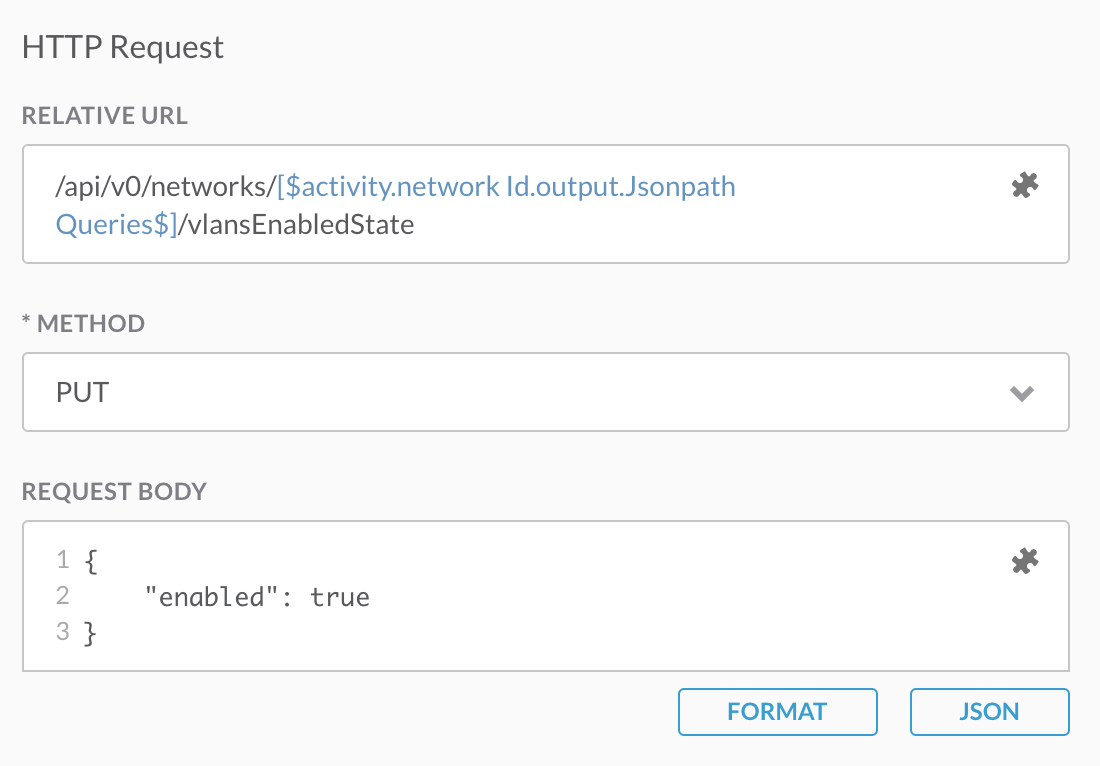
Now that the devices are added to the network, the configuration for those devices can be set. First, VLANs will be enabled and a new one added to the branch network. This is done in two sequential Web Service activities. The first calls /networks/<network id>/vlanEnabledState. The second calls /networks/<network id>/vlans with the POST body containing the VLAN configuration.
Setting Site-To-Site VPN
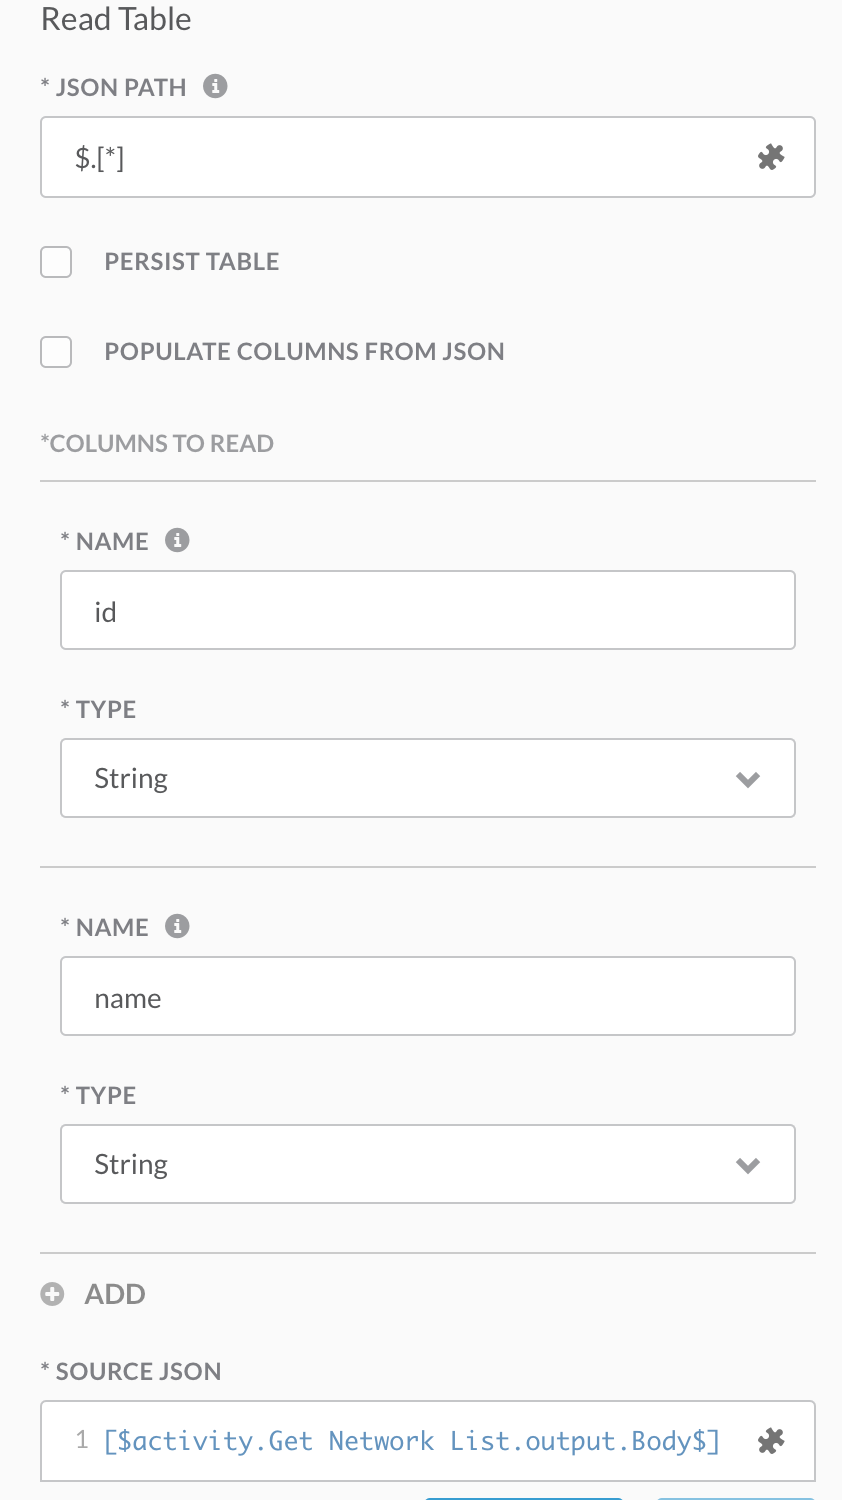
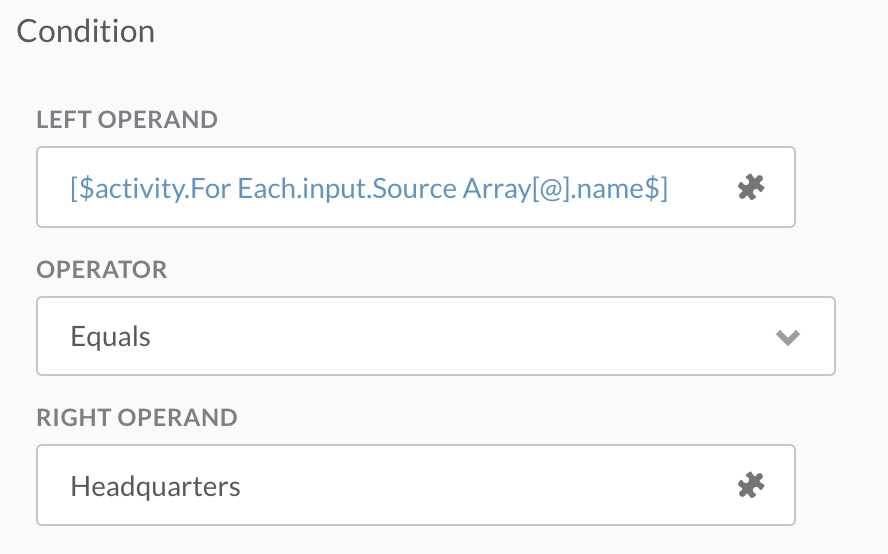
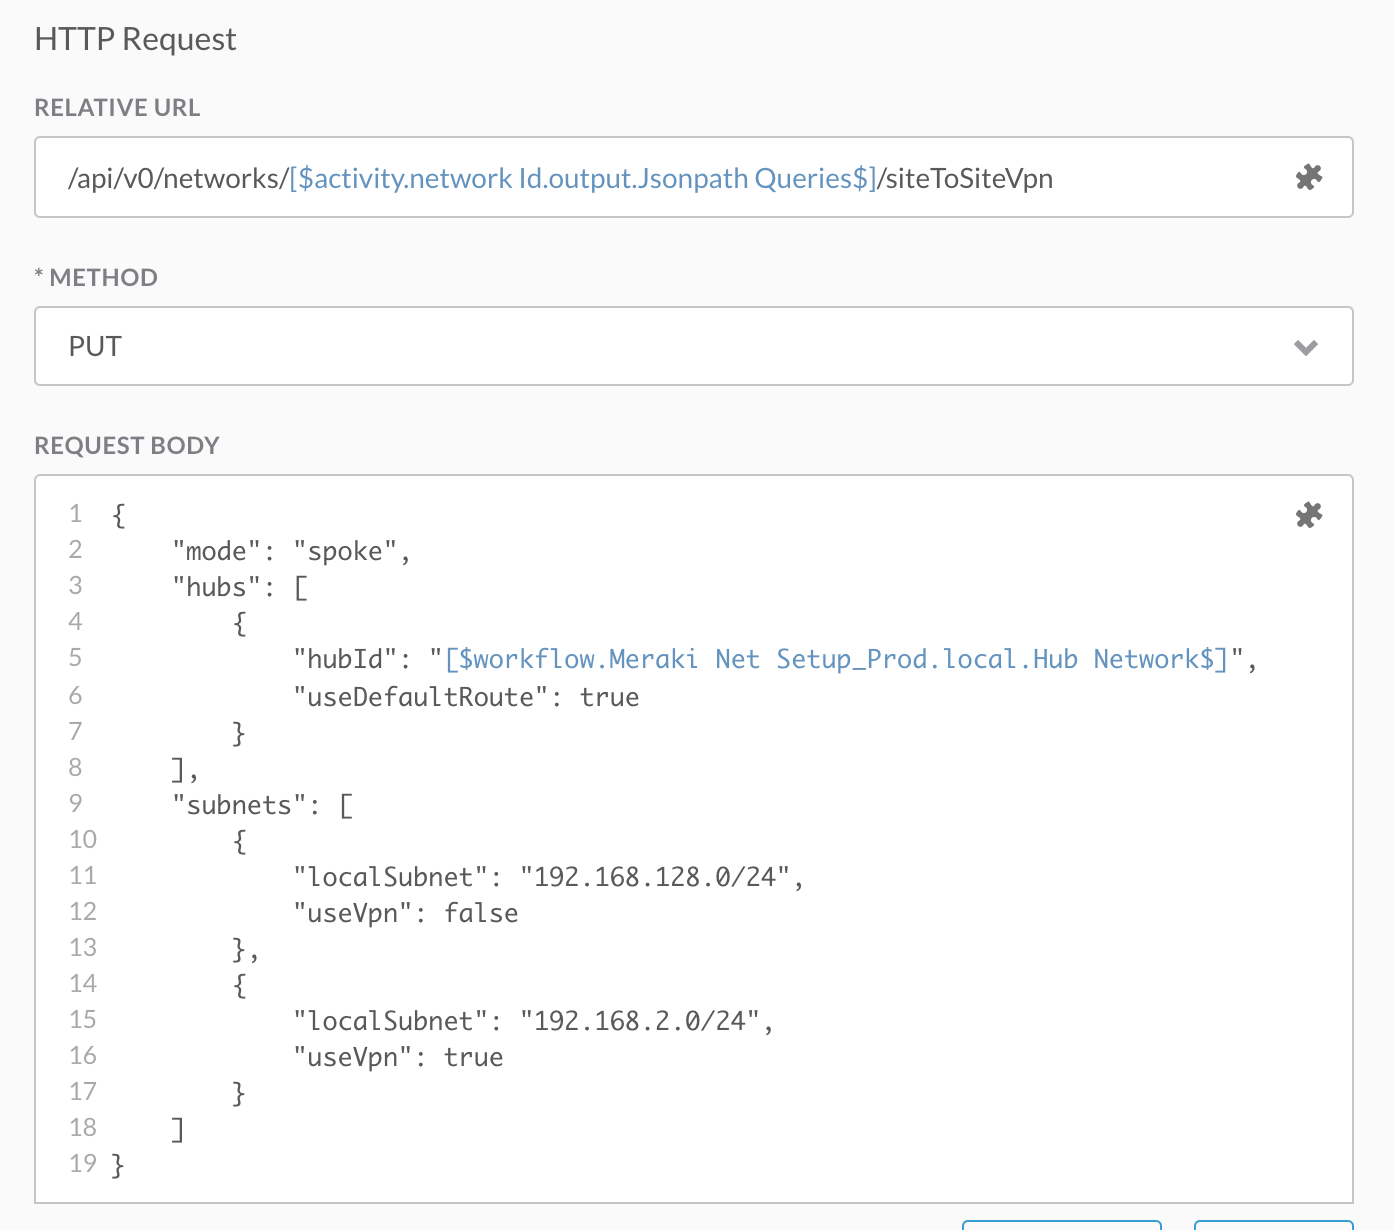
Once the VLANs are created, our new branch network can be set as a spoke for the Site-To-Site VPN. This requires a reference the Headquarters network as a hub. Therefore, we need to grab the network ID of the Headquarters network. The first step in is using yet another Web Service activity to get the network list via the /networks endpoint. The result of that API call is a JSON body with a list of networks and their attributes. We need to parse the network ID of the network named Headquarters but converting the JSON into a table using CAO’s Read Table from JSON activity. After the conversion, we can use CAO’s For Each activity to loop through the records until the name of the network equals Headquarters and the Condition Block activity is satisfied. Then we can make another Web Service activity that performs a PUT to the /siteToSiteVpn resource, passing the necessary JSON body including the network ID of the hub that was pulled earlier.
Finally! Setting SSID for client access
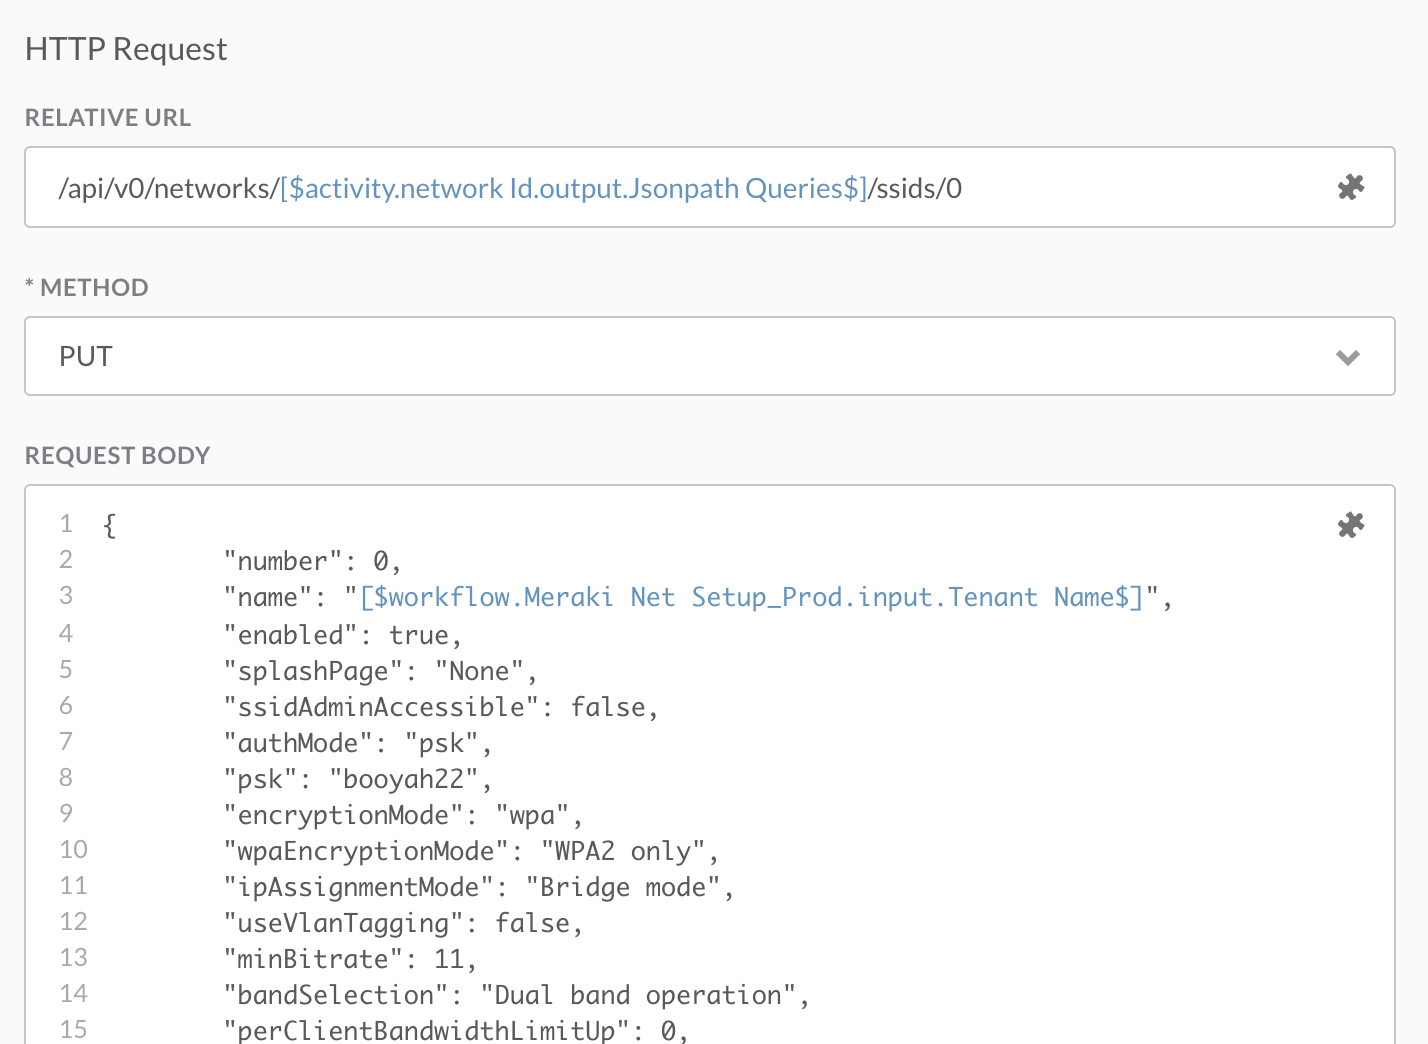
The final step to this workflow is to set the SSID for the Meraki branch network. This is simply done by a Web Service activity (yes again!) that makes a PUT call to the first SSID managed for that network. It will send the appropriate JSON body to configure per organization policy.
Success!
Now we have an easily repeatable method for deploying new branch networks that abstracts the need for admin access to Meraki and ONLY relies on a new name to be input for a new branch!
Register for one of the live webinars!
Want to know more? Starting on April 9th, 2020, and continuing for the next 5 Thursdays, we will be holding BrightTALK webinars. These 45-minute sessions will cover in detail the implementation of the above solution using Cisco Action Orchestrator on each of the different platforms. Join one or join all!
April 9 — Intro to Multi-Domain Deployments
April 16 — Implementing SD-WAN Deployments
April 23 — Implementing Meraki Deployments
April 30 — Implementing UCS/ACI Deployments
May 7 — Implementing Cisco DNA Center Deployments
Additional resources:
- Meraki Developer Resource Center
- DevNet Network Automation Exchange – shared code repos
- Cisco DevNet Certifications
We’d love to hear what you think. Ask a question or leave a comment below.
And stay connected with Cisco DevNet on social!
Twitter @CiscoDevNet | Facebook | LinkedIn
Visit the new Developer Video Channel


