
Part 3 of the 3-part ThousandEyes in Catalyst 9000 Switches Series
How to install ThousandEyes Enterprise Agent in C9K Switches using CLI?
In parts one and two of this blog series, we covered the benefits of running ThousandEyes Enterprise Agent in Catalyst 9300 and 9400 Switches and how to perform the installation using Cisco DNA Center. In this third part, we will explain how to go through the installation using CLI.
Steps to follow:
- Obtain your ThousandEyes account – The blog will not cover this step. Work with your Cisco or Cisco Partner representative to obtain access to the ThousandEyes dashboard.
- Pre-work – Define IP addressing, understand proxy requirements and gather the ThousandEyes token. This step was discussed in Blog #2 of this series.
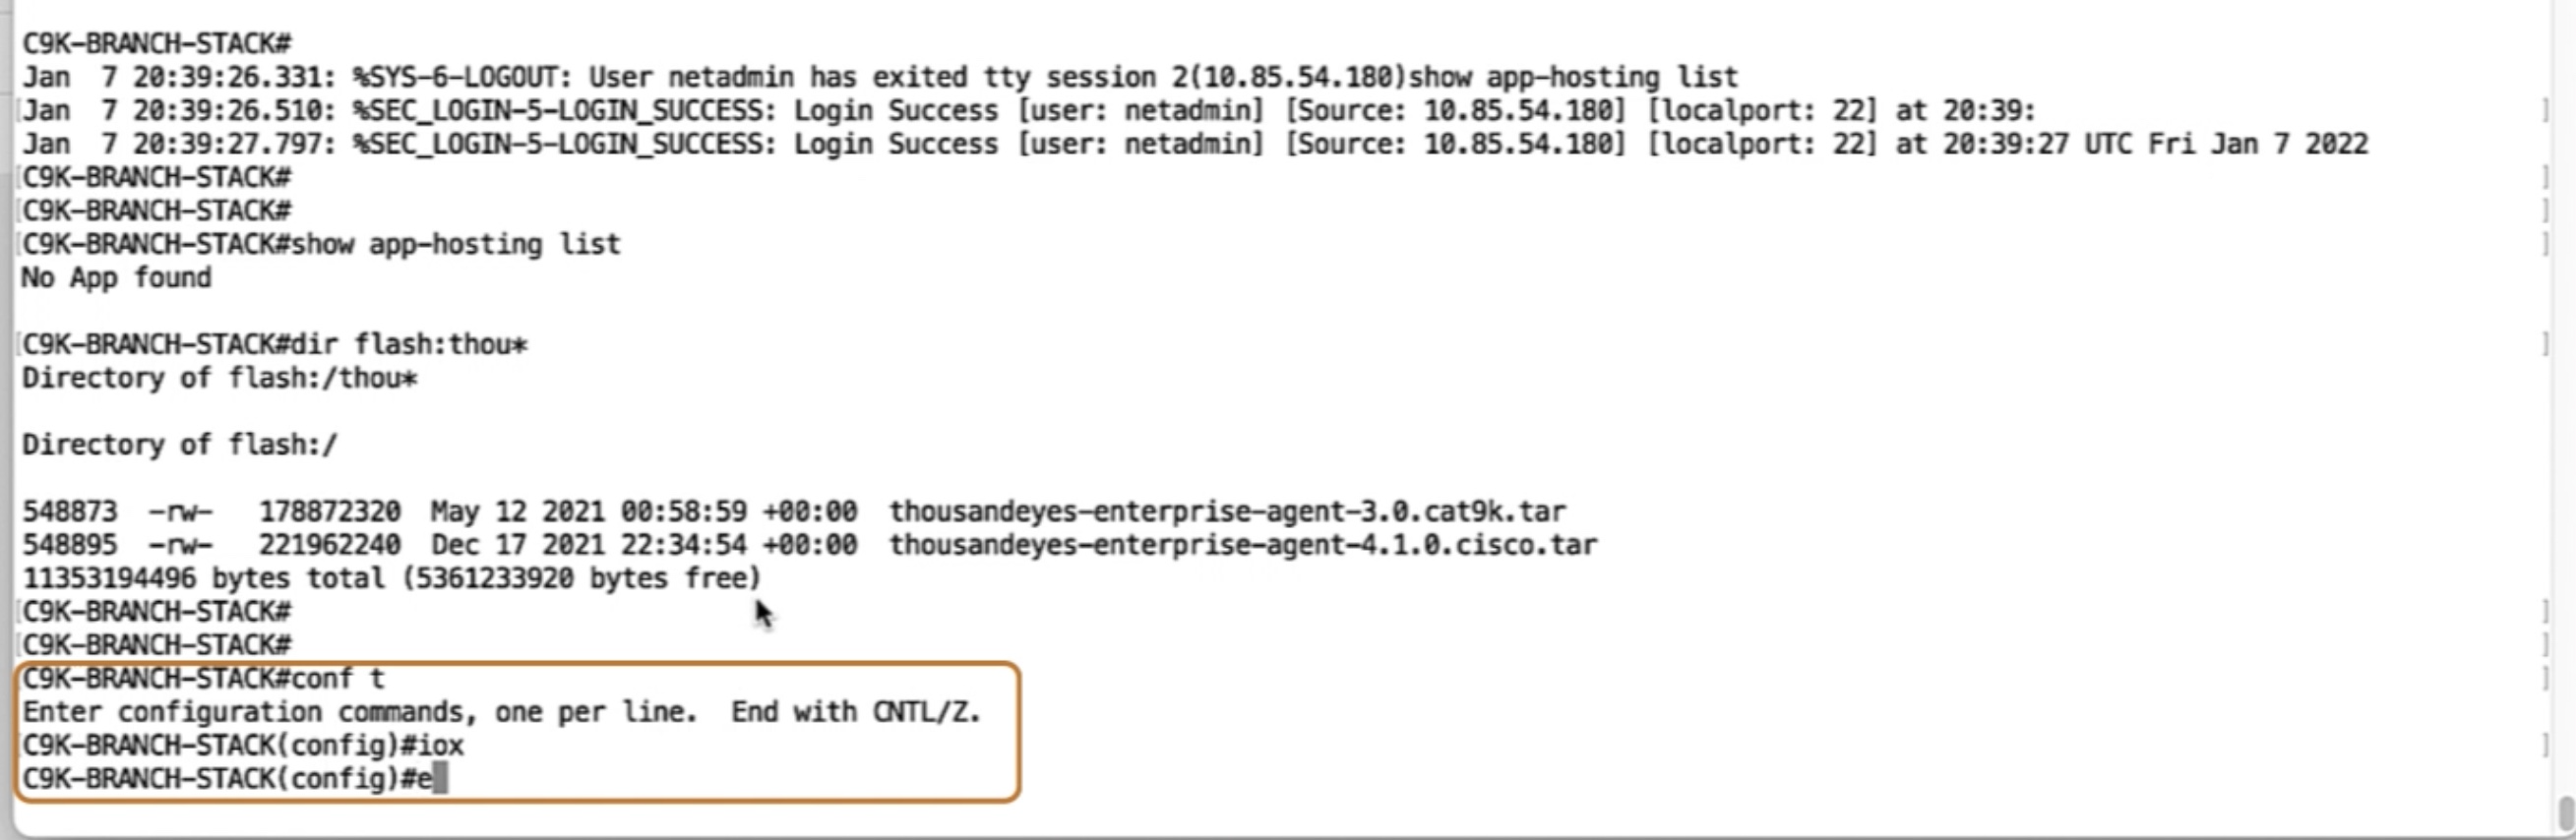
- Install the ThousandEyes Docker image
- Configure basic networking for the Docker environment
- Configure Application hosting
- Run ThousandEyes app
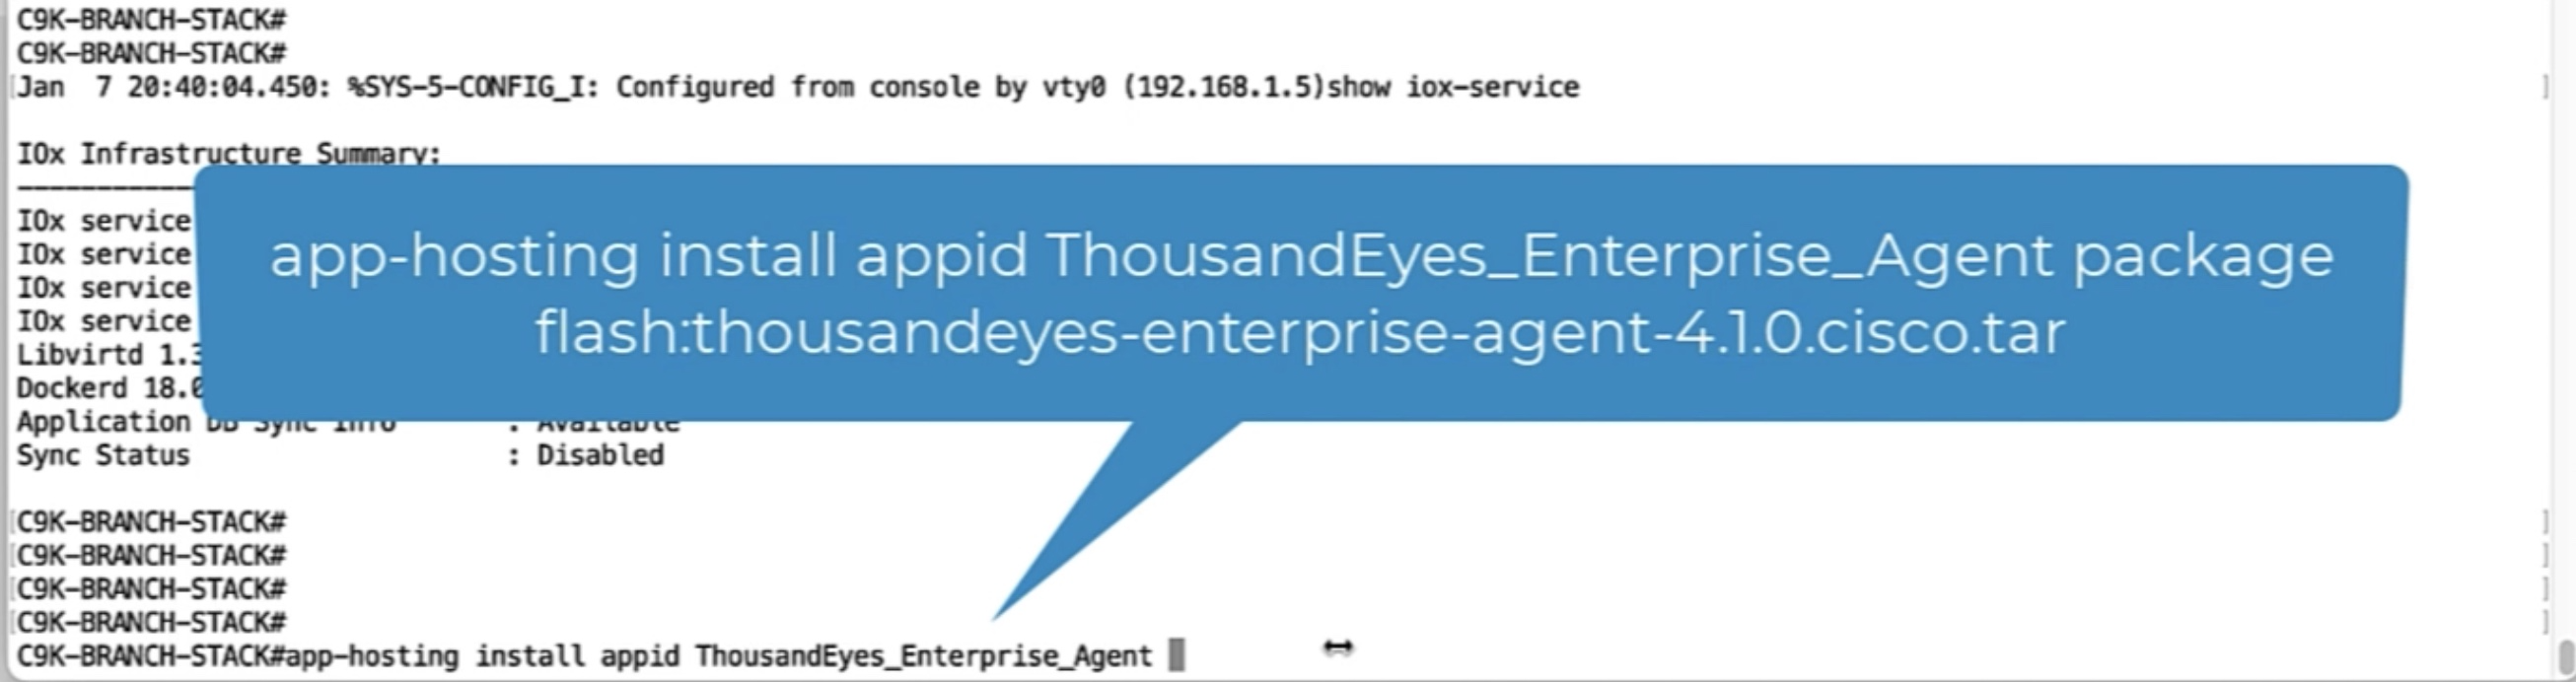
Step 3 – Install the ThousandEyes Docker image
To install ThousandEyes in a Catalyst 9300 or 9400 switch, we first need to download the “.tar” file with ThousandEyes docker image from the ThousandEyes dashboard and copy it into the switch flash. From the switch CLI, we then have to issue the commands to enable the Application Hosting framework and to install the ThousandEyes application.
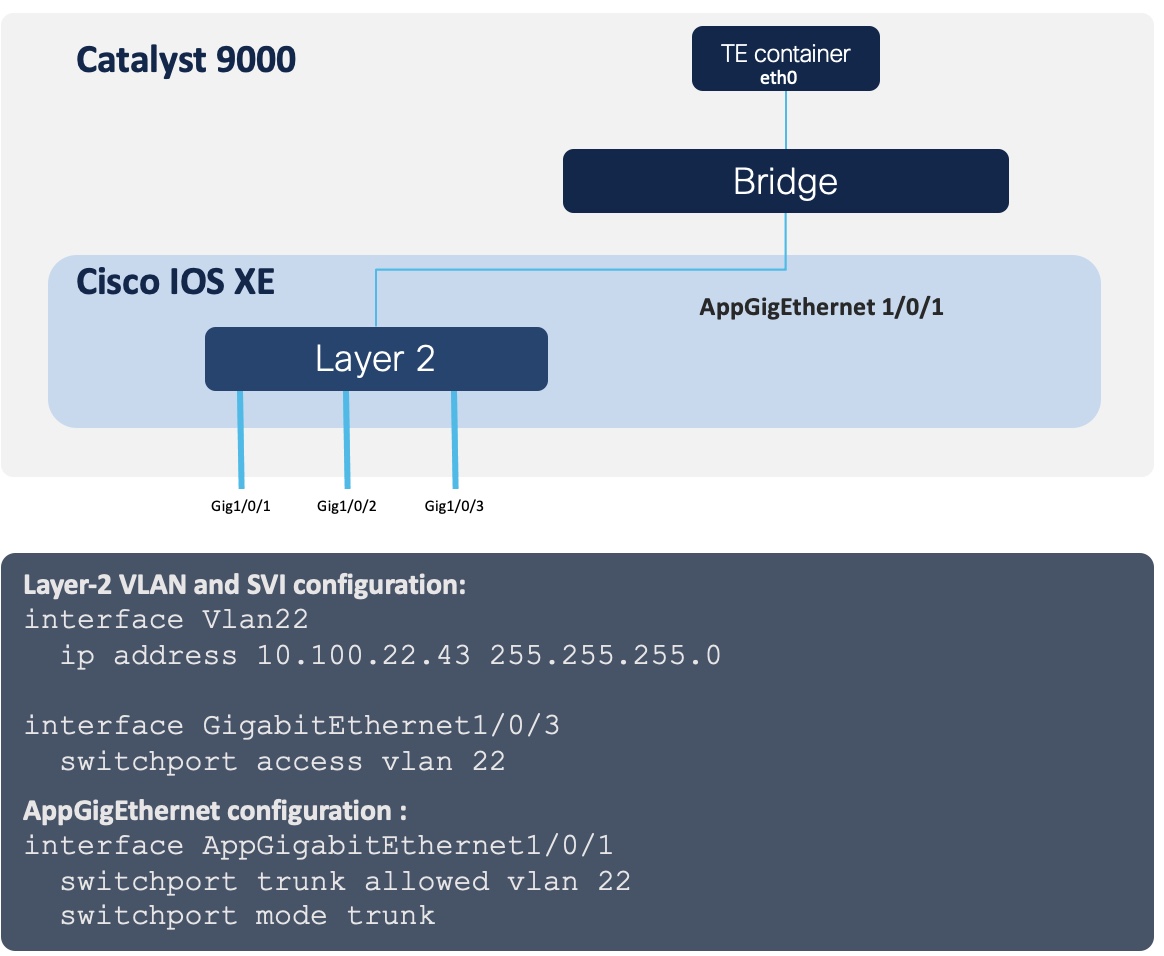
Step 4 – Configure basic networking for the Docker environment
Catalyst 9000 switches require basic networking configuration before activating the application. This includes configuration of the AppGigEthernet interface which connects to the Docker environment. The IP address assigned to the container will be in a Layer-2 VLAN which has been passed through from any active physical port and is not the default VLAN. The configuration of the AppGigEthernet interface is typically a trunk allowing the selected VLAN.
In the example below, we will be using VLAN 22 for the container IP addressing. This switch has active ports in VLAN 22 and the corresponding SVI configured. The configuration for AppGigEthernet interface is then allowing VLAN 22.
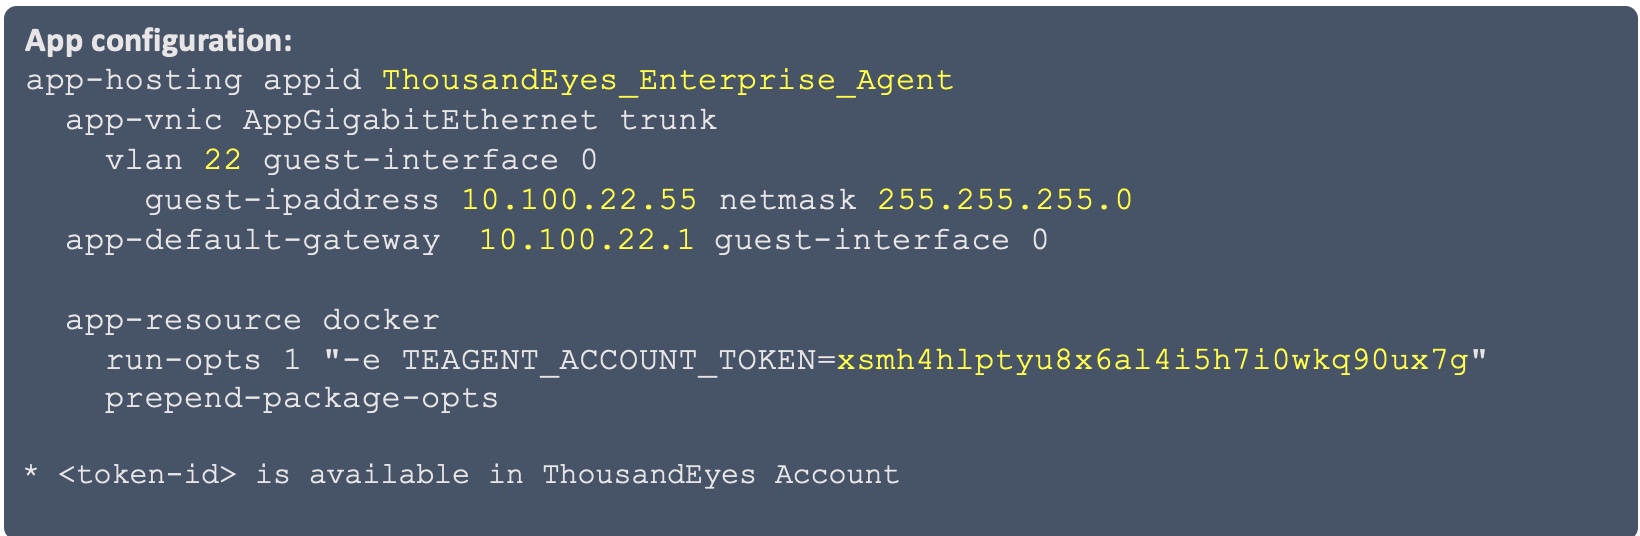
Step 5 – Configure Application hosting
Once we finish the basic networking configuration, it’s time to configure the application parameters for application hosting. As mentioned above, the container will require IP configuration including IP address, mask, default gateway and name-server. The IP addressing can be assigned statically or dynamically using DHCP. In the same manner as with DNA Center configuration, the application hosting infrastructure, requires a set of configuration settings in the form of “Docker Runtime Options” which we will be configured in this step. Blog #2 covers more details on Docker Runtime Options.
In our example, we are using VLAN 22. Hence, the IP addressing is within this VLAN.
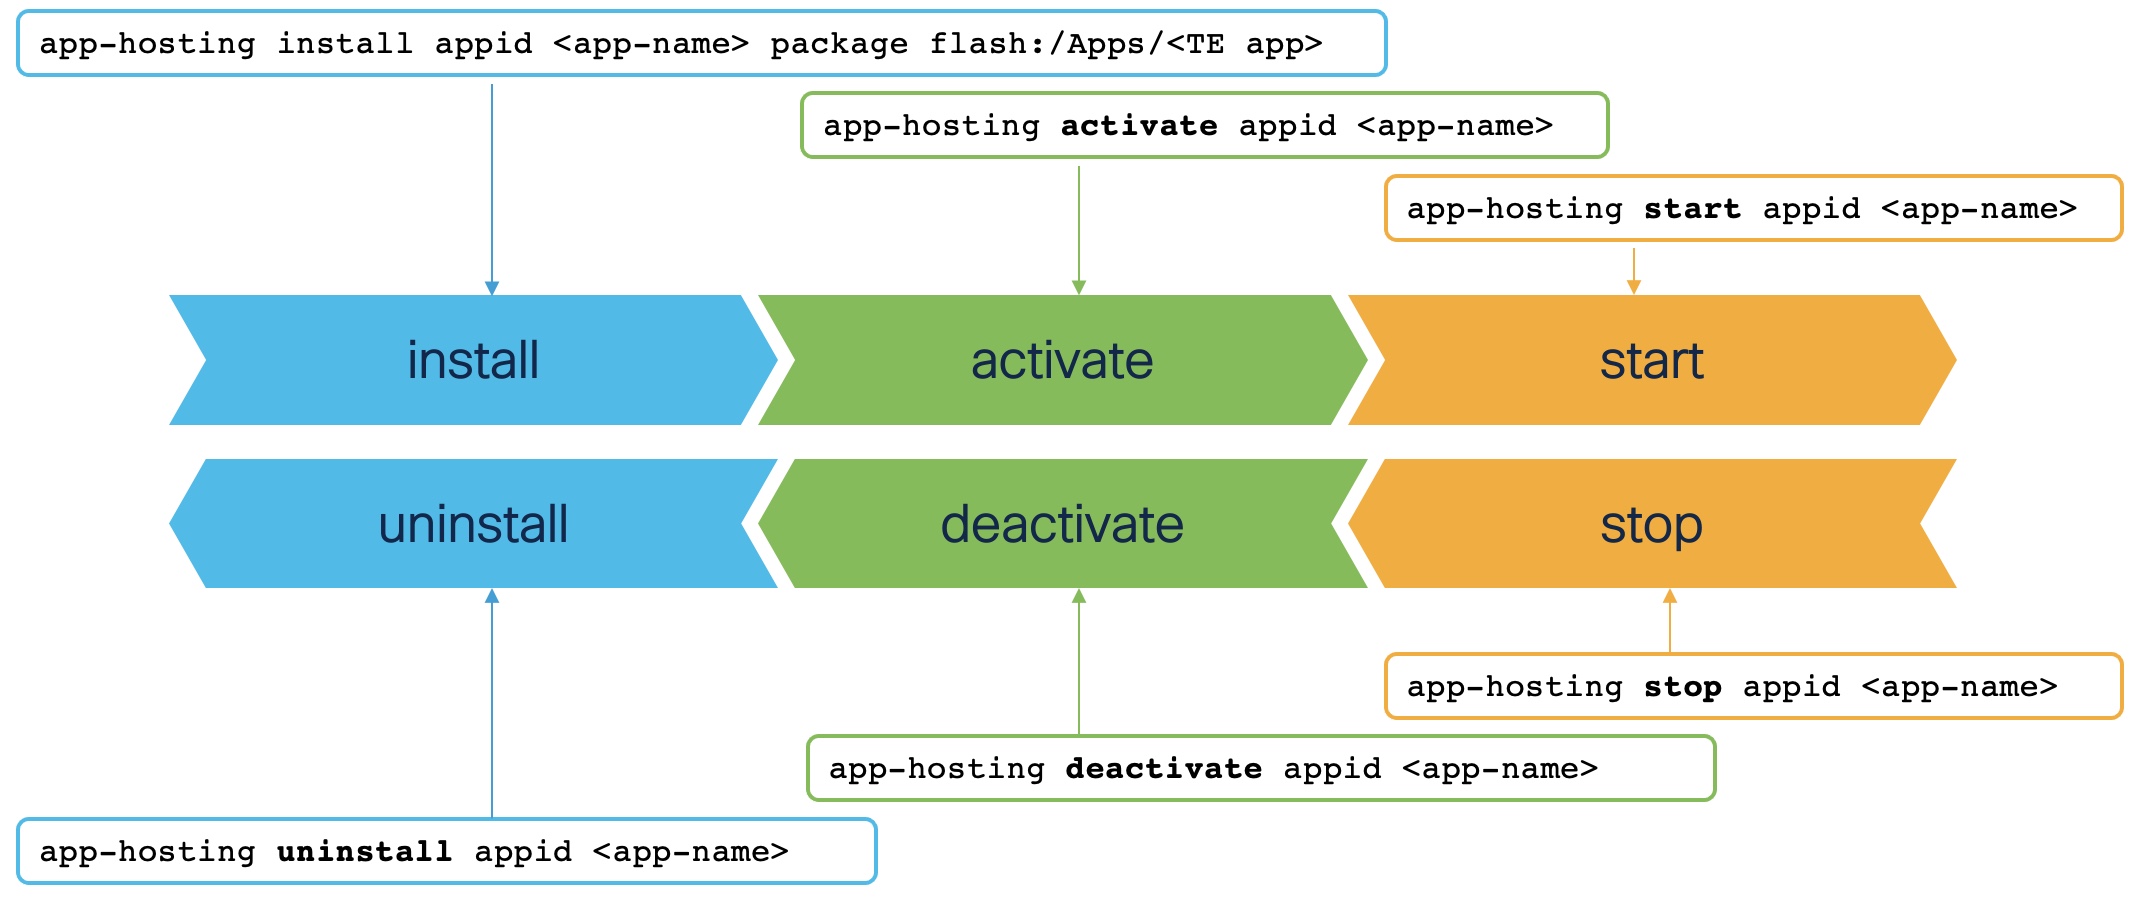
Step 6 – Run ThousandEyes App
The next step is to activate and start the application. Catalyst 9300 and 9400 switches have a suite of commands for application lifecycle management as shown below:
Putting Everything together
All these steps will come together in the video below, showing a full installation of ThousandEyes Enterprise Agent in a Catalyst 9300 stack.
Congratulations – you completed the installation!
Your infrastructure is ready to add the tests and enjoy your enhanced visibility.
Follow the ThousandEyes in Catalyst 9000 Switches Series


Nice Blog :
Do we need to install the application on every stack in the network? for application visibility, only on the transit switch stack ?
Thanks for the feedback on the Blog. Where you install ThousandEyes agent will depend in your environment. It could be on a few switches to provide visibility on behalf of an area, for example, a switch in a floor, in a building, etc. Also, you can always start small and grow if necessary. If you have a C9300 or C9400 switch with Advantage license, you can give it a try today! For more detailed design, please contact your Cisco SE or Cisco Partner.