Part 2 of the 2-part Cisco DNA Center Planning and Adoption
Recap
In my previous blog titled, Cisco DNA Center Planning and Adoption, Part 1 – What you need to make the jump to light speed, we discussed the configuration settings that are included under the Design Menu in Network Settings, Device Credentials, and in Telemetry Settings in Cisco DNA Center. In Part Two, I’ll show you what configuration settings are needed to add devices when you Onboard with PnP, Run a Device Discovery, Add a Device to the Inventory, Claim Device, and Provision a Device.
To capture and visualize the configuration changes made by Cisco DNA Center, I will use a testing and validation tool called Python Automated Test System (pyATS).
What is pyATS?
pyATS is a testing and validation framework that is platform and vendor agnostic and provides a feature, solution, system sanity checks, and scale tests for network devices (routers, switches, access points, firewalls, etc.). In other words, you can use pyATS to test and validate changes in your network devices, be they configuration or changes in the state or operation of the device, and compare the results of each run to validate that things are what they are expected to be.
Further, pyATS can be integrated into your existing tooling and processes to provide the necessary testing and validation task for your Closed Looped Automations.
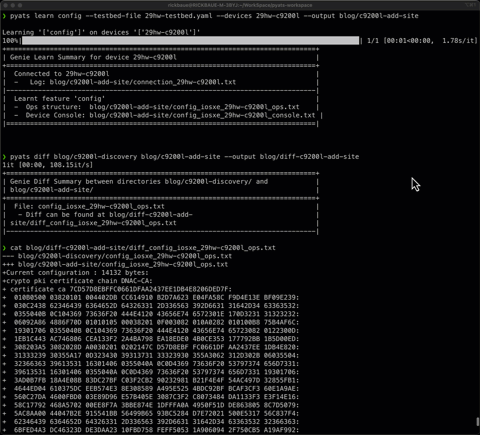
For this exercise, I will use two pyATS commands, “pyats learn config” and “pyats diff” to collect and compare the pre/post configurations. As I said earlier, pyATS is powerful and can do much more than just collect and compare configuration files. I urge you to dig deeper into this very useful testing and validation tool.
Examples of the “pyats learn config” and “pyats diff” commands.
- pyats learn config –testbed-file 29hw-testbed.yaml –devices 29hw-c9200l –output blog/c9200l-base-No-AAA
- pyats diff blog/c9200l-base-No-AAA blog/c9200l-discovery –output blog/diff-c9200l-Discovery
For more information on pyATS, check out these resources:
Python Automated Test Systems (pyATS) Overview
DevNet: Accelerating your DevOps with pyATS
Workflows and configuration change
We will look at the workflows and actions in Cisco DNA Center that will apply the configuration to your infrastructure. As described in Part 1, in the Base Automations, those settings are driven by Device Controllability and configured in Network Settings, Device Credentials, and Telemetry tabs. These settings will put configuration on your devices, but what will change will depend on what you may or may not already have configured.
I will first work with a fresh-out-of-the-box device with no configuration and work through the process of PnP, Claiming a device, and adding to a site. This will give you an idea of how this process can improve your Day0 tasks of Onboarding devices and show you what configuration will be applied to your devices from the base automation and custom configuration with Day0/DayN templates.
Then I’ll take you on the journey of adding brownfield devices to Cisco DNA Center through Discovery and Add Device into Inventory. To show you how this works, I’ll use two Brownfield use cases.
- Brownfield device with an existing configuration that conflicts with those in Network Settings
- Brownfield device without configuration defined in Network Settings
A Note on Device Controllability
Device Controllability is a system-level process on Cisco DNA Center that enforces state synchronization for some device-layer features. Its purpose is to aid in deploying the required network settings that Cisco DNA Center needs to manage devices. Changes are made on network devices during discovery, when adding a device to Inventory, or when assigning a device to a site. Suppose changes are made to any settings under the scope of this process. In that case, these changes are applied to the network devices during the Provision and Update Telemetry Settings operations, even if Device Controllability is disabled. The following device settings will be enabled as part of Device Controllability when devices are discovered:
- SNMP Credentials
- NETCONF Credentials
After discovery, devices will be added to the Inventory. The following device settings will be enabled when devices are added to the inventory:
- Cisco TrustSec (CTS) Credentials
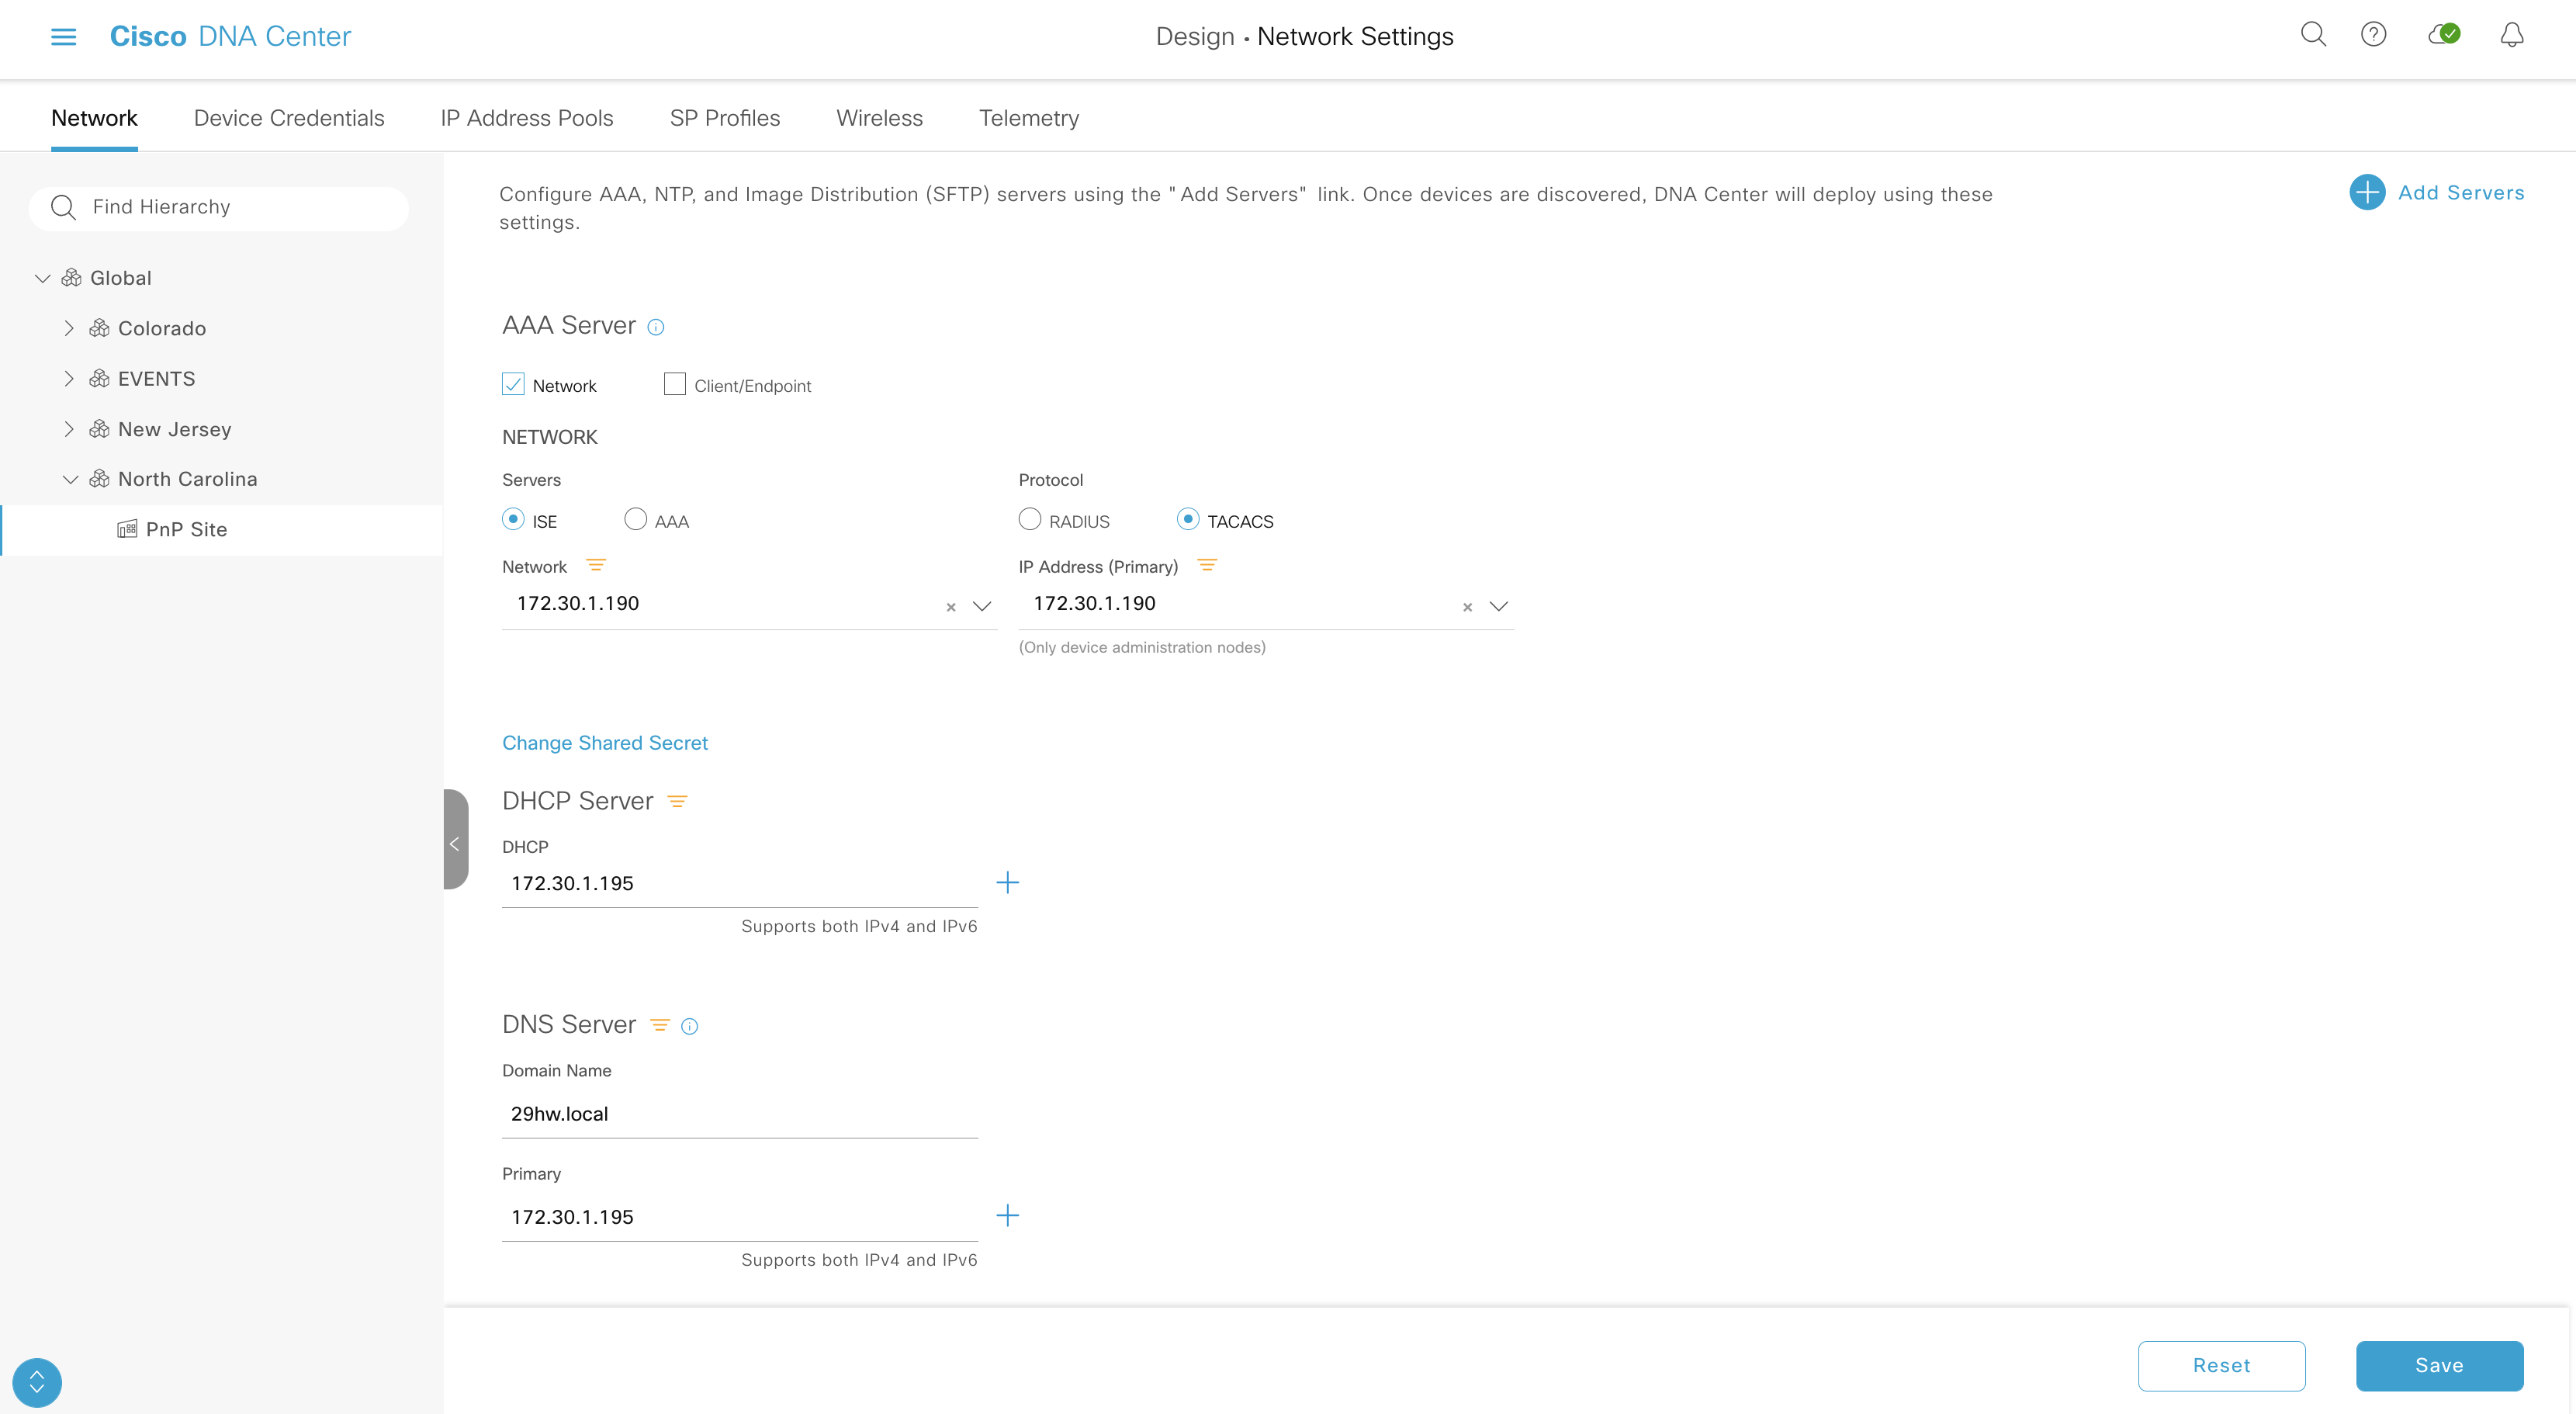
The following device settings will be enabled when devices are assigned to a site. Some of these settings can be defined at a site level under Design > Network Settings > Telemetry & Wireless.
- IPDT Enablement
- Controller Certificates
- SNMP Trap Server Definitions
- Syslog Server Definitions
- NetFlow Server Definitions
- Wireless Service Assurance (WSA)
- Wireless Telemetry
- AP Impersonation
- DTLS Ciphersuite
If Device Controllability is disabled, Cisco DNA Center does not configure any of the credentials or settings mentioned above on devices during discovery, runtime, or site assignment.
***In short, you will significantly reduce the effectiveness of Cisco DNA Center and its ability to operate in its intended manner if you disable Device Controllability. So, unless you are 100% sure this is what you must do, DON’T DO IT!
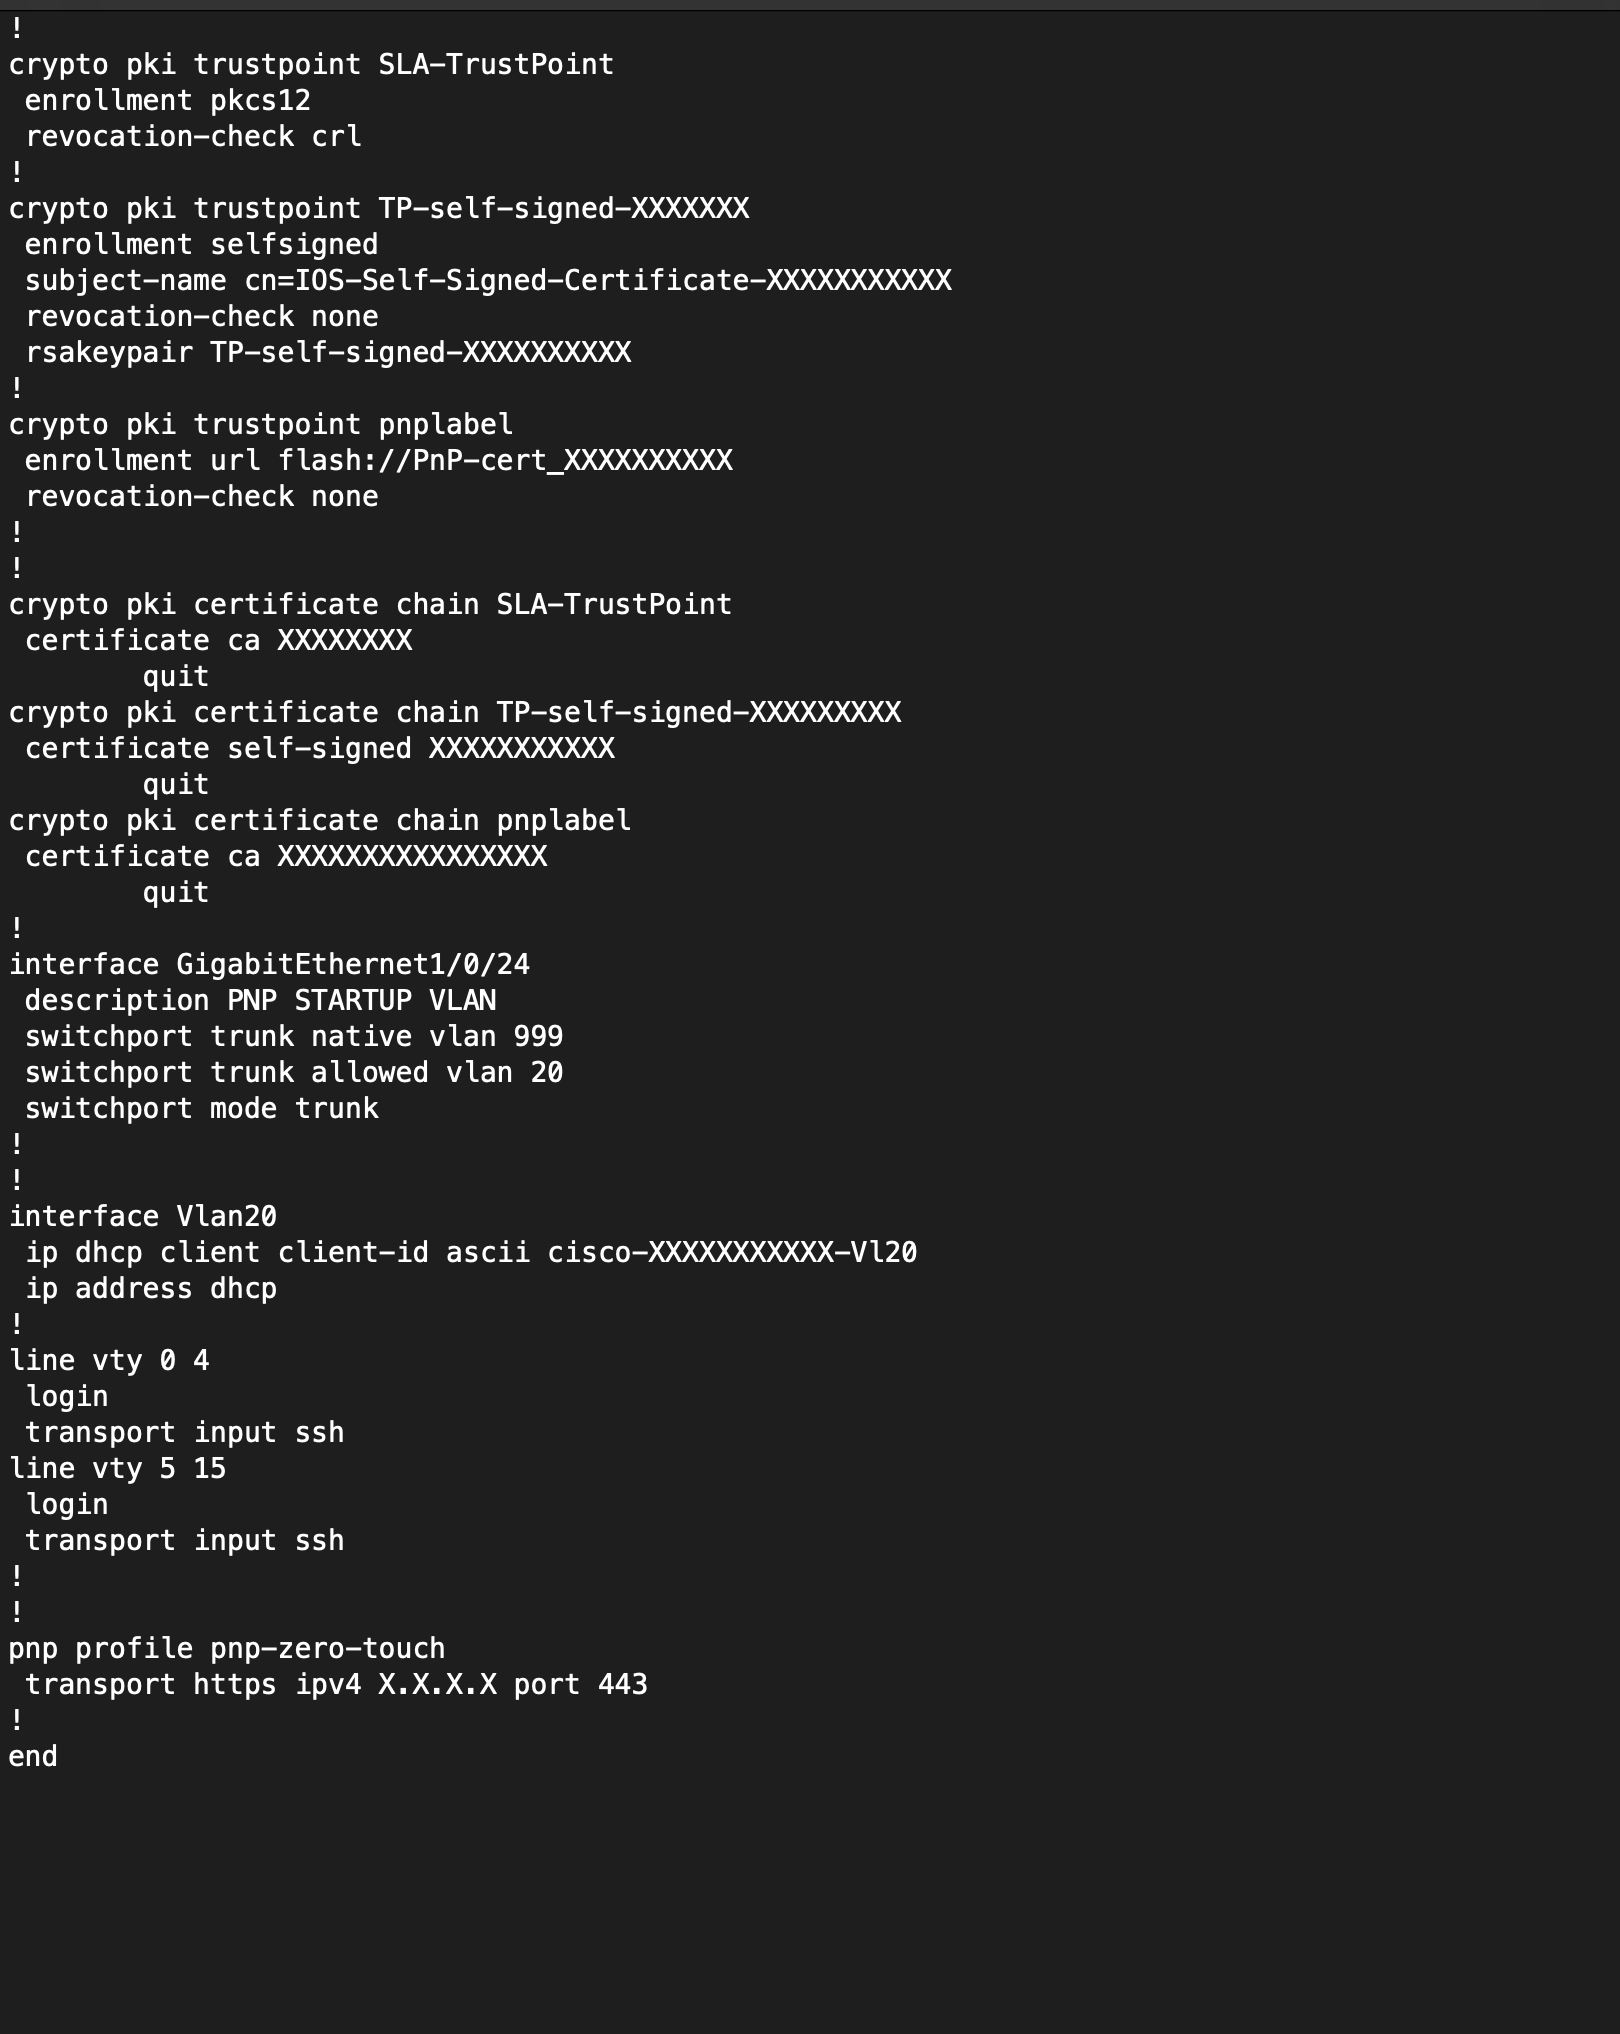
Base Configuration
This is the base configuration that we will use for our testing.
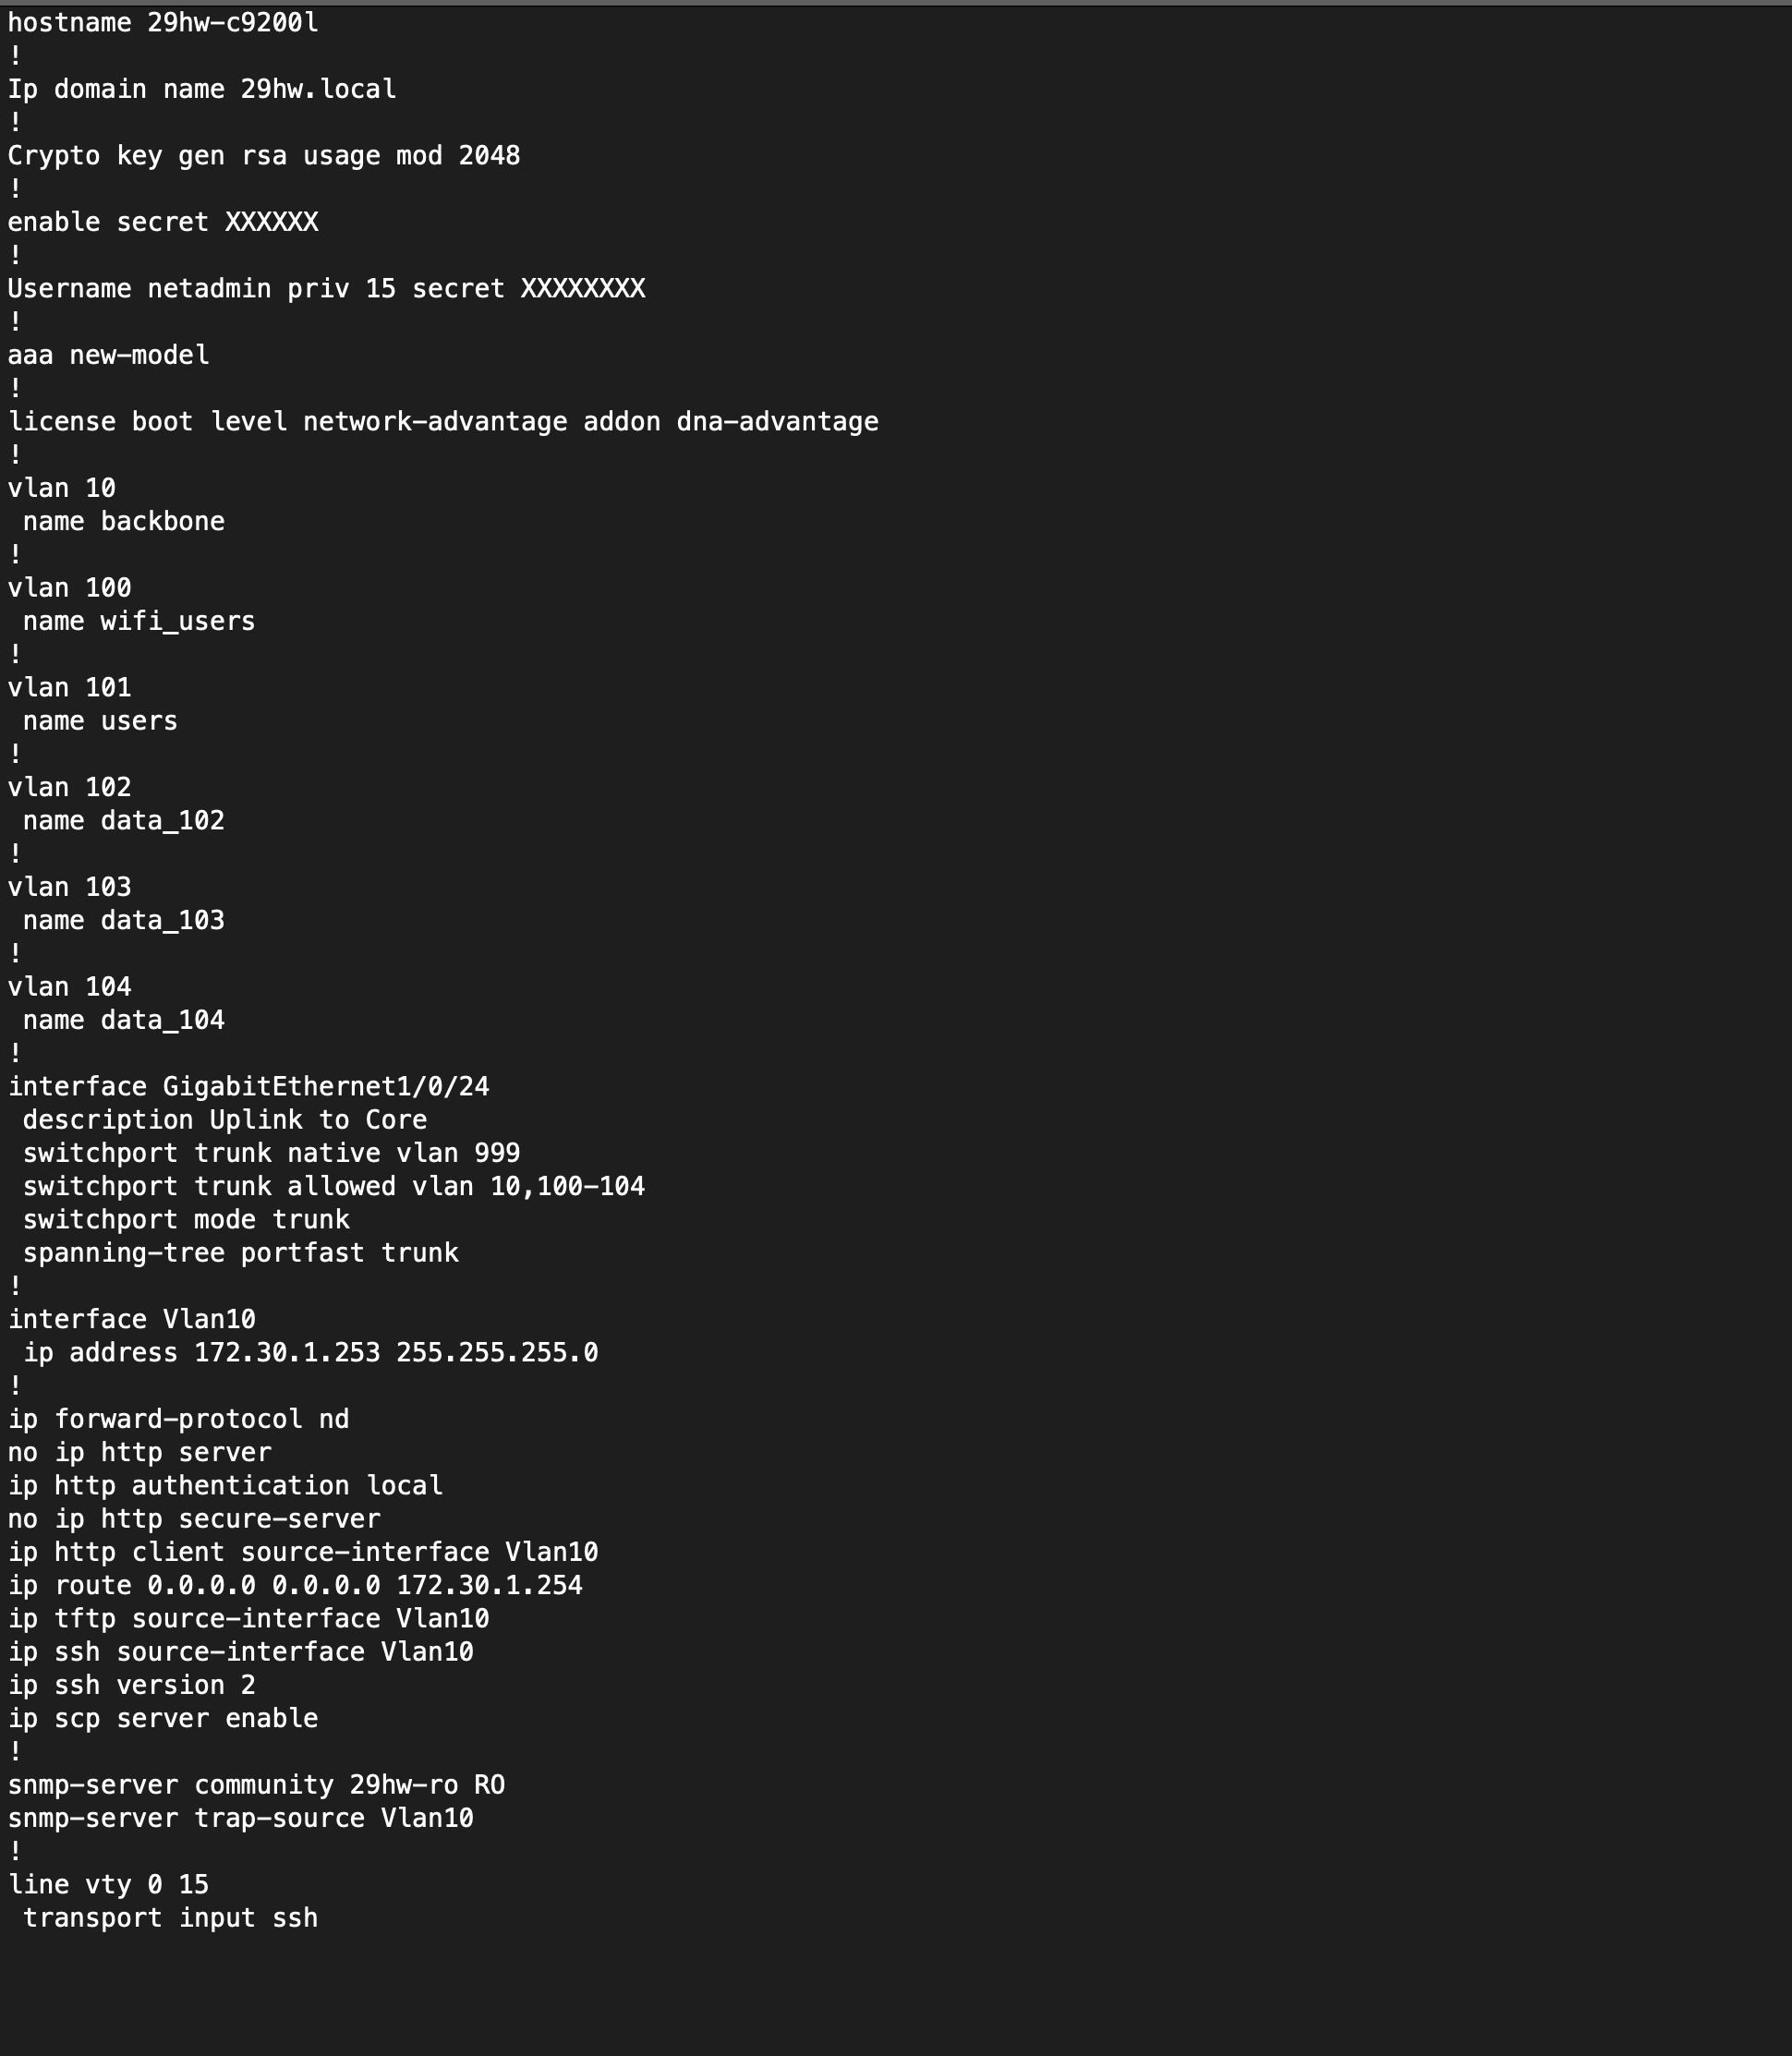
PnP – Device Onboarding
When you onboard a device with PnP, there are a couple of steps in the process; Claiming the device, adding it to a site, and optionally adding custom configuration through the use of Day0/DayN Configuration Templates. But the basic action of the PnP Claim process yields the configuration changes below, which as a bare minimum, allows Cisco DNA Center to communicate with the device.
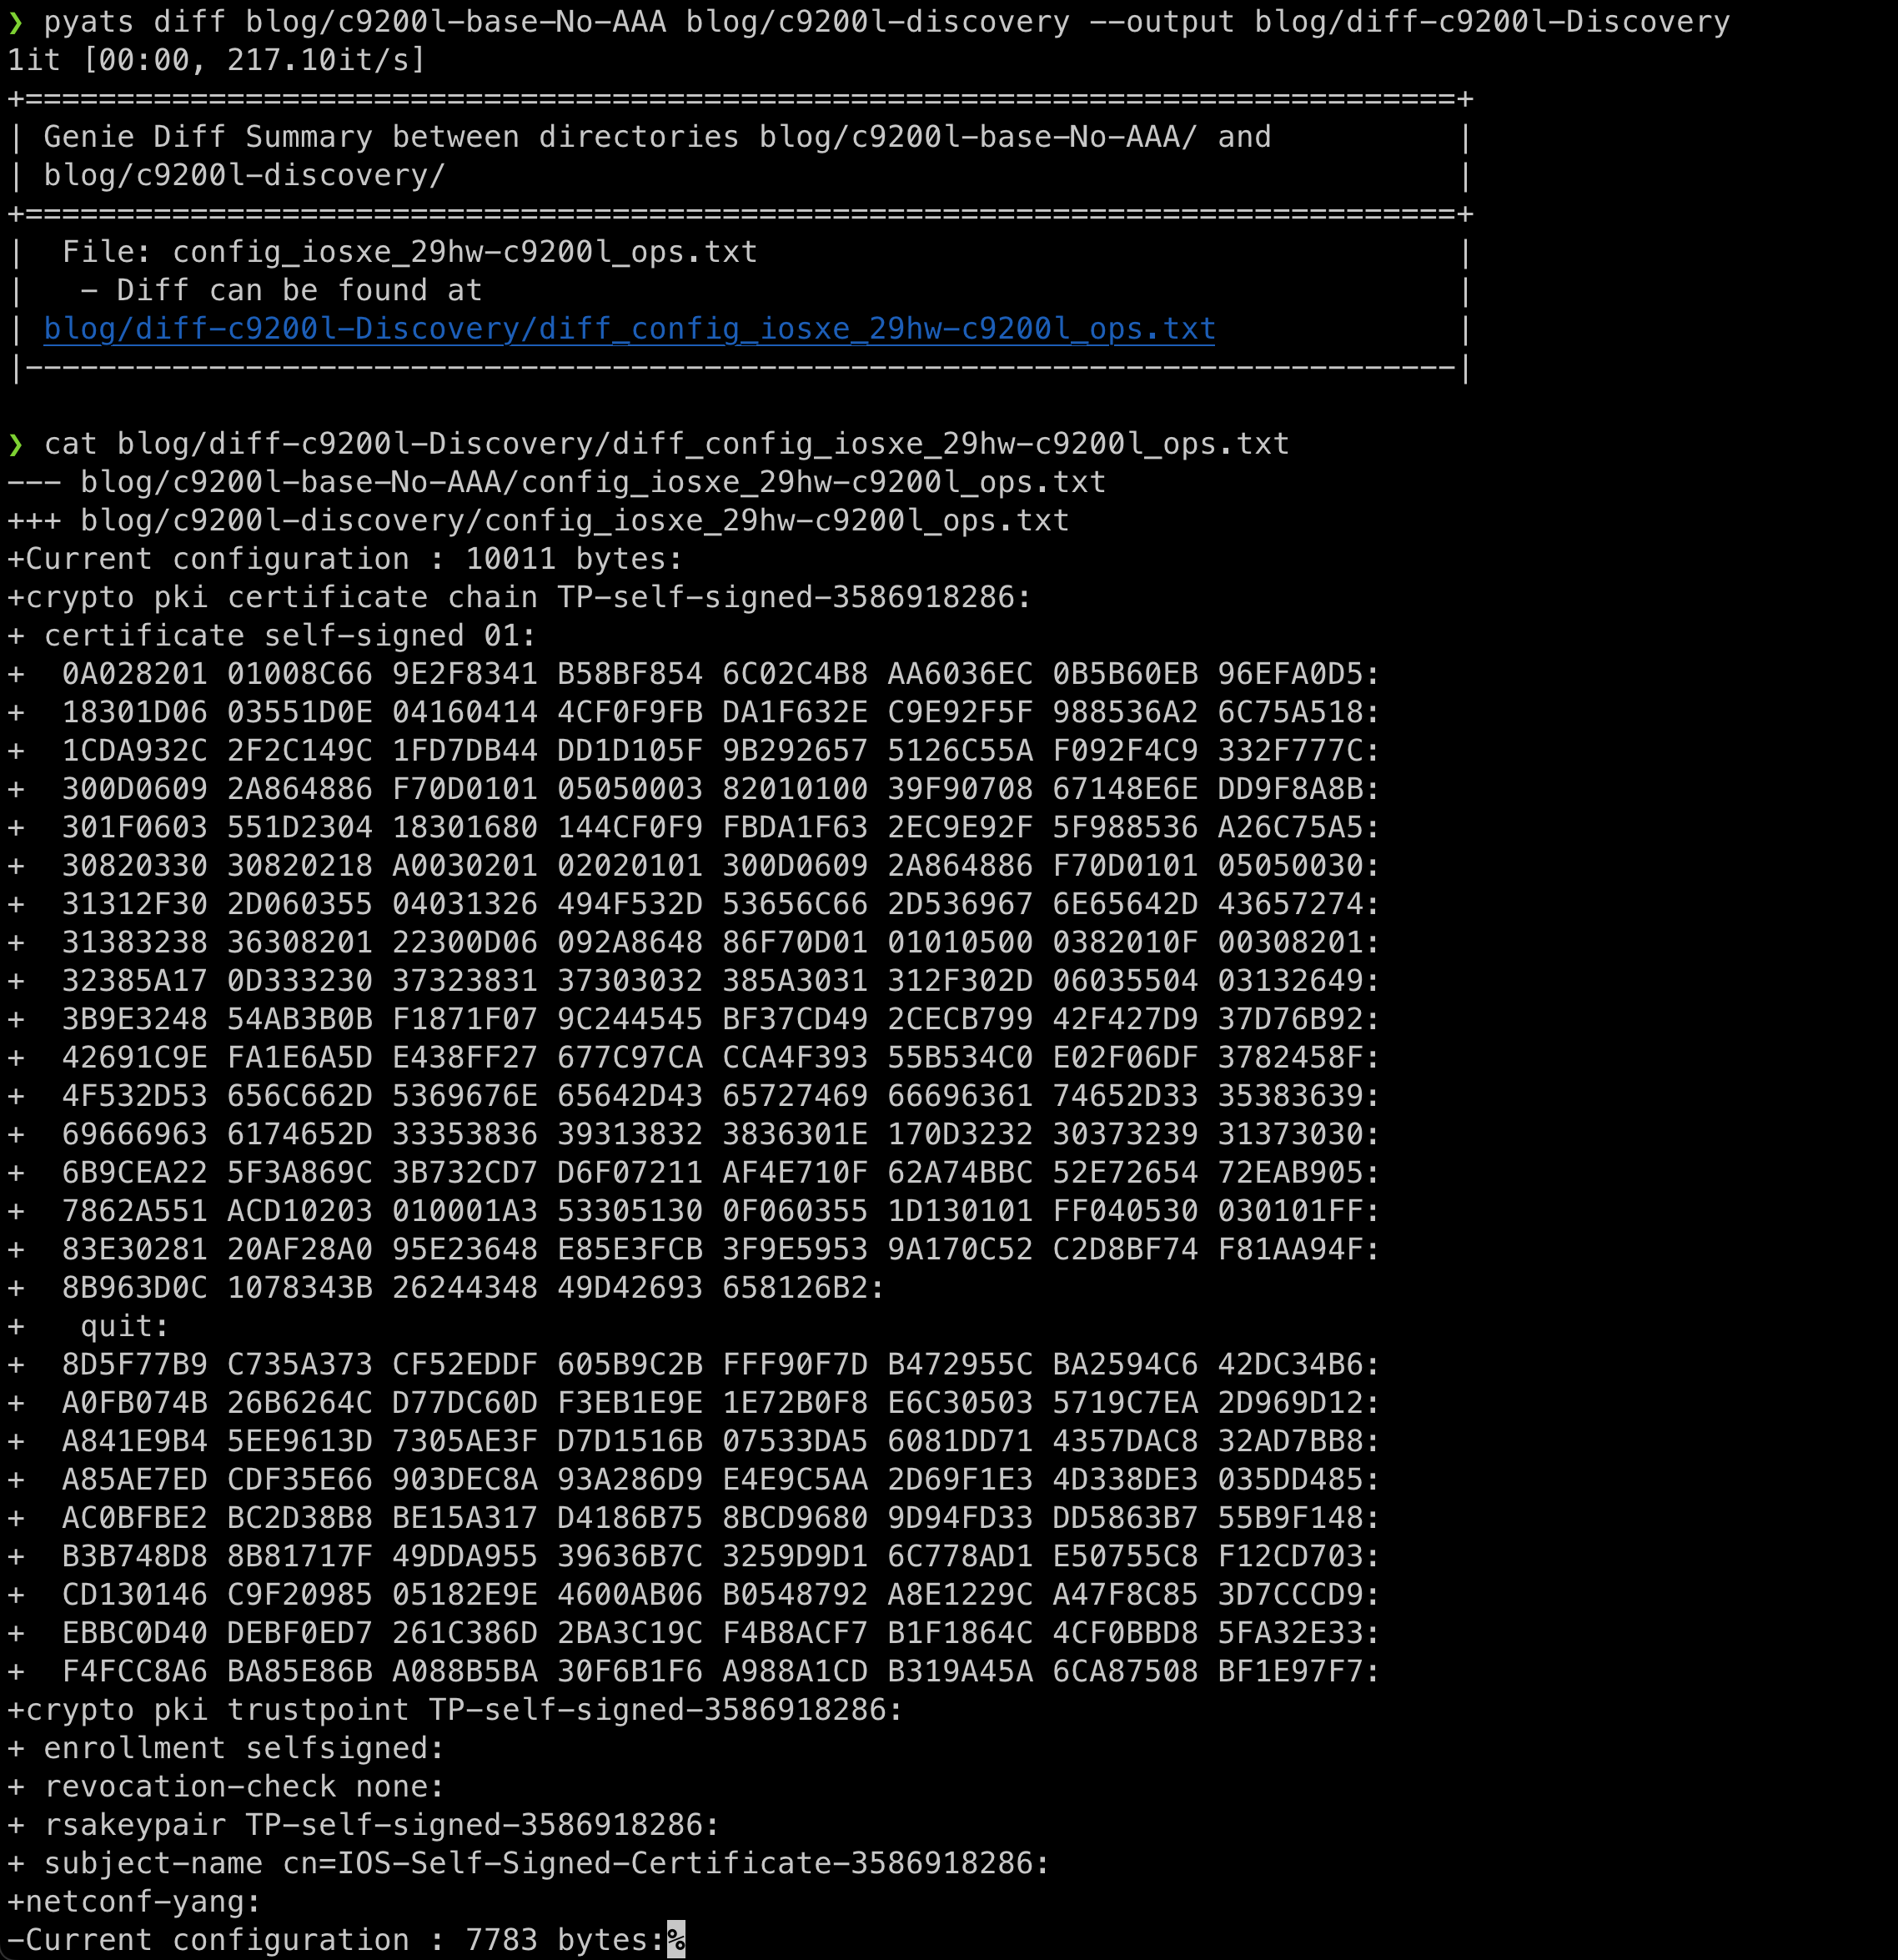
Discovery – Brownfield device
In the image below, we can see the differences between the base config and the configuration that resulted from doing a discovery of our Catalyst 9200L switch. Since we had the CLI credential and SNMP RO Community already configured in our base configuration Cisco DNA Center added a Self-Signed Certificate, TrustPoint, and configured netconf-yang.
Assign a device to a site
Now that we have discovered our Catalyst 9200L, let’s add it to our device to a Site and observe what happens.
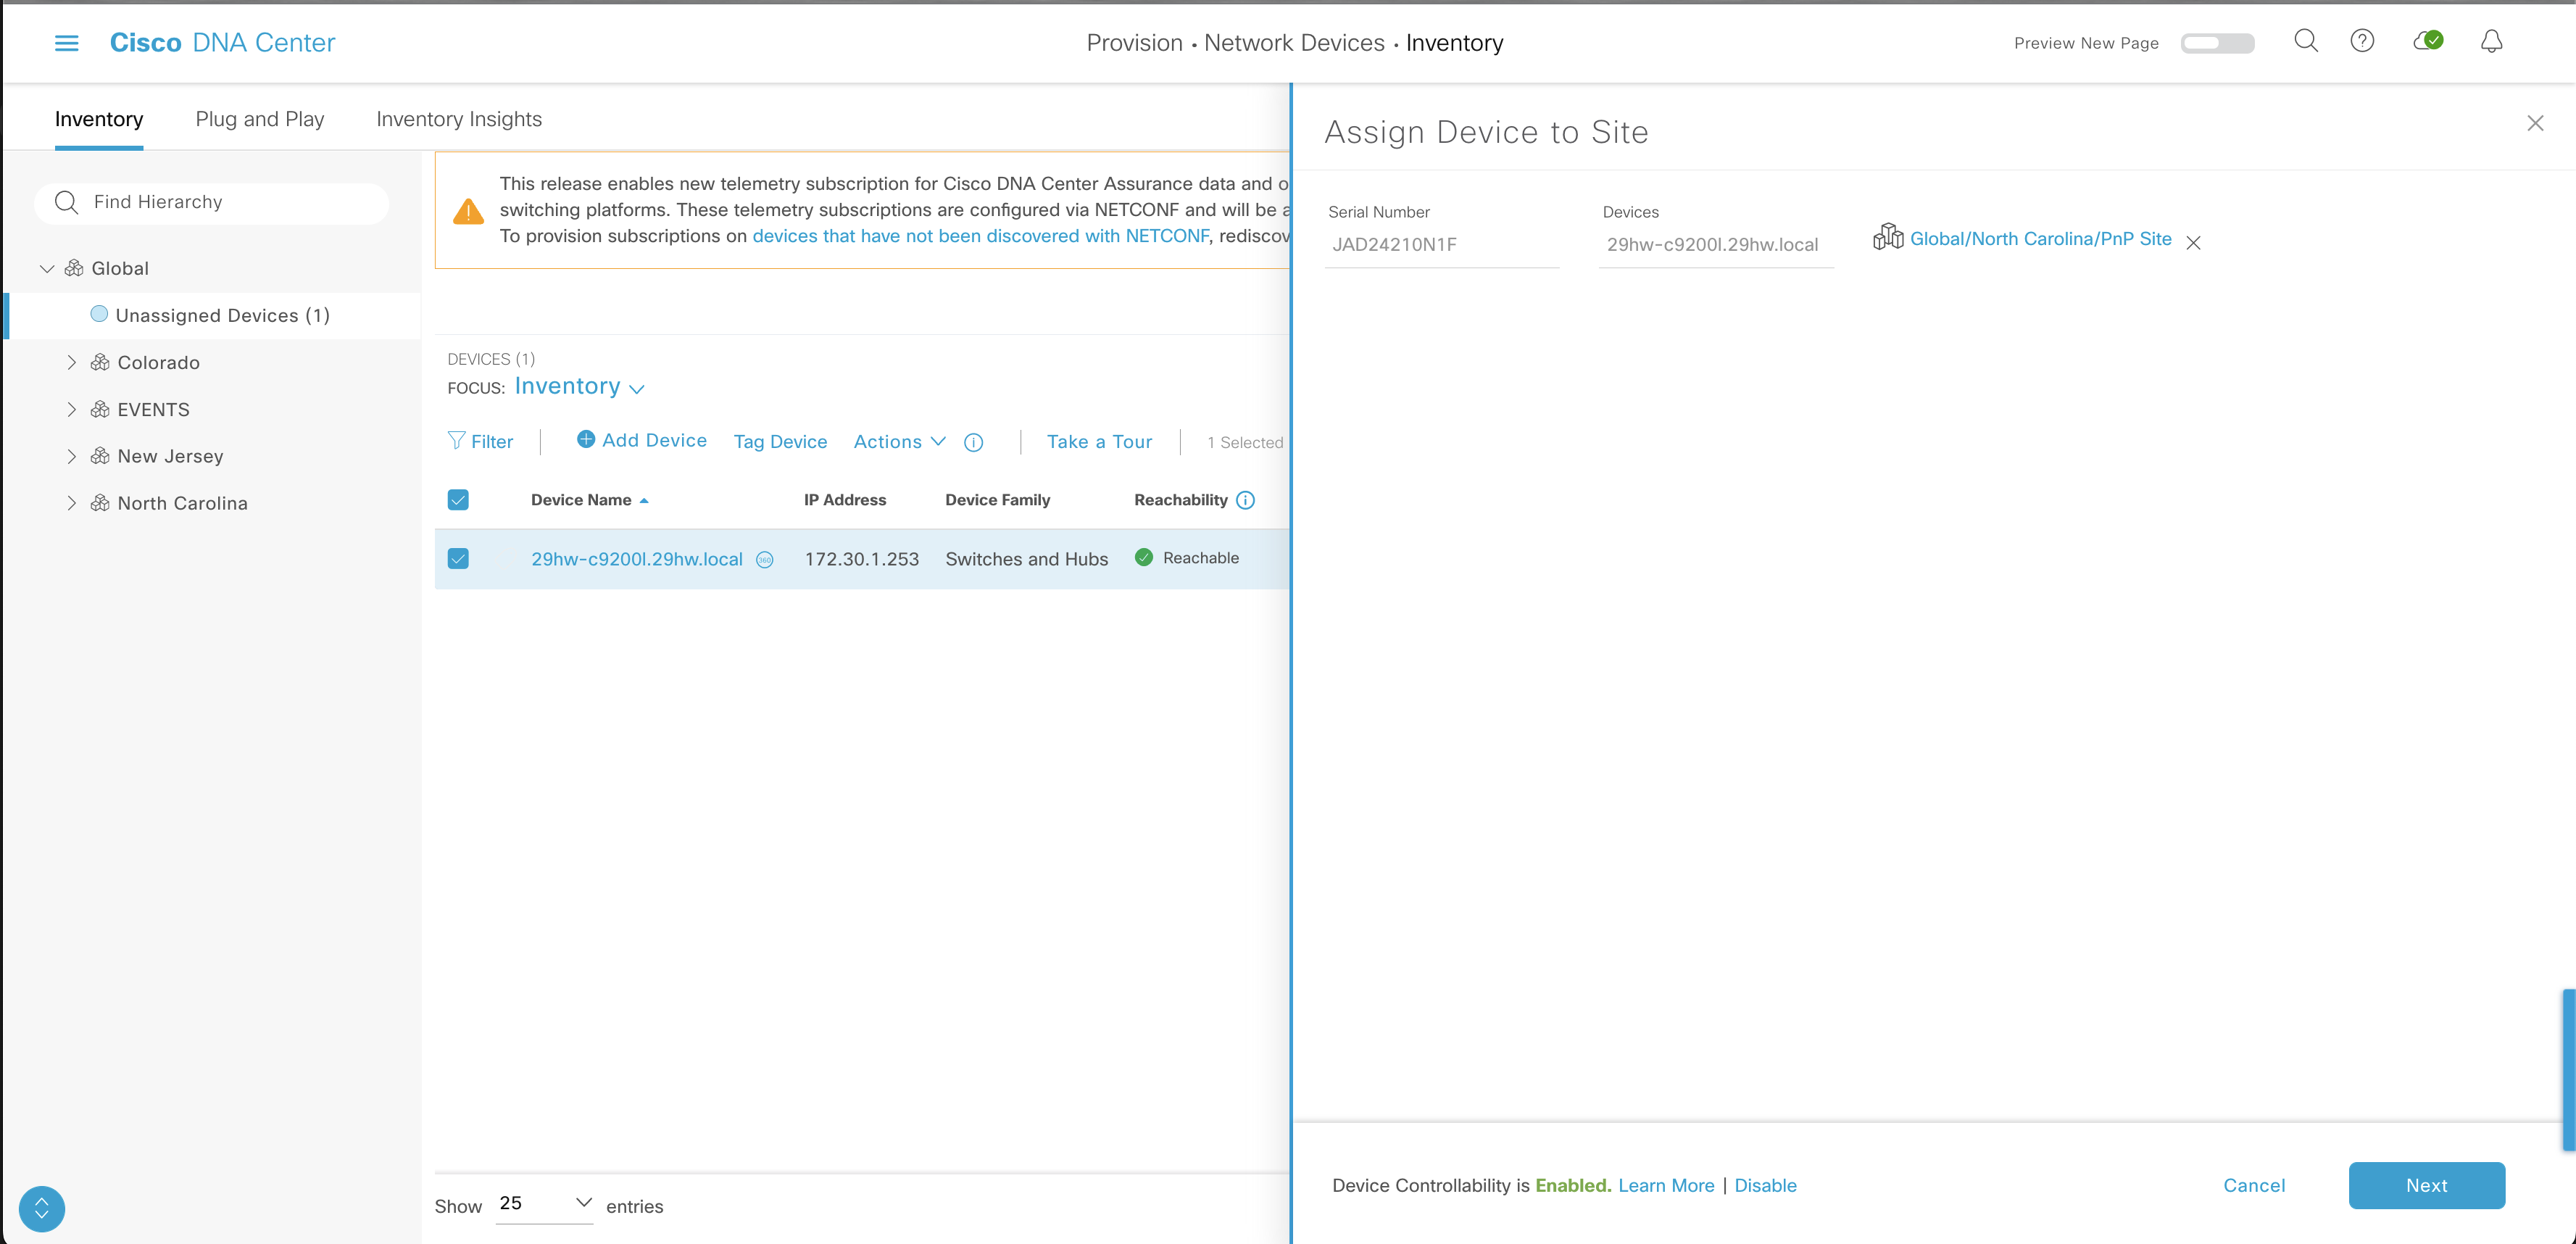
Here we see that Add Site has changed the previous configuration from Device Discovery. The items marked with —Discovery configuration and +++Add-Site configuration. Take notice of the changes to the Certificate, SNMP, SYSLOG, and Netconf-yang. To summarize, Cisco DNA Center added new certificates, SNMP settings, SYSLOG settings, and Netconf-yang was removed from the new configuration after adding the device to the site. Not to worry, Netconf-yang will get reapplied later in Device Provisioning.
Provision Device
For this exercise, I set the device back to the base configuration without AAA settings (above) to show what will change when Brownfield devices are provisioned.
The changes on the device are based on what was configured in the Design menu and on the Network, Device Credentials, and Telemetry tabs. As you can see, Provisioning the device adds a good deal of configuration.
Let’s look at the difference between the configuration we captured from the device in the c9200l-base-No-AAA state and the configuration after it was provisioned.
— blog/c9200l-base-No-AAA/config_iosxe_29hw-c9200l_ops.txt
+++ blog/c9200l-provision/config_iosxe_29hw-c9200l_ops.txt

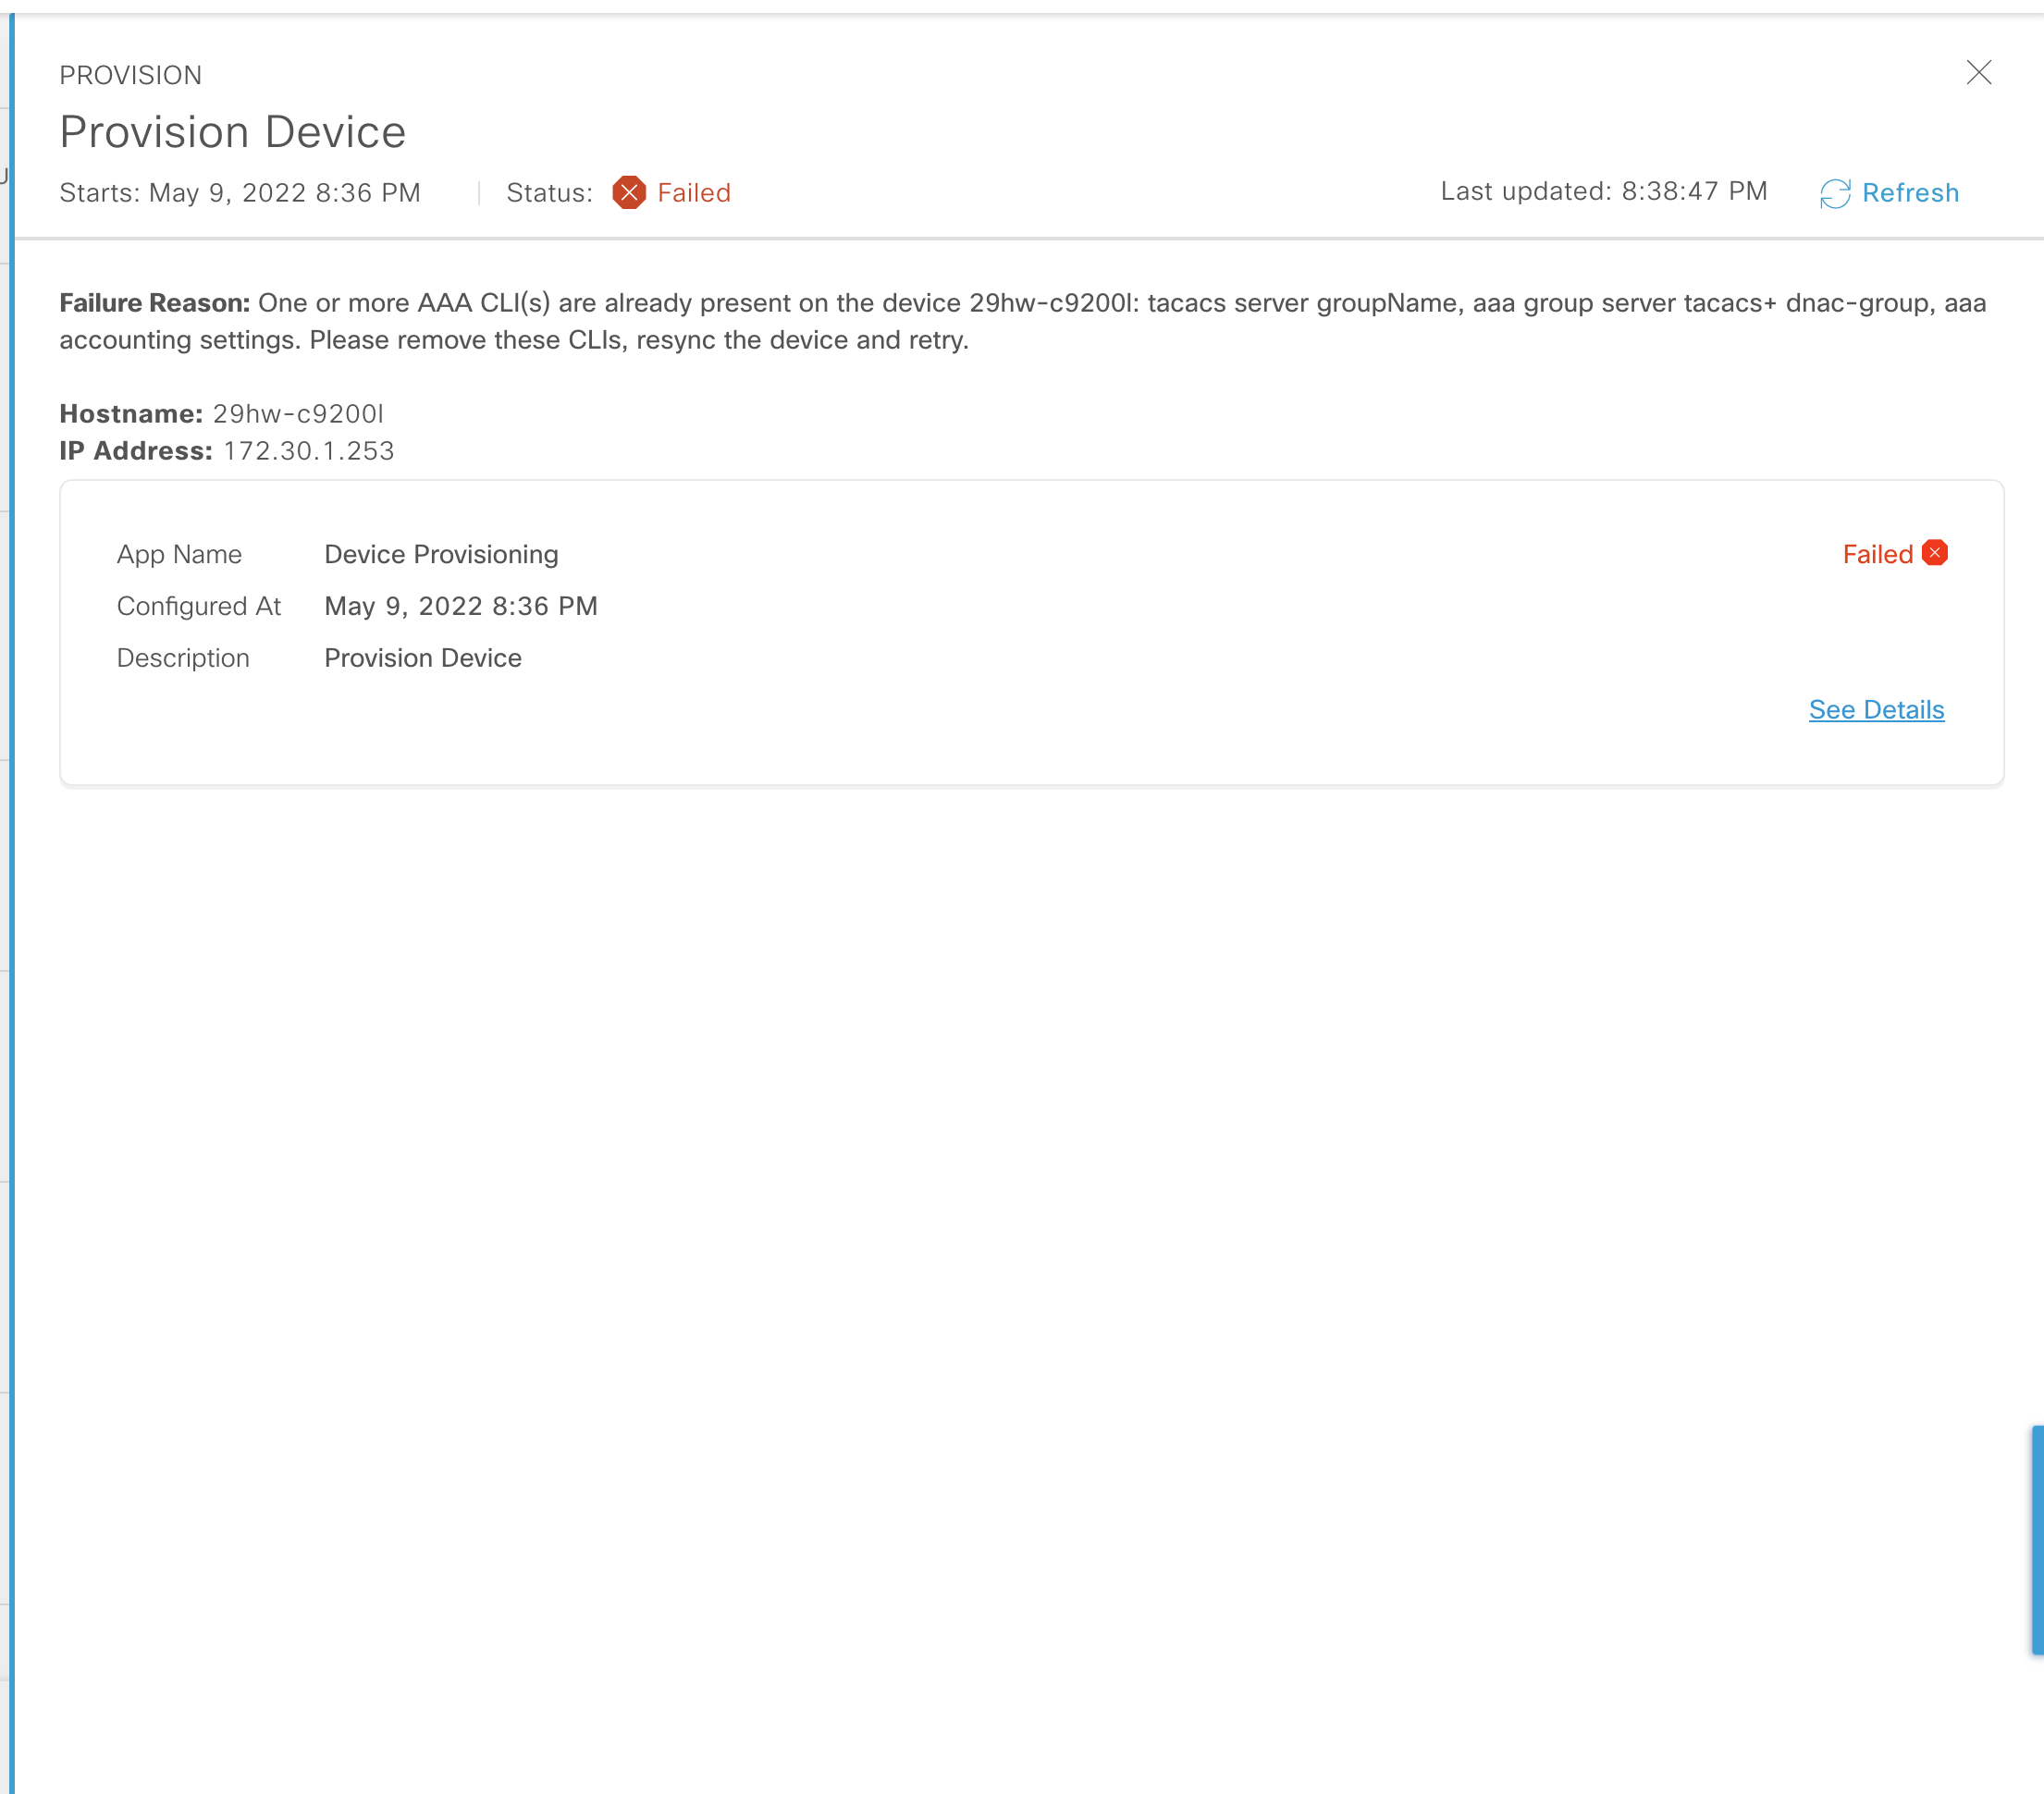
NOTE: if the device had a AAA configuration and Cisco DNA Center was running 2.2.3.x, and above, the device would have failed provisioning.
Enable Application Telemetry
After provisioning the device, Enabling Application Telemetry did not yield any configuration differences. So I will update the Telemetry setting and Force the Configuration Push.
Update Telemetry Settings with Force Configuration Push
Let’s see what happens with we Update the Telemetry Settings and Force a Configuration Push.
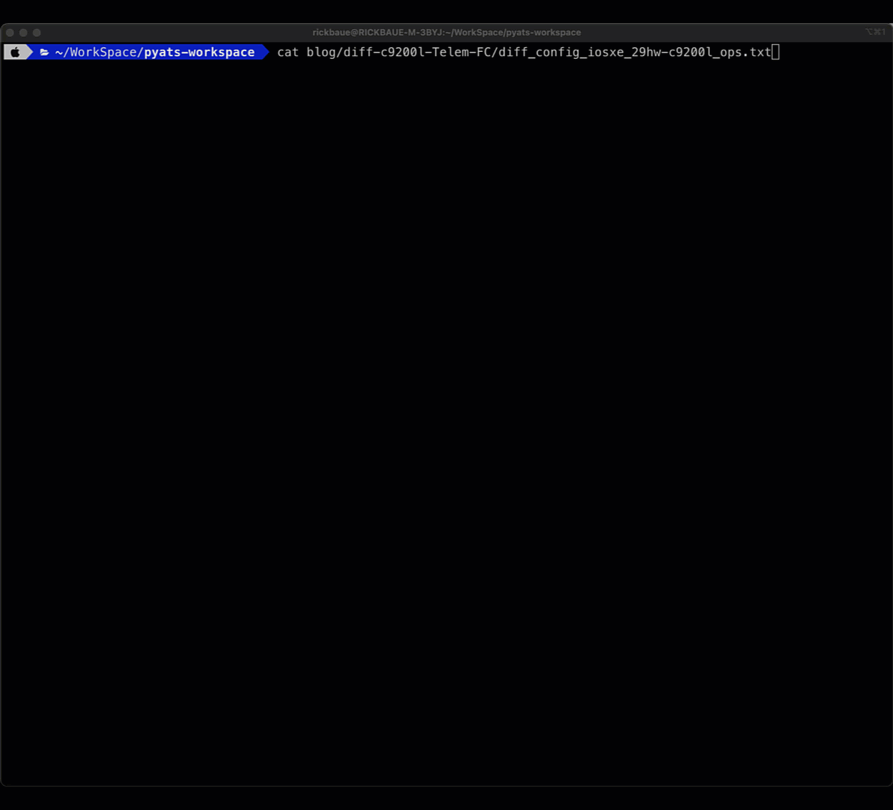
Diff between Provision and Telemetry with a Force Configuration
— blog/c9200l-provision/config_iosxe_29hw-c9200l_ops.txt
+++ blog/c9200l-Telem-FC/config_iosxe_29hw-c9200l_ops.txt
As you can see, Cisco DNA Center added the Netflow configuration to the switch.
Use Cases
Next, I’ll test two use cases showing you what happens when you have a brownfield configuration that conflicts with the settings in the Design Menu. This is not an exhaustive list of use cases, but they cover some common scenarios and will allow you to begin testing in your environment.
Use case #1 – AAA Server Configured in Cisco DNA Center and Brownfield AAA configuration (v2.2.3.5)
In this use case there is a brownfield AAA configuration on the switch and I have configured AAA settings for the site in Cisco DNA Center.
In this case, provisioning will fail due to conflicting configurations. This reiterates what I said in Part 1 “you must keep in mind that the Base Automation and Network Settings are there to automate the configuration in the interest of Cisco DNA Center.”
Use case #2 — Brown Field SNMP RO ACL and VTY ACL configured on the switch – Discovery/Add Device
If an entry for Cisco DNA Center is not present in the ACLs, then discovery or add device will fail. However, if there is an entry for Cisco DNA Center in the ACLs, then the device will be added to the inventory, and the ACL configuration will remain configured on the switch.
Here are the contents from the pyats learn of the base configuration with SNMP and VTY ACLs.

This time I use egrep to search through the Post Provision configuration learned by pyats for ‘line vty’ and ‘snmp-server community’ in conjunction with -A to get 4 lines after the search strings. In the screen capture, you can see that the ACL configuration is still applied to the SNMP community and the vty access-class.

Conclusion
Hopefully, you now have a better understanding of what and when the Base Automations in Cisco DNA Center will make changes to the configuration of your network devices. Don’t just check the box in Cisco DNA Center or any other tool; really know what it does by thoroughly testing!
I want to hear from you. So leave a comment and let me know what you want to hear more about.
Dig in and see what else pyATS is capable of:
pyATS/Gene – Models, Parsers, Triggers, and Verifications.
Genie Models List