
Whether you’re using a large virtual machine or beefy hardware server, running labs with a lot of nodes or labs with resource-hungry nodes in Cisco Modeling Labs (CML) can require a lot of memory/RAM and CPUs. But this can become especially problematic in a multi-user system—until now.
Cisco Modeling Labs offers a new feature called resource limiting, available now in CML 2.5 for Enterprise and Higher Education. Read on to learn more about resource limiting, how to set up resource limits in CML 2.5, and what you need to know as you configure the new feature on your CML server or cluster.
What is resource limiting in CML 2.5?
Resource limiting is one of the new features of the CML 2.5 release. The basic idea here is to limit the resources an individual user or group of users can consume with an administrative policy configured on the CML server or cluster. Since this feature only makes sense within a multi-user system, resource limiting is only available in CML Enterprise and CML for Higher Education. Obviously, there is no reason to have a single user restrict themselves.
Resources on a CML deployment, defined
Prior to the introduction of resource limiting, a user could grab all resources on a CML deployment. And, as a result, other users were unable to launch their labs and nodes.
For context, resources in a CML deployment refer to:
- Memory
- CPU cores
- Node licenses
- External connectors
The first three elements of this list are indeed resources with limited availability. The external connectors, however, can be restricted from a policy point of view. Even though external connectors are almost free in terms of memory and CPU cost, it can make sense to restrict their usage for different users/groups.
How to configure CML resource limits
By default, no resource limits are present. An administrator can put resource limits in place by creating resource pools, which then are assigned to a user or group of users.
Create and assign resource pools
You can manage resource pools by navigating to Tools → System Administration → Resource Pools.
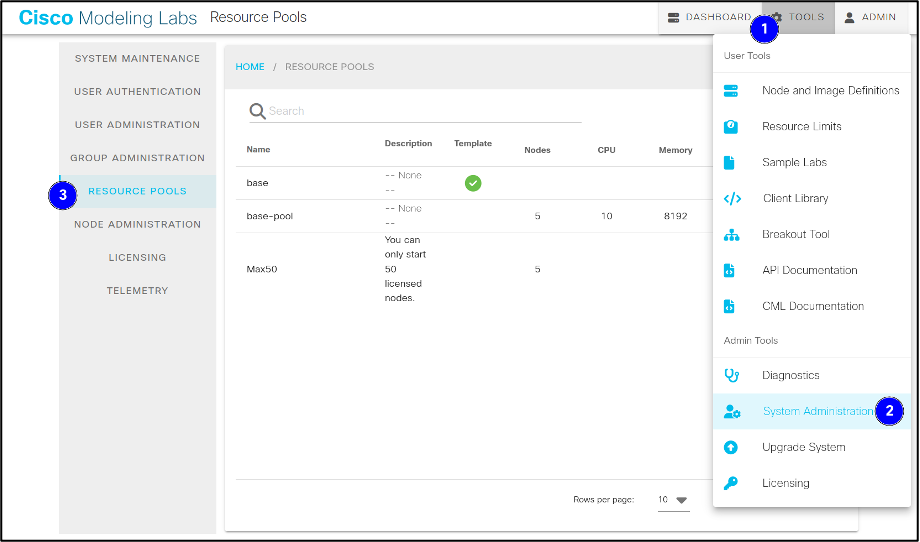
From there, you can create and assign pools. The system differentiates between a template and an actual pool, which is always based on a template and has a user or multiple users connected to it.
When assigning a template to a group of users, all users of this group will be in one of these two categories:
- They’ll be assigned an individual pool cloned from the chosen template.
- They’ll share the same pool cloned from the chosen template.
The shared pool switch controls this assignment, as the following screenshot shows:
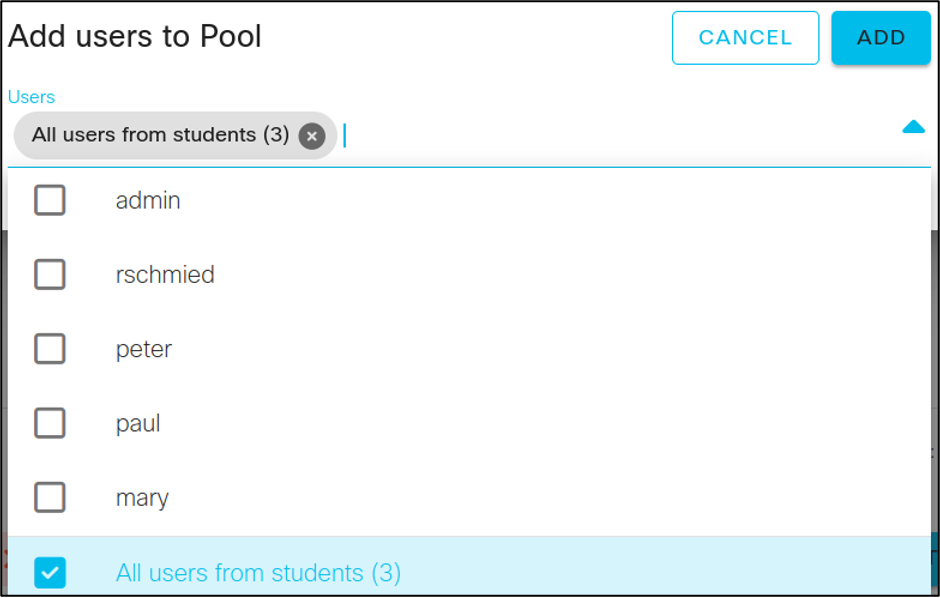
When adding CML users to the resource pool (via the Next step button in the Add workflow), the administrator can choose which users (or groups of users) are assigned to the pool, as shown in the following screenshot:
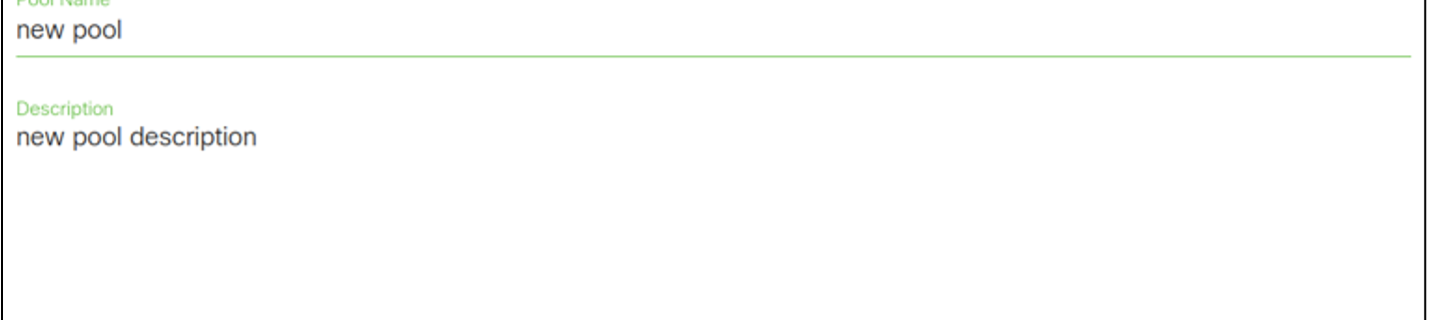
Create and define your template(s)
Resource pools are always based on a template. This also means that, at the very minimum, you must configure one underlying template (a base template) first. Templates allow us to automatically associate a new resource pool with a new user, whether they are manually created by an administrator or when they are created based on a new lightweight directory access protocol (LDAP) user login.
Templates also allow you to quickly change a setting for all the pools inherited from a template. In addition, you can override values for individual pools. That is, the values in the individual pool take precedence over the values defined in the individual pool’s template.
When a pool has multiple users assigned, then all users share the resources configured in this pool.
Watch Cisco Modeling Labs Training Videos
Available on the Cisco Learning Network. Learn more
Limit access to external connectors
External connectors provide outside connectivity. In shared environments with additional network interface cards (NICs), which connect to different outside networks, you might want to control which user or group has access to which outside networks. You can also achieve this by leveraging resource limiting.
A resource pool can define which external network configuration is allowed or denied. As shown in the following screen shot, the administrator can give users of this resource pool one of two options:
- They can use no external connector at all (see: Block all).
- They can decide which specific external connector configuration to use by selecting the appropriate one
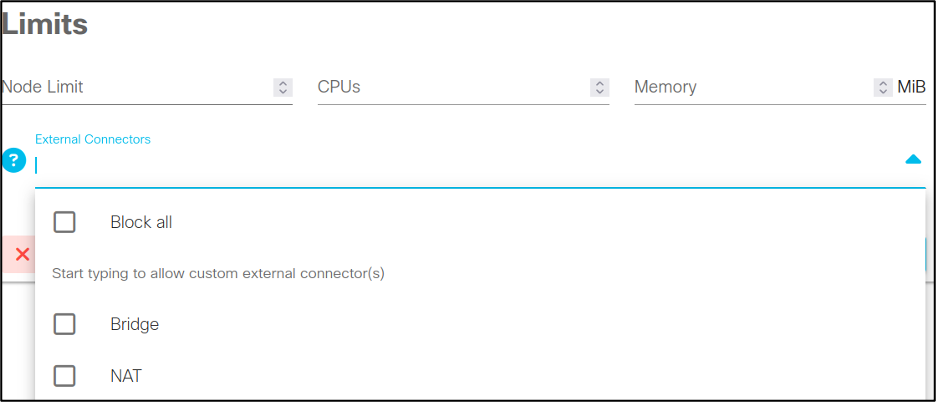
In the absence of a specific external connector limit, users with this policy can select all existing external connectors.
How to check resource usage
The administrator, as well as individual users, can check the resource limit status. For administrators, the overall system state is shown. (For example, all existing resource pools, including their current usage.) The resource limit use is available via the Tools → Resource limits menu entry, as the following graphic shows:
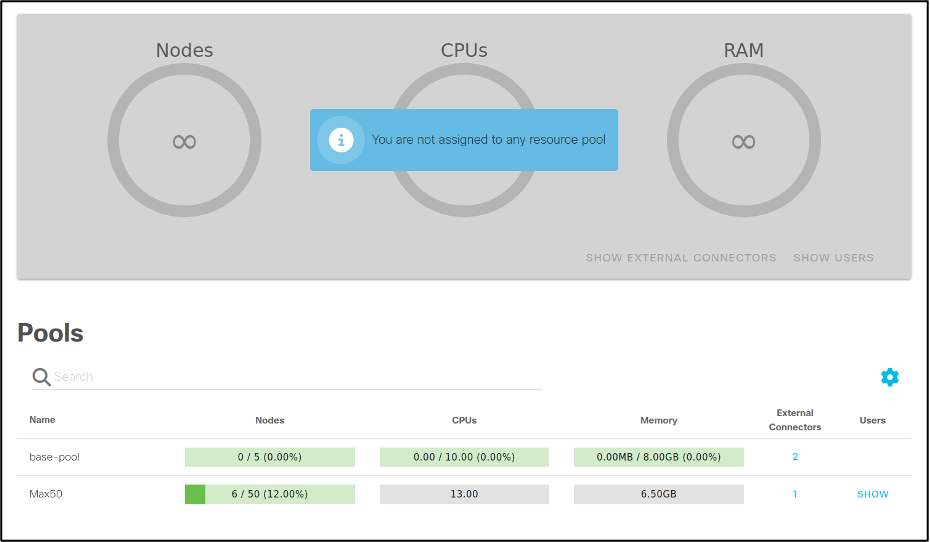
Here, the administrator sees that there are two pools and that node licenses are in use in the pool named Max50. In addition, the CPU and Memory usage of that pool also appears. However, since the usage is not limited, the bar appears in gray. The external connector and user column show the external connectors the pool is using and the users assigned to the pool, respectively.
As for the users, their view appears in the following graphic (also via Tools → Resource limits):
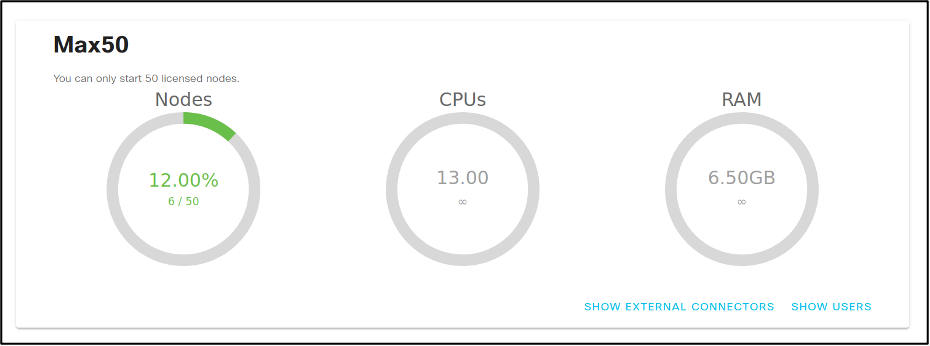
Node licenses are limited, 6 out of 50 or 12% are in use, and 13 CPU cores and 6.5GB of memory are in use. Both CPUs and RAM are not limited, indicated by the infinity symbol in the gauge.
NOTE: Resource limiting does not check for over-subscription. In other words: If the CML system has, for example, 32 CPUs, and the administrator puts a 64 CPU limit into a pool, then the system would not prevent this. It is up to the administrator to put reasonable limits in place!
Consequently, if no limit is put in place, resources are obviously not infinite.
Highlights and benefits of CML 2.5 resource limits
The new resource limiting feature of Cisco Modeling Labs 2.5 provides a granular way to ensure fair consumption of resources on a shared system. In addition, it allows better policy control and is also a useful way to quickly determine resource usage by users or groups of users via the Resource Limits status page.
I hope you found this overview on resource limiting useful. What do you think of this new feature update? Please share your thoughts with me in the comments. Thanks for reading!
Read next: Get started with Terraform and learn how to control virtual network infrastructure with Cisco Modeling Labs. Read now.
Join the Cisco Learning Network today for free.
Follow Cisco Learning & Certifications
Twitter | Facebook | LinkedIn | Instagram
Use #CiscoCert to join the conversation.


Hello,Is it possible to deploy modeling labs using Cisco cloud and access it through the web page or there is only option to download labs to server device and offer it as a platform through the local area network only?
Thank you in advance
The current deployment model is local / “on-prem”. There’s currently no immediate plans from the Cisco Modeling Labs engineering team to offer a “CML service” (SaaS). Going forward, we want to provide options to run it on cloud service providers, following the PaaS model. However, you as a user would need to provision and run it in the cloud.