
Out-Of-Office Automatic Reply
What a great feature, right? A short out-of-office email that goes out automatically to anyone who sends you a message while you are away for a period of time. It notifies the sender that you are away and may not respond until you return.
Your out-of-office message usually provides important information such as:
- Return date
- Backups person who is filling in for you
- Emergency Contact
Email & WebEx IM (Instant Messaging)
I’m sure that you are getting many emails every day. However, I’ve noticed that I’m getting more and more Webex messages as well!
To handle the large volume of emails, especially when I’m away, I created a very efficient set of outlook folders and rules – Both work perfectly! However, Webex IM doesn’t support that (for now).
So… I thought to myself… (challenge #1)
- It would be nice if WebEx could send an auto out-of-office reply with my backup person’s contact.
- Most folks will not send repeated messages on the same subject when they know I’m away.
- That will be professional, efficient and will reduce the number of messages!
And then I thought… (challenge #2)
- Let’s make it even more interesting!
- Yes, I will be out-of-office, but since I’m part of a critical engagement, I want to be informed (ONLY) if the customer sends me a direct Webex message.
- But I know myself, if I will open the Webex client, I will be tempted to read other messages…
- It would be great to auto-forward ONLY the customer Webex message as a text message (i.e., SMS). That way, I wouldn’t need to open the WebEx client!
You are probably thinking, “Yossi, Webex DOES show your status as out of office! You know, this cool airplane icon? ✈️” You are right. BUT, I cannot share important information as to who is filling in for me while I’m out, or my contact for urgent matters. Also, Webex IM is my (and many others) preferred communication method, so I would expect to have the same out-of-office future/support.
So… Let’s have a fun challenge! Let’s design and build something cool! A new Webex IM feature – Automatic out-of-office reply!
The Objectives
I want the new Webex feature to:
- Send an auto-notification when I’m out of the office.
- Send the notification ONLY to individual chats and not group chats.
- Send only one notification (and not every time the same person sends a message).
- [stretch-goal.1] Support message markdown format and attachments.
- [stretch-goal.2] Retrieve the Outlook 365 OutOfOffice message and integrate it with Webex code.
- Forward Webex messages from a specific person (i.e., the customer) to my mobile phone using Twilio integration.
The Design
The script logic is as follows:
Check my Webex status every X seconds/minute leveraging Webex “List People” API call. After some thinking, I decided NOT to implement this step as a more proper/scalable way is to set up a webhook and subscribe for notification. However, I could not find such a Webex webhook yet… ? (What is a Webex Webhook?)- Configure pyngrok to introspect HTTP traffic running over port 5000 (What’s ngrok? What’s pyngrok?).
- Configure Webex webhook to send notifications to ngrok URL when:
- It receives a new chat message.
- The message is from a direct room ONLY (i.e., from 1:1 sessions and not from n:1 sessions).
- Once a new message is received, record the sender name
- If the sender name doesn’t exist in the log file – Send an out-of-office message.
- If the sender name does exist in the log file – Do not send an out-of-office message.
- Add support for “persona response”.
- Integrate with Twilio to send a text message.
… and the plot thickens
Seems simple right? But what about the Webex API tokens limitation? For the script to work, we need a token to:
- Create a webhook
- Send a message
The challenge is that we cannot use the following:
- Webex Bot token to create a webhook as the webhook will be associated with messages sent to the Bot and not to me.
- Personal access token to send messages as it’s limited to 12 hours.
- Guest user token cannot access the “status” data as it isn’t part of the organization.
What can we do… Let’s think… ?
Option #1
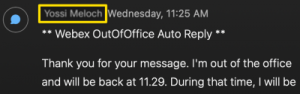 For a demo/PoC purpose, use the personal access token. Using that token, we can create the webhook and messages. However, it is limited to 12 hours.x
PROS: Simple to use (one token is needed).
CONS: The token is limited to 12 hours.
The Out-Of-Office message will look like this —>
Option #2
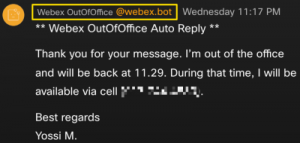 Combining a personal access token to create the webhook and Webex Bot token to send the messages (WebEx Bot is part of the organization with a permanent token).
PROS: Simple to use (two tokens are needed, Bot token is permanent).
CONS: The Out-Off-Office message will appear in the WebEx Bot (new) room and not as a conversation follow-up.
Option #3
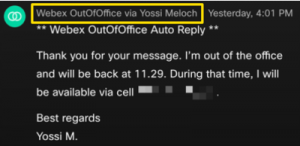 Combining a personal access token to create the webhook and Webex Integration token. This token is valid for 14 days, and the refresh token is valid for 90 days.
PROS: The recommended way for a Webex integration project.
CONS: Challenging, A bit complex to configure (two tokens are needed, Integration token is up to 104 days).
My Recommendation
Practice the three options above ?
- [Walk] Start with option #1 and get familiar with Webex personal access token and python code.
- [Run] Continue with option #2 and learn about Webex Bot token.
- [Fly] Complete the practice by implementing a Webex Integration token and an OAuth grant environment using a web browser.
The python code of the three options is very similar. The only difference is the Webex tokens usage and some pre-conf needed for options #2 (How to configure Webex Bot?), and #3 (How to configure Webex Integration?).
Let’s review the code ??
Step #1 – Import the required python modules.
- The Twilio python library can be downloaded from “twilio.com/docs/libraries/python”.
from pyngrok import conf, ngrok
from twilio.rest import Client
from threading import Thread
import requests
import base64
import time
import json
import sys
import re
import os
Step #2 – Set up the required tokens, log files, and stderr env.
- I decided to suppress the Ngrok “502 Bad Gateway” error messages (which are expected, as ngrok is not configured to point to an actual listening application).
- Create a log file to record the message sender name.
- Define the required Webex and Twilio tokens (Note lines 10 and 11. These are required if using the Bot or Integration tokens).
# Suppress error messages sys.stderr = open(os.devnull, "w") # Create log file log_file = open("/tmp/webexOOO.log", "w") log_file.close() # Authorization token(s) webex_personal_token = "xxx1" # For option #1, #2 and #3 # webex_bot_token = "xxx2" # For option #1 and #2 # webex_integration_token = "xxx3" # For option #1 and #3 twilio_account_sid = "yyy" twilio_auth_token = "zzz" customer_email = "a@b.c"
Step #3 – A callback function to surface ngrok logs and export them to a log file.
- I decided to suppress the Ngrok “502 Bad Gateway” error messages (which are expected, as ngrok is not configured to point to an actual listening application).
- Create a log file to record the message sender name.
- Define the required Webex and Twilio tokens (Note lines 10 and 11. These are required if using the Bot or Integration tokens).
def log_event_callback(log):
    with open('/tmp/logFile.log', 'a') as f:
        print(log, file=f)
conf.get_default().log_event_callback = log_event_callback
Step #4 – A function to:
- Using Webex API GET call, retrieve the customer’s latest message.
- Integrate with Twilio for sending text messages.
- Lines #5 and #6 are required if using the Bot or Integration tokens.
- Lines #21 and #22 configure the Twilio (sending) phone number and the destination phone number.
- Line #24 is a Webex image file (to be sent with the text message).
def func0(): url = "https://webexapis.com/v1/messages/direct?personEmail=" + customer-email headers = { 'Authorization': 'Bearer ' + webex_personal_token, # For option #1, #2 and #3 # 'Authorization': 'Bearer ' + webex_bot_token, # For option #2 # 'Authorization': 'Bearer ' + webex_integration token, # For option #3 'Content-Type': 'application/json' } response = requests.request("GET", url, headers=headers) r_json = response.json() message = r_json["items"][1]["html"] TAG_RE = re.compile(r'<[^>]+>') message_parsed = TAG_RE.sub('', message) # Twilio Integration client = Client(twilio_account_sid, twilio_auth_token) message = client.api.account.messages.create( to="+1xxxxxxxxx", from_="+1yyyyyyyyy", body=message_parsed, media_url=['https://images.contentstack.io/v3/assets/bltd14fd2a03236233f/bltab28bd9a758b3f81/60d617644763af56bad5a0d5/download'])
Step #5 – A function to:
- Create Ngrok tunnel on port 5000.
- Get Ngrok (HTTPS) tunnel information (i.e., the tunnel URL).
- Create Webex webhook.
- Lines #13 to #17 describe the Webex webhook configuration.
- “resource”: “messages” -> Capture ONLY Webex messages.
- “event”: “created” -> When a new event (i.e. message) is created.
- “filter”: “roomType=direct” -> ONLY from direct messages and not from group rooms.
- “targetUrl”: tunnel_IP -> Ngrok tunnel URL.
- “name”: “Webex OOO” -> Wehbook name
- Line #20 – To create the webhook, we can use ONLY the webex_personal_token (and not the Bot or Integration tokens).
def func1(): print("\n| --> Create ngrok tunnel") ngrok.connect(5000, bind_tls=True) tunnels = ngrok.get_tunnels() tunnel_IP = re.findall(r'\"(.+?)\"', str(tunnels))[0] # Create webex webhook print("| --> Create webex webhook") url = "https://webexapis.com/v1/webhooks" payload = json.dumps({ "resource": "messages", "event": "created", "filter": "roomType=direct", "targetUrl": tunnel_IP, "name": "Webex OOO" }) headers = { 'Authorization': 'Bearer ' + webex_personal_token, 'Content-Type': 'application/json' } response = requests.request("POST", url, headers=headers, data=payload) r_json = response.json() print("| --> Listening...")
Step #6 – A function to:
- Tail the log file and check if a new “localhost:5000” entry was added.
- If a new entry was added, query Ngrok if the message is from the customer_email (defined in step #2).
- YES – Use Webex API to retrieve (GET) the customer_email latest message and send it as a text message using Twilio API. Then continue.
- NO – Check if the sender’s email address is already stored in the log file.
- YES – Do nothing.
- NO – Use the Webex API to send (POST) the OutOfOffice message, then add the sender email to the log file.
- Line #22 contain a regex to find (any) email address. You may change the regex to only search for your organization emails (e.g., r’\w*@cisco.com\w*’ will find ONLY x@cisco.com emails).
- Lines #43 and #44 are required if using the Bot or Integration tokens.
def func2(): while True: time.sleep(5) # Check webhook for new messages with open("/tmp/logFile.log", "r+") as file: result = (list(file)[-1]) if "localhost:5000" in result: file.truncate(0) file.write(str('rolloverLine')) url = "http://localhost:4040/api/requests/http?limit=1" response = requests.request("GET", url) r_json = response.json() for i in range(0, len(r_json['requests'])): encrypted_response = r_json["requests"][i]["request"]["raw"] base64_bytes = encrypted_response.encode("ascii") sample_string_bytes = base64.b64decode(base64_bytes) sample_string = sample_string_bytes.decode("ascii") match = re.findall(r'\b[A-Za-z0-9._%+-]+@[A-Za-z0-9.-]+\.[A-Z|a-z]{2,}\b', sample_string) if str(match).strip("[']") == customer_email: func0() elif str(match).strip("[']") in open('/tmp/webexOOO.log').read(): continue else: log_file = open("/tmp/webexOOO.log", "a") log_file.write(str(match).strip("[']")+ "\n") log_file.close() with open("/tmp/webexOOO.log") as f: personEmail = f.readlines()[-1] url = "https://webexapis.com/v1/messages" payload = json.dumps({ "toPersonEmail": "" + str(personEmail) + "", "markdown": "** Webex OutOfOffice Auto Reply **\n\nThank you for your message. I’m out of the office and will be back at (Date of Return). During this period, I will have limited access to Webex chat.\n\nFor project X, please contact (Contacts Name) at (Contacts Email Address).\nFor project Y, please contact (Contacts Name) at (Contacts Email Address).\n\nIf you need immediate assistance, please contact me on my cell phone at (cell phone number).\n\nBest regards\nYossi M." }) headers = { 'Authorization': 'Bearer ' + webex_personal_token, # For option #1, #2 and #3 # 'Authorization': 'Bearer ' + webex_bot_token, # For option #2 # 'Authorization': 'Bearer ' + webex_integration token, # For option #3 'Content-Type': 'application/json' } response = requests.request("POST", url, headers=headers, data=payload) else: pass if __name__ == '__main__': Thread(target = func1).start() Thread(target = func2).start()
The Demo (2:42 Minutes) ?
BTW…
- [stretch-goal.1] Support message markdown format and attachments – Webex “Create a Messages” API call supports markdown ?.
- [stretch-goal.2] Retrieve the Outlook 365 OutOfOffice message and integrate it with Webex code – That can be done leveraging the “automaticRepliesSetting” call of Microsoft Graph (Office 365 API).
- Yes, there are other ways to write the Python code (w/o using the log files). However, my goal was to create a simple and more understandable code.
- Yes, additional features such as a script scheduler, and a friendly UI can be added.
- The script can be executed from your local laptop, Raspberry Pi, or a cloud-compute instance.
Additional Resources
- Webex Webhook:
- Webex Integration (using OAuth):
- Understanding the OAuth Flow of a Webex Integration
- Webex-Teams-Flask-oAuth
- Webex-teams-auth-sample
- Have a question? Leave me a comment on this blog (I automated the generation of both Access and Refresh tokens).
- Learn more about how you can develop rich integrations and powerful automation with Webex cloud-collaboration platform APIs and SDKs.
- Learn more about Webex Meetings API Options for Developers
Final Thoughts
- The power of automation, innovation, and integration – Cool, right! ?
- Think of that… using similar integrations, you can:
- Integrate with ServiceNow, PagerDuty, etc., and automatically open a service request based on keywords directly from Webex chat!
- Create personalized responses when you are away/out-of-office.
- What is your challenge? Can you leverage automation/different technologies/programming languages to mitigate it?
- Want to learn more about APIs, automation, and Integration? Python programming? Check the AIDE User Guide or get in touch with the Cross-Domain TAB team.
We’d love to hear what you think. Ask a question or leave a comment below.
And stay connected with Cisco DevNet on social!
LinkedIn | Twitter @CiscoDevNet | Facebook | Developer Video Channel


