
In part 1 of this blog series we covered advanced concepts including if statements, regexp and bound variables. This post takes bound variables one step further and provides some more sophisticated examples linking them into loops.
Bound Variables – advanced
The last blog showed how data about a device (device Product Id) could be accessed from within a template. Another common use case is to pass in information about interfaces on the device to the template. This is achieved through a bound variable. In this case there will be a list of interfaces, each with attributes. The template below expects a list of interfaces ${interfaces}. The foreach statement will look at each one and assign it to the variable $interface.
The if statement looks for interfaces with an attribute called “interfaceType” and “mediaType”. Essentially looking for copper interfaces on the switch. In the simple example, the template just updates the description to include the interfaceType and mediaType. It could easily be changed to add any configuration to the interface.
#foreach ($interface in ${interfaces})
#if ($interface.interfaceType == "Physical"  &&
    $interface.mediaType == "10/100/1000BaseTX")

interface $interface.portName
description $interface.interfaceType $interface.mediaType
#end
#end
To define the binding, click on the variable definition icon in the template (as in the earlier blog). Again, it is bind to source. The source is “inventory” and this time the entity is “interface”. No attributes are selected, which means all of them are provided to the template.
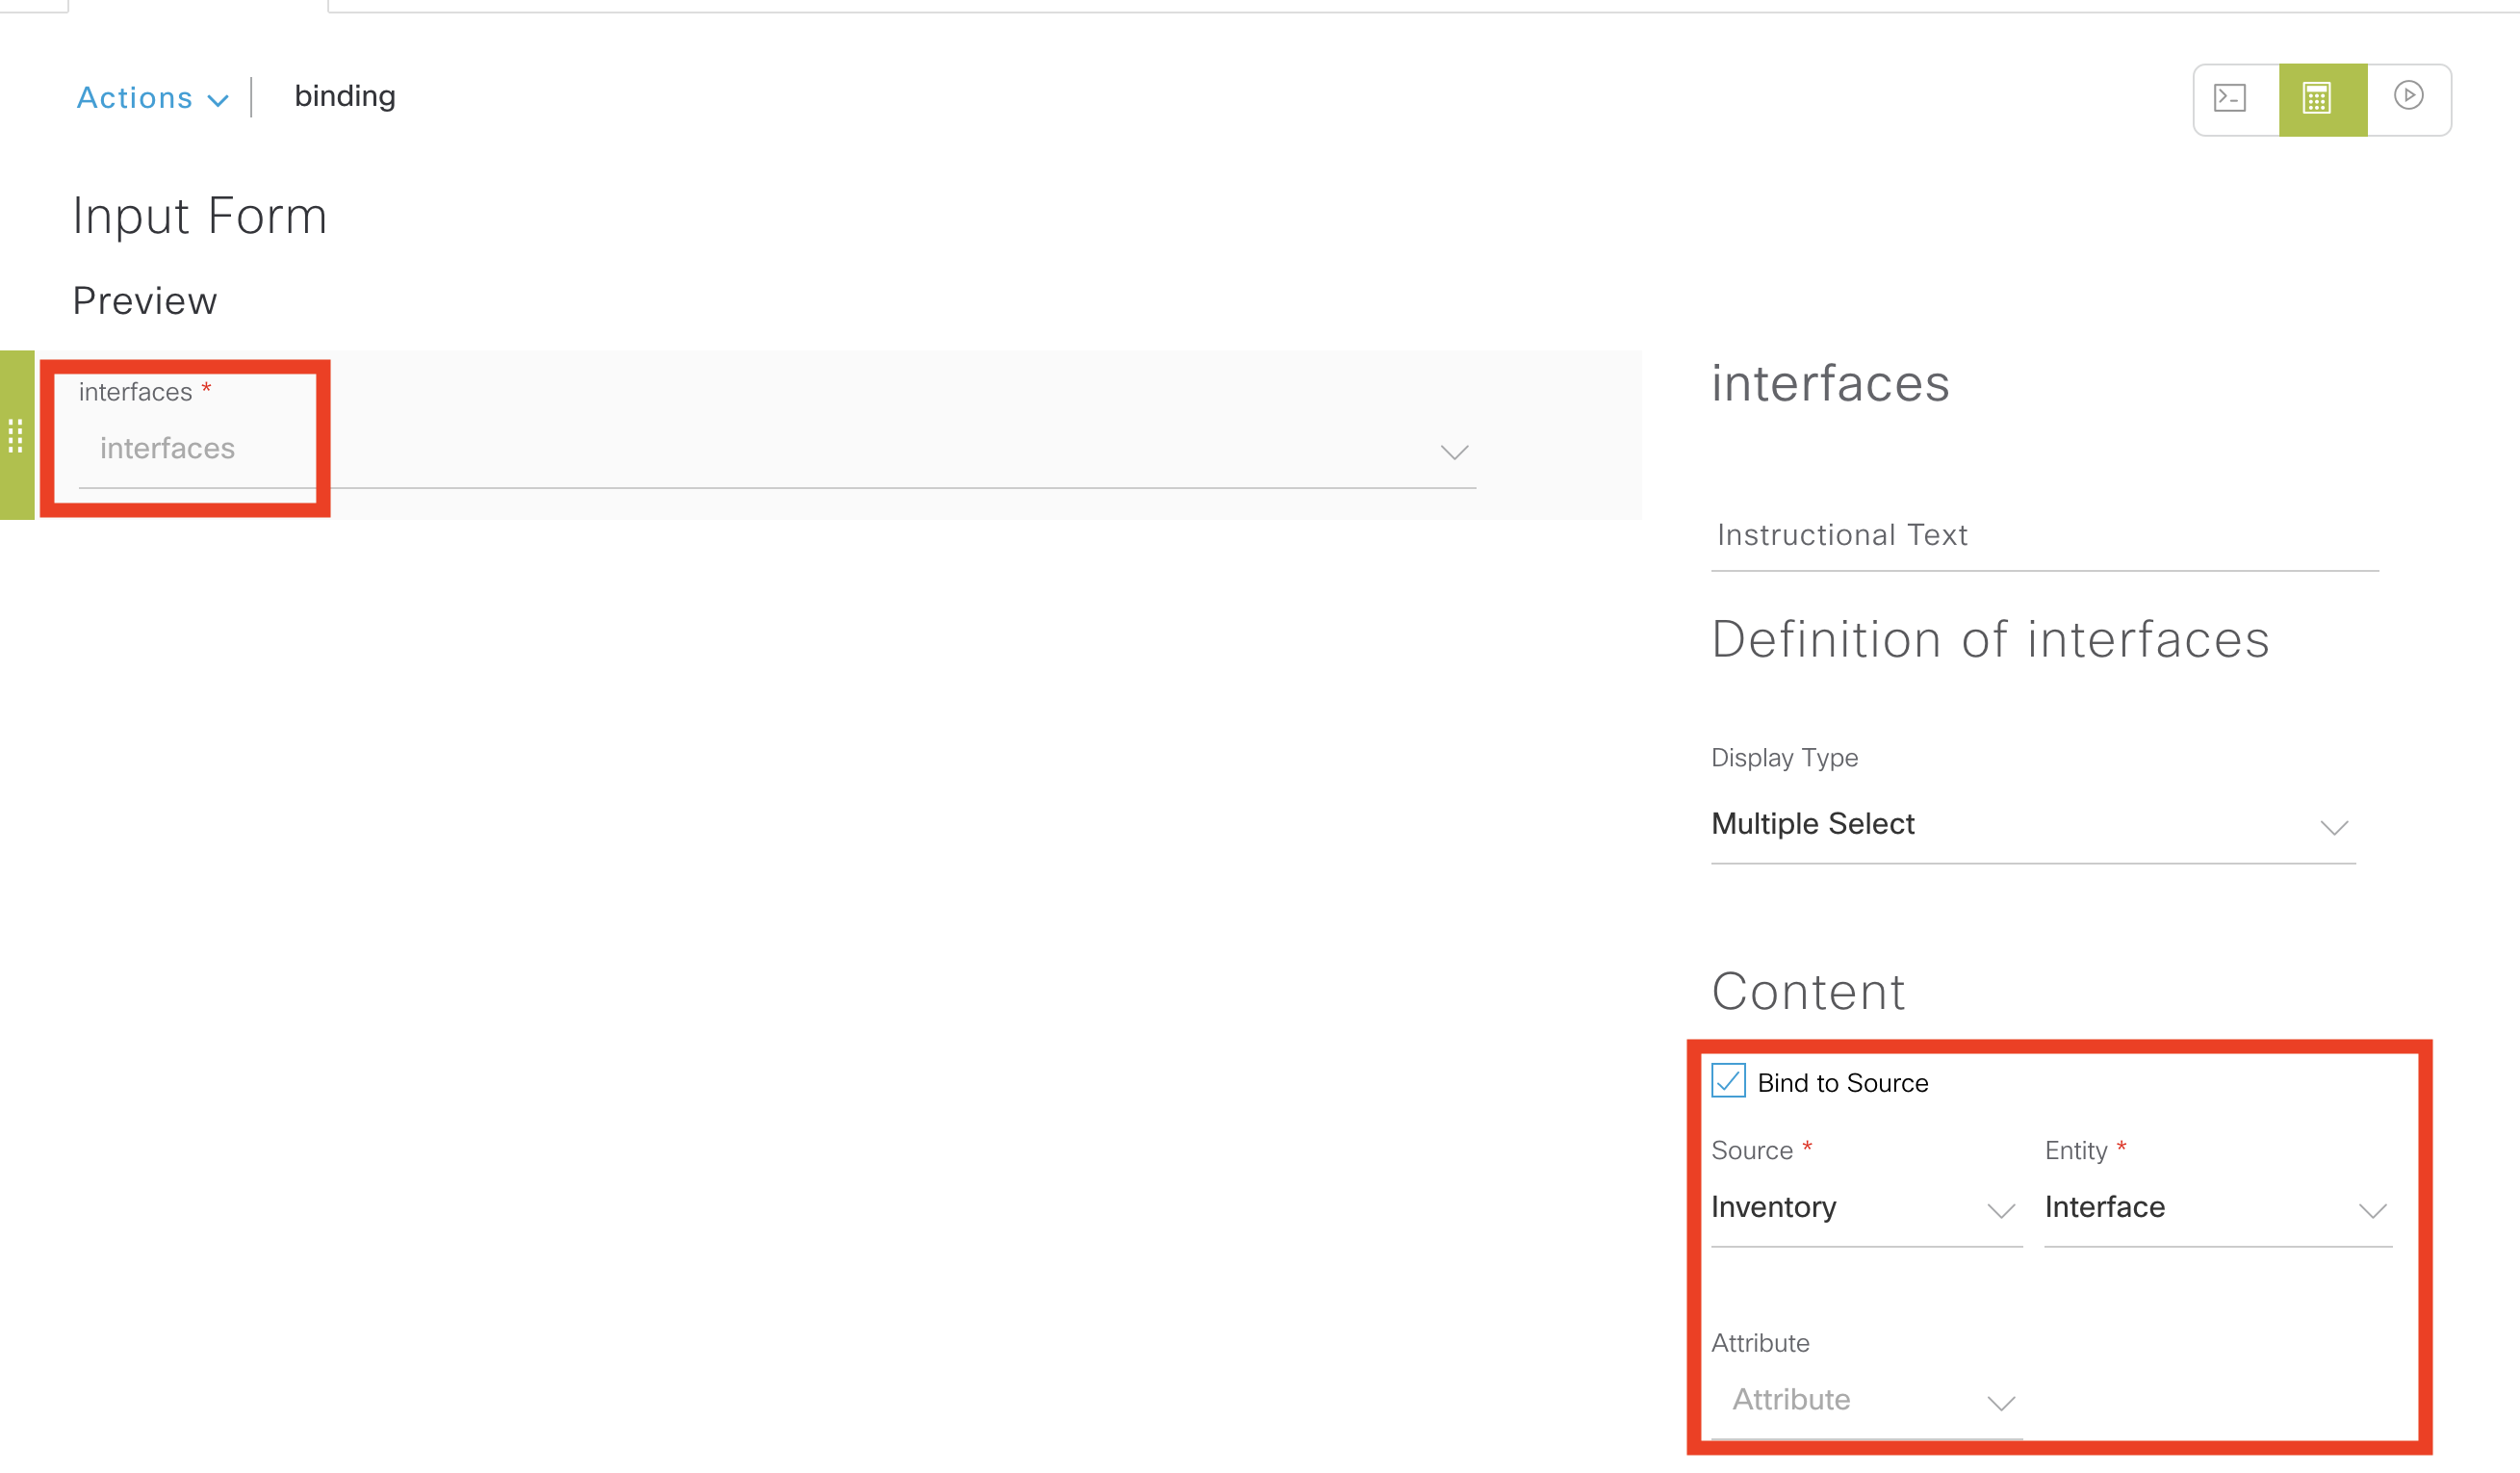
How do you know what attributes are available? Click in the attribute section and it will provide a dropdown. Alternatively, a REST API call for /dna/intent/api/v1/interface, below is an example.
{
      "adminStatus": "UP",
      "className": "SwitchPort",
      "description": "",
      "deviceId": "a9265e64-4384-4498-9037-64033fba31c1",
      "duplex": "AutoNegotiate",
      "id": "3faf73ef-bdc3-4d5c-bb9e-d6219d9b9f65",
      "ifIndex": "18",
      "instanceTenantId": "5d817bf369136f00c74cb23b",
      "instanceUuid": "3faf73ef-bdc3-4d5c-bb9e-d6219d9b9f65",
      "interfaceType": "Physical",
      "ipv4Address": null,
      "ipv4Mask": null,
      "isisSupport": "false",
      "lastUpdated": "2020-04-21 07:48:55.517",
      "macAddress": "6c:41:6a:0d:e7:8b",
      "mappedPhysicalInterfaceId": null,
      "mappedPhysicalInterfaceName": null,
      "mediaType": "10/100/1000BaseTX",
      "nativeVlanId": "1",
      "ospfSupport": "false",
      "pid": "WS-C3650-48PQ-E",
      "portMode": "access",
      "portName": "GigabitEthernet2/0/11",
      "portType": "Ethernet Port",
      "serialNo": "FDO17020000",
      "series": "Cisco Catalyst 3650 Series Switches",
      "speed": "1000000",
      "status": "down",
      "vlanId": "1",
      "voiceVlan": null
    }
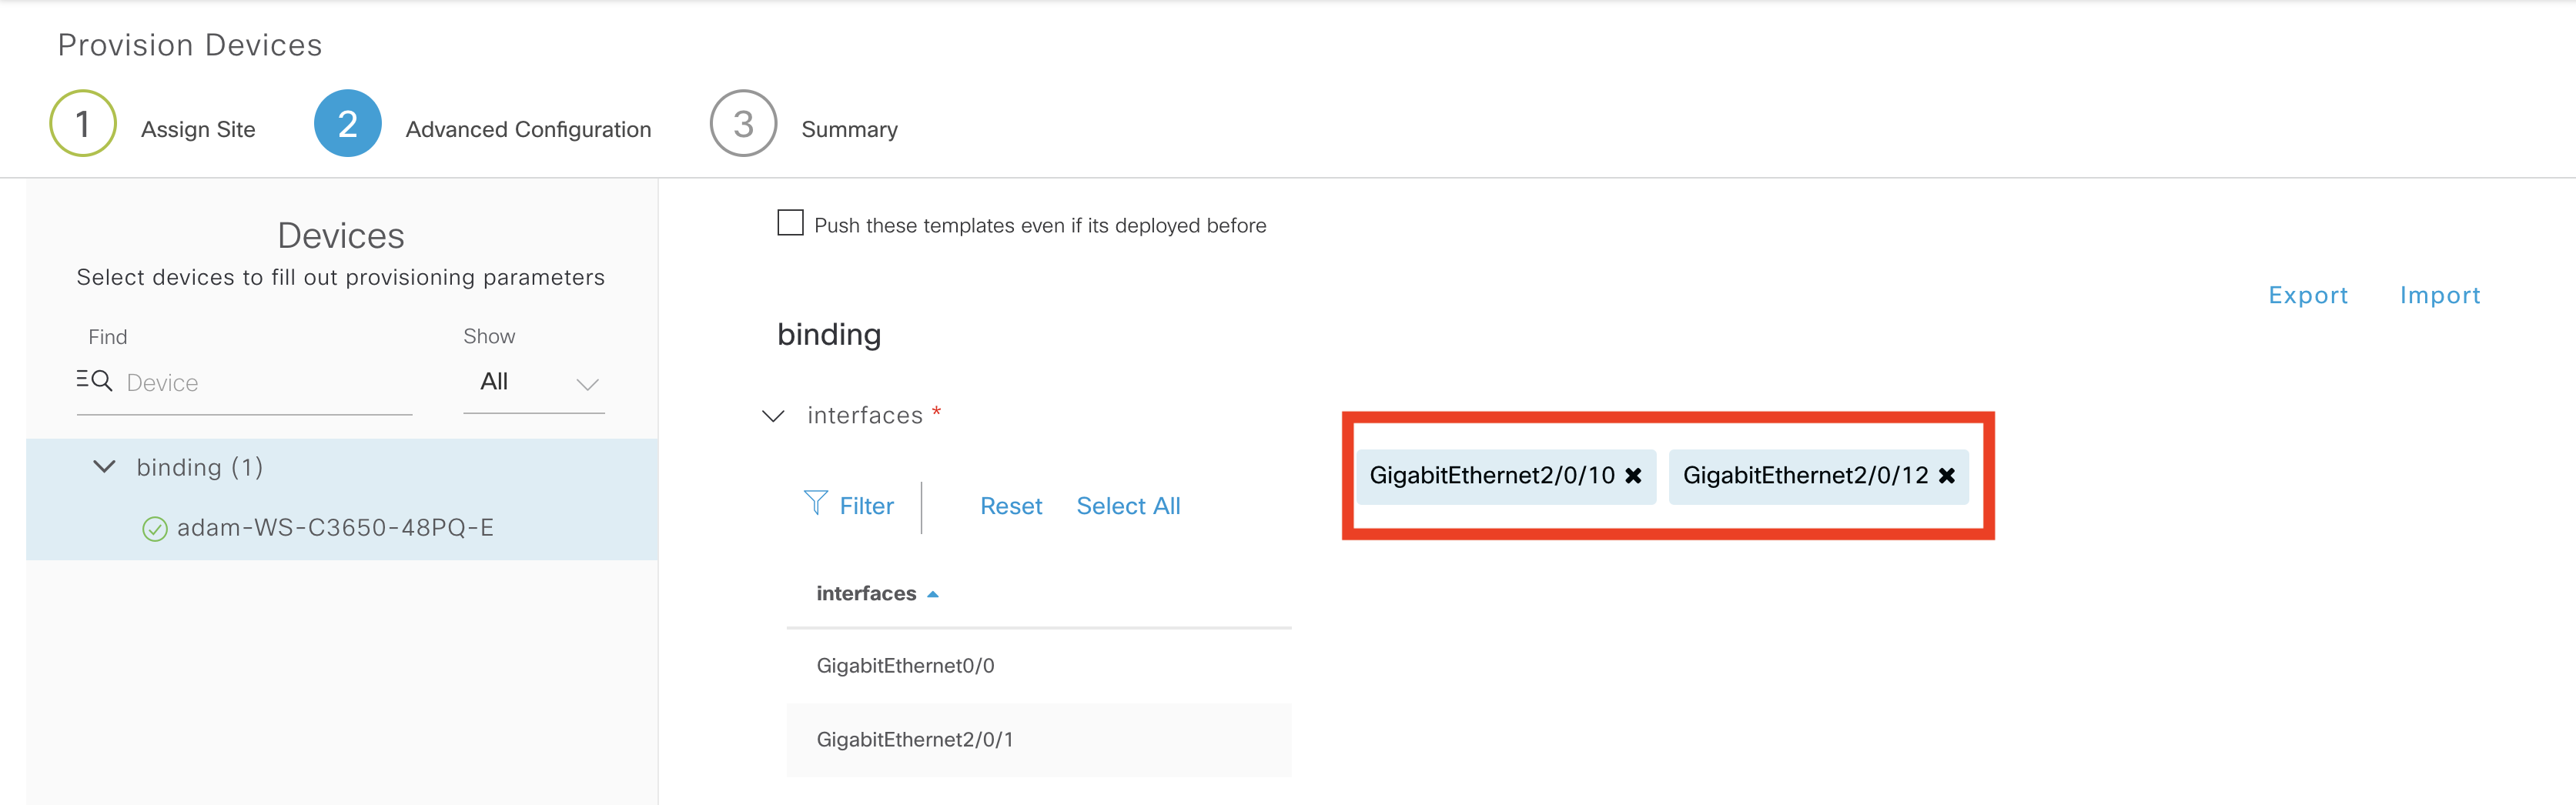
To deploy this template, goto inventory, select a device then choose provision. It is assumed the site profile has been created and the template added to the profile. When you see “Advanced Config” select your device (in this case adam-WS-C3650-48PQ-E).
Then click on interfaces (underneath binding). A list of interfaces for the device will appear and you can select one or more. The red box shows two were selected.
After provisioning the interface will have the following description. Obviously not a real example, but an educational one.
show run int g2/0/10
Building configuration...

Current configuration : 122 bytes
!
interface GigabitEthernet2/0/10
 description Physical 10/100/1000BaseTX
Appending a Description
A more realistic situation is appending the “lan” keyword to the description of an interface. This is presently required for Application Visibility in Cisco DNA Center.
The template loops through all interfaces. If the interface is physical and and access port, look to see if the lan field is already configured via the regular expression (“.* lan”) . Append “lan” to the description if it is not present.
#foreach ($interface in ${interfaces})

#if ($interface.interfaceType == "Physical" && $interface.portMode == "access")

#if  ($interface.description.matches(".* lan"))
int $interface.portName
desc $interface.description
#else
int $interface.portName
desc $interface.description lan
#end
#end
#end
This will change the configuration of g2/0/11 as follows:
show run int g2/0/11
Building configuration...

Current configuration : 150 bytes
!
interface GigabitEthernet2/0/11
 description Physical 10/100/1000BaseTX lan
 switchport
For Software defined Access (SDA), this template can be made more explicit. The vlan of an access port is between 1000 and 2000. vlan needs to be converted to an integer so mathematical operators can be used, as <> do not apply to strings.
#set($Integer = 0)
#foreach ($interface in ${interfaces})

## convert vlan to integer
#if ($interface.vlanId)
#set ($vlan = $Integer.parseInt($interface.vlanId))
#end

#if ($interface.interfaceType == "Physical" &&
 $vlan < 2000 && $vlan > 1000)

#if  ($interface.description.matches(".* lan))
int $interface.portName
desc $interface.description
#else
int $interface.portName
desc $interface.description lan
#end
#end
#end
Some Tips
When using bound variables, remember this is the DNAC view of the device. If you have made some recent change to the configuration, make sure you resync the device (and that has completed) before applying the template. By default, resync occurs every 6 hours, or within 10mins of a configuration change.
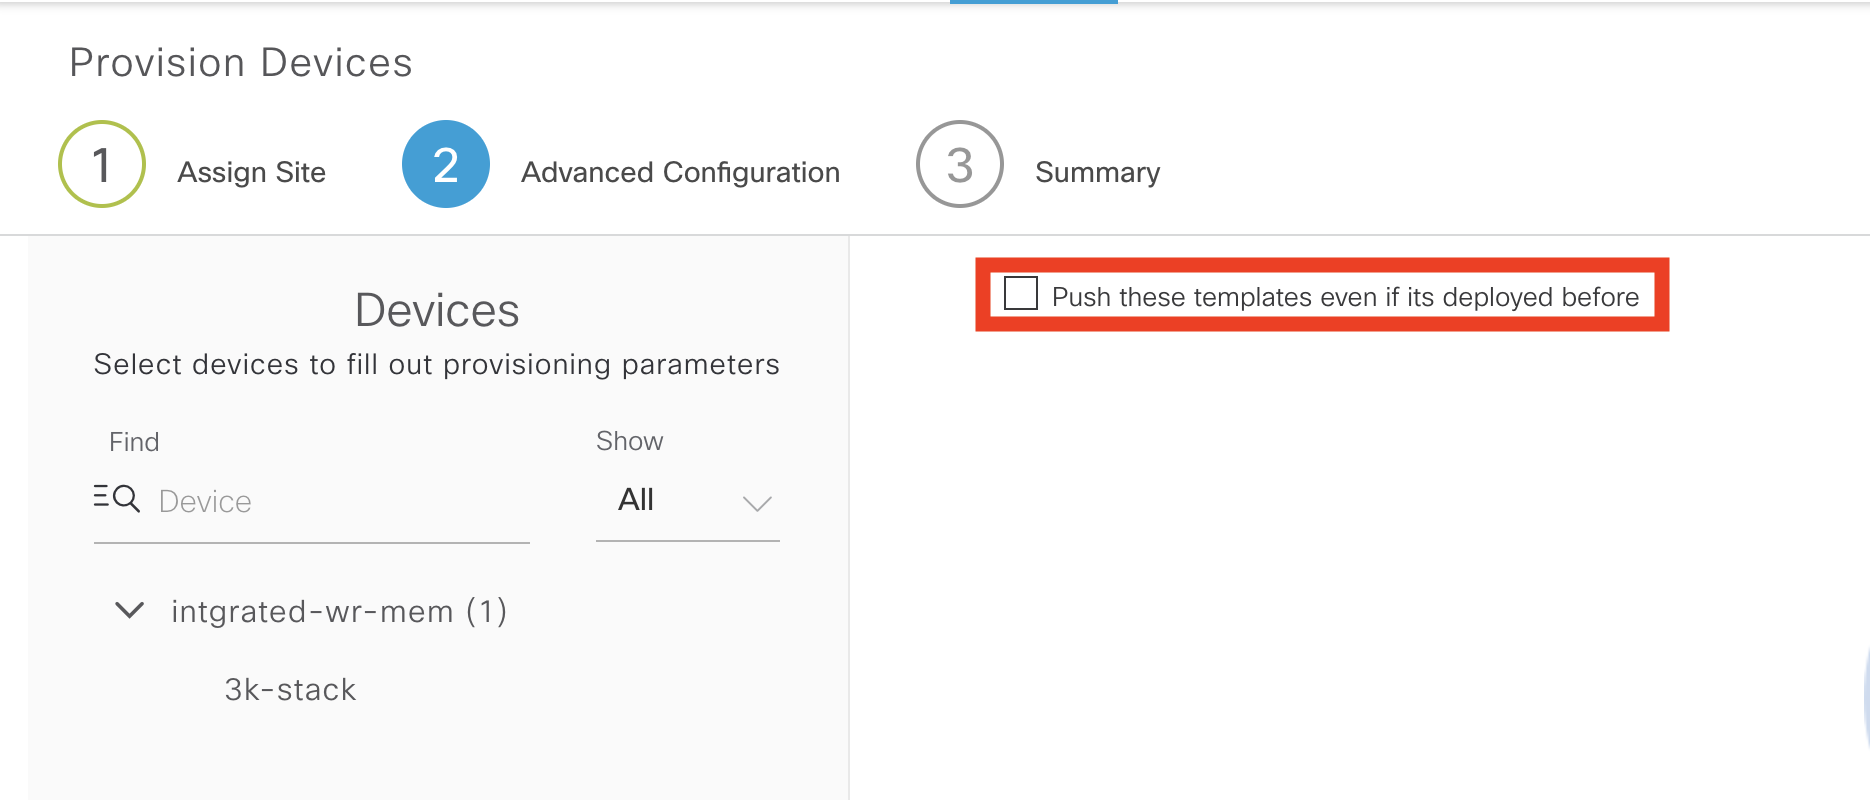
When you apply the same template, with the same values to a device, DNAC will not push it again. To force a template to be pushed again use the “Push these templates even if its deployed before” option.
What Next?
This blog shows advanced topics for velocity templates. The next blog in the series will look at interactive and exec commands embedded in templates.
In the meantime, if you would like to learn more about Cisco DNA Center you could visit Cisco Devnet.
Thanks for reading
Related resources:
- Cisco DNA Center
- DevNet Networking Dev Center
- DevNet Network Automation Exchange
- Cisco DevNet Certifications
We’d love to hear what you think. Ask a question or leave a comment below.
And stay connected with Cisco DevNet on social!
Twitter @CiscoDevNet | Facebook | LinkedIn
Visit the new Developer Video Channel


Hi Adam,
I’ve tried to make a similar setup using the dnac programmer python scripts. This works fine for basic setup but it doesn’t work with a foreach loop.
#if($platform.matches(“C9300-48UXM.*”))
#end
#set ($stack_member_count = $stack_count)
#foreach($switch in [1..${stack_member_count}])
interface range TwoGigabitEthernet${switch}/0/1 – 12
description DATA LAN
switchport mode access
switchport access vlan ${datavlan}
logging event link-status
no snmp trap link-status
storm-control broadcast level 75.00 50.00
storm-control multicast level 75.00 50.00
storm-control action shutdown
spanning-tree portfast
spanning-tree guard root
interface range TwoGigabitEthernet${switch}/0/13 – 24
description DATA LAN
switchport mode access
switchport access vlan ${apvlan}
logging event link-status
no snmp trap link-status
storm-control broadcast level 75.00 50.00
storm-control multicast level 75.00 50.00
storm-control action shutdown
spanning-tree portfast
spanning-tree guard root
#end
When I apply the template I’m running into the problem that he doesn’t know the switch variable , and nothing gets applied to the switch
I have the impression that the API call has a problem with the foreach loop
https://X.X.X.X:443/dna/intent/api/v1/template-programmer/template/0f5fbe57-b7ef-46a1-8d4b-618f87ea0fac
Showing Template Body:
#if($platform.matches(“C9300-48UXM.*”))
#end
#set ($stack_member_count = $stack_count)
#foreach($switch in [1..${stack_member_count}])
interface range TwoGigabitEthernet${switch}/0/1 – 12
description DATA LAN
switchport mode access
switchport access vlan ${datavlan}
logging event link-status
no snmp trap link-status
storm-control broadcast level 75.00 50.00
storm-control multicast level 75.00 50.00
storm-control action shutdown
spanning-tree portfast
spanning-tree guard root
Did you see this problem before ?
two things:
1) The if statement does not do anything? Is that your intention?
2) Did you make the type of the $stack_count variable an integer, and pass it into the template as an integer?
How can we set $stack_count variable from dnac inventory?
you can. Indirectly. I normally look at the serialNu or pid. They will be a comma seperated list. You just count the number entries in the list. 2 switch stack members = 2 x serialNumbers and 2 x PID
This is the code you need. bind variable $serial to inventory-> device -> serialNumber
#set ($stackcount = $serial.split(“,”))
$stackcount.size()
Tried using your example against a few switch types, 3850 and 9300, and it didn’t work. I traced the issue to the fact DNA doesn’t have any MediaType attributes set on the interfaces, all come back as null when using Postman. Is this a possible bug within DNA’s inventory process or do some switches not provide this? Currently on the latest DNA 1.3.3.5 and switches are running 16.12.3a.
“series”: “Cisco Catalyst 9300 Series Switches”,
“vlanId”: “1”,
“mediaType”: null,
“speed”: “1000000”,
“status”: “up”
yes, it seems like there is an issue with “mediaType” now..
One other little bonus…. If you want to configure pim sparse-mode for SDA, you can use this template with bound variable to configure it
#foreach ($interface in ${interfaces})
#if ($interface.interfaceType == “Virtual”)
#if ($interface.description.matches(“vrf interface to External router”))
int $interface.portName
ip pim sparse-mode
#end
#end
#end
probably need to remove the smart quotes above… ;-(