
Cisco Nexus switches are part of the data center offering from Cisco. They support two modes of operation based on the code that is running on them: ACI mode and standalone mode. In ACI mode, the Nexus switches form a fabric that is being managed by a central controller called APIC. In standalone mode, the Nexus switches function as L2/L3 data center switches and are being managed individually and run Open NX-OS as their operating system.
Over the next month and a half I will be posting a series of blogs that take you on a journey of network programmability and automation with Cisco Open NX-OS. We will cover NX-API CLI, NX-API REST, NX-SDK and we will start with one Cisco Nexus virtual switch and work our way up to large topologies powered by Cisco CML-P.
We will also start from the beginning, without assuming any prior knowledge of advanced computer programming and networking concepts. Basic Python and networking knowledge will be needed. We have a large number of learning labs around getting started with Python and Cisco NX-OS if you feel the concepts discussed in this series of blog posts are too advanced. You can find some great learning labs, sandboxes, and other helpful information on the DevNet Open NX-OS resources page .
If at any point you feel lost, or have questions, ask them in the Comments section at the bottom of this blog. I will be more than happy to address them.
Setting up your development environment
In this first blog, we will setup the development environment. There are several options here. You could use a Cisco Nexus switch in your own lab or you could take advantage of the Cisco DevNet Sandbox that gives you free access to Cisco software and hardware. Or you could deploy a virtual instance of Cisco Open NX-OS on your own PC or laptop. We’ll go with this last option in this blog series.
Personally, I find it much easier to interact with virtual instances of network devices such as routers and switches on my own laptop. You do not need an Internet connection, you can take it with you anywhere you go, and it’s just more convenient all around. A MacBook Pro running macOS Catalina will be used throughout this series to showcase hands-on and practical activities. Microsoft Windows or Linux based PCs and laptops can also be used without any restrictions. All software that is used throughout the blog series is available for most operating system flavors.
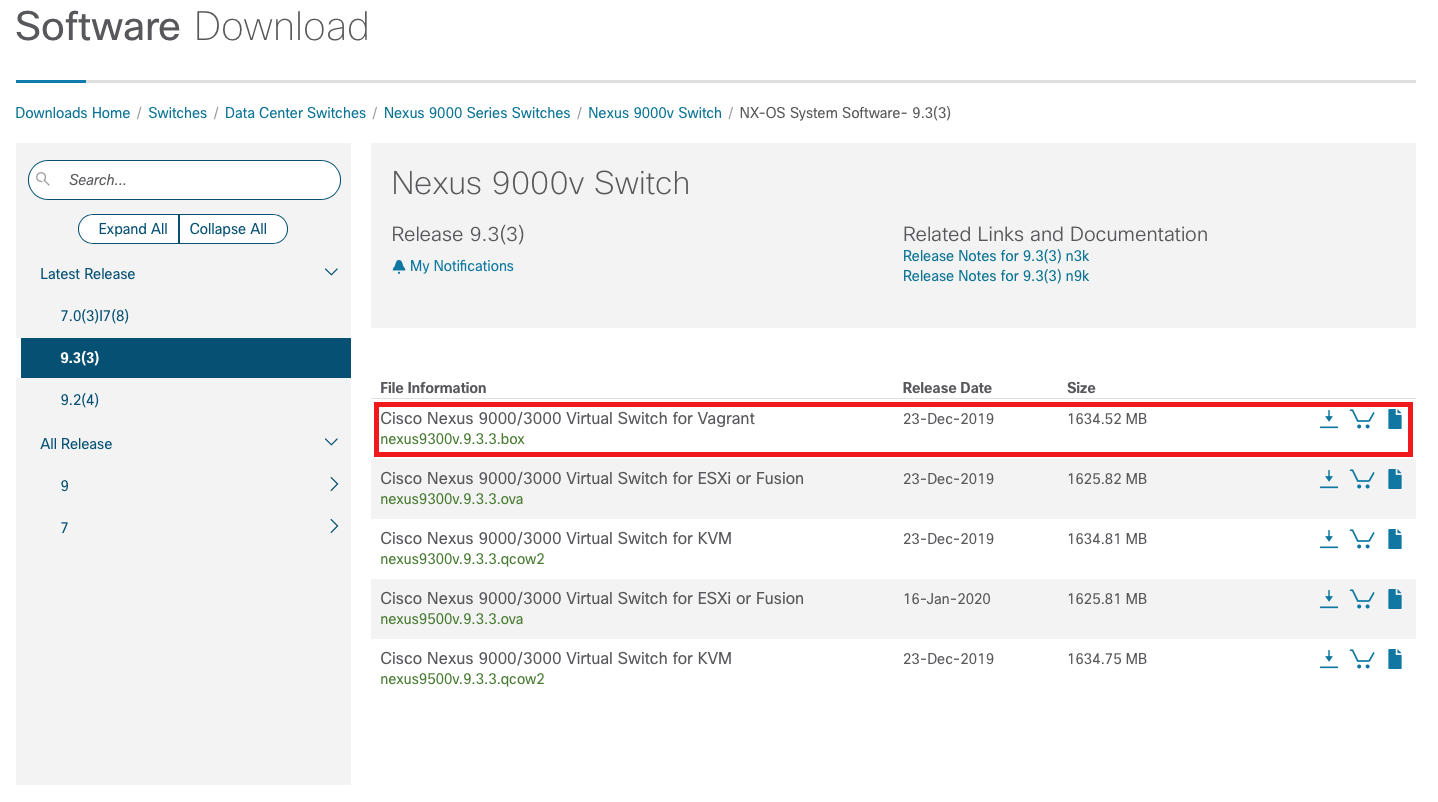
Starting with Cisco NX-OS version 7.0(3)I5(1), Cisco has made available the Nexus 9000v virtual platform. This platform is designed to simulate the control plane of Cisco Nexus switches in a virtual environment. With the latest release, 9.3(3), Cisco Nexus 9000v is available in two options: Nexus 9300v and Nexus 9500v. Cisco Nexus 9300v represents a virtual non-modular switch with one single line card and 64 virtual interfaces. The 9500v version represents a virtual modular switch capable of supporting up to 16 line cards with 400 virtual ports. Software images for both Nexus 9300v and 9500v can be downloaded from https://software.cisco.com.
There are three virtualization technologies supported with release 9.3(3): Vagrant, VMware ESXi/Fusion and KVM/QEMU.
I chose to use Vagrant for this blog because of its simplicity and price (or lack thereof). Vagrant is being actively developed by HashiCorp and can be downloaded for free from https://www.vagrantup.com/downloads.html. I like to think of Vagrant as a CLI for Oracle VirtualBox. It gives you the option to easily manage the lifecycle of virtual machines and automate deployment of virtual environments. Similar to Docker, it is intended to provide a consistent and repeatable virtual environment that can be easily shared, scaled, and modified.
While Docker is used for containers, Vagrant is used for virtual machines. Similar to Docker Hub, there is Vagrant Cloud which is a collection of publicly available box files that you can download and use in your virtual environments. Vagrant Cloud and all the public box files available for download can be found at https://app.vagrantup.com/boxes/search.
Vagrant installation is straightforward and you shouldn’t face any problems. If you are just getting started with Vagrant there’s a good write up on it at https://www.vagrantup.com/intro/getting-started/index.html and there’s also the complete documentation of Vagrant will every single feature explained in great detail at https://www.vagrantup.com/docs/.
Once you have installed Vagrant and downloaded the box file nexus9300v.9.3.3.box from https://software.cisco.com, you are ready to import the Cisco Nexus 9300v virtual switch into your Vagrant environment. But first, make sure you installed Vagrant correctly. In a terminal window issue the following command:
vagrant version
which should return the version of Vagrant installed on your machine:
Installed Version: 2.2.7
Latest Version: 2.2.7
You’re running an up-to-date version of Vagrant!
Once you verify that Vagrant was correctly installed, you can import the Cisco Nexus virtual switch into your Vagrant environment. This is done as below:
vagrant box add nxos/9.3.3 /path/to/box/file/nexus9300v.9.3.3.box
And the output should look similar to the following:
==> box: Box file was not detected as metadata. Adding it directly...
==> box: Adding box 'nxos/9.3.3' (v0) for provider:
box: Unpacking necessary files from: file:///path/to/box/file/nexus9300v.9.3.3.box
==> box: Successfully added box 'nxos/9.3.3' (v0) for 'virtualbox'!
Verify that the box file has been successfully added to VirtualBox by issuing the following command in the terminal window:
vagrant box list
which should return the following information:
nxos/9.3.3 (virtualbox, 0)
Now that the box file has been successfully imported in the Vagrant environment, you can create, start, stop, and destroy Cisco Nexus 9300v virtual instances. Vagrant uses Vagrantfiles to describe the virtual environment that you want to create. Vagrantfiles are written in Ruby. But do not worry if you do not know Ruby, since Vagrant provides a command that automatically generates the Vagrantfile for you.
I suggest you create a new working folder and issue the `vagrant init` command in it. `vagrant init` will create a default Vagrantfile that is very well documented and explains in excruciating detail most of the options that are available with Vagrant. The only change needed to this file at this point, is to configure the correct box image to be used in the virtual environment. Look for config.vm.box = “base” and replace base with nxos/9.3.3.
You could also create a new Vagrantfile from scratch without using `vagrant init`. This file should contain the following information:
# -*- mode: ruby -*-
# vi: set ft=ruby :

Vagrant.configure("2") do |config|

config.vm.box = "nxos/9.3.3"

end
The value “2” in Vagrant.configure represents the configuration version and since we are running Vagrant version 2.2.7 this is equal to 2. config.vm.box specifies the virtual machine box file that will be used in the virtual environment described by this Vagrantfile and in this case it is the nxos/9.3.3 Cisco Nexus 9300v virtual switch.
Virtual environment components in place
All the components needed to start the virtual environment should be in place now — vagrant installed, box file imported, Vagrantfile created (either with vagrant init or from scratch). All that’s left to do now is to startup the virtual environment defined within the Vagrantfile. In the same folder where you created the Vagrantfile, issue the `vagrant up` command in the terminal window. Give it a couple of minutes to power on the virtual switch and bring online all the components. Messages similar to the following ones should be displayed in your terminal window:
Bringing machine 'default' up with 'virtualbox' provider...
==> default: Importing base box 'nxos/9.3.3'...
==> default: Matching MAC address for NAT networking...
==> default: Setting the name of the VM: nxos933_default_1587073300910_31501
==> default: Clearing any previously set network interfaces...
==> default: Preparing network interfaces based on configuration...
default: Adapter 1: nat
==> default: Forwarding ports...
default: 22 (guest) => 2222 (host) (adapter 1)
==> default: Booting VM...
==> default: Waiting for machine to boot. This may take a few minutes...
default: SSH address: 127.0.0.1:2222
default: SSH username: vagrant
default: SSH auth method: private key
The configured shell (config.ssh.shell) is invalid and unable
to properly execute commands. The most common cause for this is
using a shell that is unavailable on the system. Please verify
you're using the full path to the shell and that the shell is
executable by the SSH user.
Ignore the last message for now and issue the `vagrant ssh` command to get access to the management interface on the virtual switch. You should now be connected to the switch and see the virtual switch prompt similar to the following:
Cisco NX-OS Software
Copyright (c) 2002-2019, Cisco Systems, Inc. All rights reserved.
Nexus 9000v software ("Nexus 9000v Software") and related documentation,
files or other reference materials ("Documentation") are
the proprietary property and confidential information of Cisco
Systems, Inc. ("Cisco") and are protected, without limitation,
pursuant to United States and International copyright and trademark
laws in the applicable jurisdiction which provide civil and criminal
penalties for copying or distribution without Cisco's authorization.

Any use or disclosure, in whole or in part, of the Nexus 9000v Software
or Documentation to any third party for any purposes is expressly
prohibited except as otherwise authorized by Cisco in writing.
The copyrights to certain works contained herein are owned by other
third parties and are used and distributed under license. Some parts
of this software may be covered under the GNU Public License or the
GNU Lesser General Public License. A copy of each such license is
available at
http://www.gnu.org/licenses/gpl.html and
http://www.gnu.org/licenses/lgpl.html
***************************************************************************
* Nexus 9000v is strictly limited to use for evaluation, demonstration *
* and NX-OS education. Any use or disclosure, in whole or in part of *
* the Nexus 9000v Software or Documentation to any third party for any *
* purposes is expressly prohibited except as otherwise authorized by *
* Cisco in writing. *
***************************************************************************
Nexus9000v#
Congratulations!
At this point you should have a working Cisco Nexus 9300v virtual switch environment on your own laptop or PC. If you ran into any issues with setting up your environment, please let me know in the comments below.
In the next blog post we will start exploring the network programmability and automation features that are available with Cisco Open NX-OS starting with NX-API CLI. See you in a couple weeks.
Related resources:
- DevNet Open NX-OS resources
- DevNet Networking Dev Center
- DevNet Network Automation Exchange
- Cisco DevNet Certifications
We’d love to hear what you think. Ask a question or leave a comment below.
And stay connected with Cisco DevNet on social!
Twitter @CiscoDevNet | Facebook | LinkedIn
Visit the new Developer Video Channel


Hello Adrian,
Upon launching the “vagrant up” command I get the following:
———–
Bringing machine ‘default’ up with ‘hyperv’ provider…
==> default: Verifying Hyper-V is enabled…
==> default: Verifying Hyper-V is accessible…
==> default: Box ‘nxos/9.3.3’ could not be found. Attempting to find and install…
default: Box Provider: hyperv
default: Box Version: >= 0
The box ‘nxos/9.3.3’ could not be found or
could not be accessed in the remote catalog. If this is a private
box on HashiCorp’s Vagrant Cloud, please verify you’re logged in via
`vagrant login`. Also, please double-check the name. The expanded
URL and error message are shown below:
URL: [“https://vagrantcloud.com/nxos/9.3.3”]
Error: The requested URL returned error: 404 Not Found
————
I created a Vagrant u/p and logged in via the cmd prompt, but no changes to the error. Obviously I’m running on Windows, not Mac.
Any suggestions?
Also, just to confirm, running “vagrant box list” does show the following:
nxos/9.3.3 (virtualbox, 0)
As a work-around I also installed virtualbox 6.1 and used the “vagrant up –provider virtualbox” command to prevent it from trying to use Hyper-V. I was then able to vagrant ssh successfully.
I’m looking forward to the rest of this series!
Anonymous, what Nic said. Make sure you also have VirtualBox installed and if needed specify it when issuing the vagrant up command as suggested by Nic.
Just wanted to highlight that there is a specific learning lab on DevNet that covers what’s outlined in this blog specifically that I didn’t see linked to:
https://developer.cisco.com/learning/modules/vagrant_up
Also, if you don’t have access to download the images as outlined given your specific relationship with Cisco, you can use the DevBox Sandbox on Cisco DevNet and it has the boxes preinstalled.
Andre, thanks for pointing out additional DevNet resources for this blog series!
superbly written Blog Adrian. Look forward to the rest of your blog series
Thanks for the comment Ravi! More NX-OS content to come in the next months 🙂