
Demo overview
If you read my previous blog post your demo environment is now completely set up and includes the following main components:
- 1 central headend router where partner extranet VPN connections from remote devices are terminated
- 4 remote partner routers (partner1, partner2, partner3, partner4) that represent the unmanaged side of extranet/partner VPN connections
You have simulated devices connected to both, the remote partner routers and the headend one, and configured with IP SLA probes to send interesting traffic through the VPNs and keep them active.
Every remote partner router (1 to 4) is completely configured to establish their respective VPNs. Having connectivity for each one of them will depend exclusively on having the proper configuration applied on the headend router side.
On the headend router we have already provided the required configuration to setup VPN connections towards partner1 and partner2 remote devices. The partners directory includes YAML files with all required parameters to configure the headend router and complete the VPN connections just for partner1 and partner2 remote locations (not 3 and 4).
This configuration has been provided using Ansible and associated NSO modules during step 8 of the setup phase. That step is the one that runs an Ansible playbook, described in the site.yaml file. If you go through its content, you will see that first it synchronizes the configuration from NSO to the remote devices for consistency (in case there might have been any changes configured directly on the devices they will be overwritten by this step). Then the playbook will load partner1 and partner2 YAML files into variables and push those to NSO as new headend router configuration to activate those specific VPNs. Finally, the playbook with instruct NSO to sync that new configuration from NSO to the headend router.
However, partner3 and partner4 VPNs are pre-configured only on the partner/remote side and will need you to provide additional configuration on the headend to complete those VPNs setup.
Instead of configuring it manually, or via YAML files and Ansible, for this demo you will be able to define the required configuration in the headend via a GUI management portal. It will allow you to provide the required parameters, and the GUI will translate them into the required information to send towards NSO north-bound APIs.
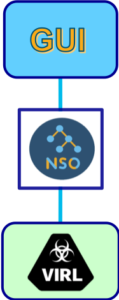
This API-based automation solution will enable you to easily apply or remove the required configuration in the headend router, without having to connect to the device via CLI and type myriads of commands.
At this point you might be wondering why NSO is part of the architecture, or if you could use Ansible to directly configure your network devices. One of the multiple benefits that NSO provides is that, although in this demo we are only using IOS XE devices, it would be easy to support a mixed environment with other types of devices / CLIs (i.e., IOS XR, ASA firewall, and other vendors) without doing any modifications in the management GUI. Please remember the GUI uses NSO north-bound APIs, so it does not depend on the type of underlying infrastructure devices. NSO plays a key role by performing that translation from API requests to the information and format those devices require and support natively.
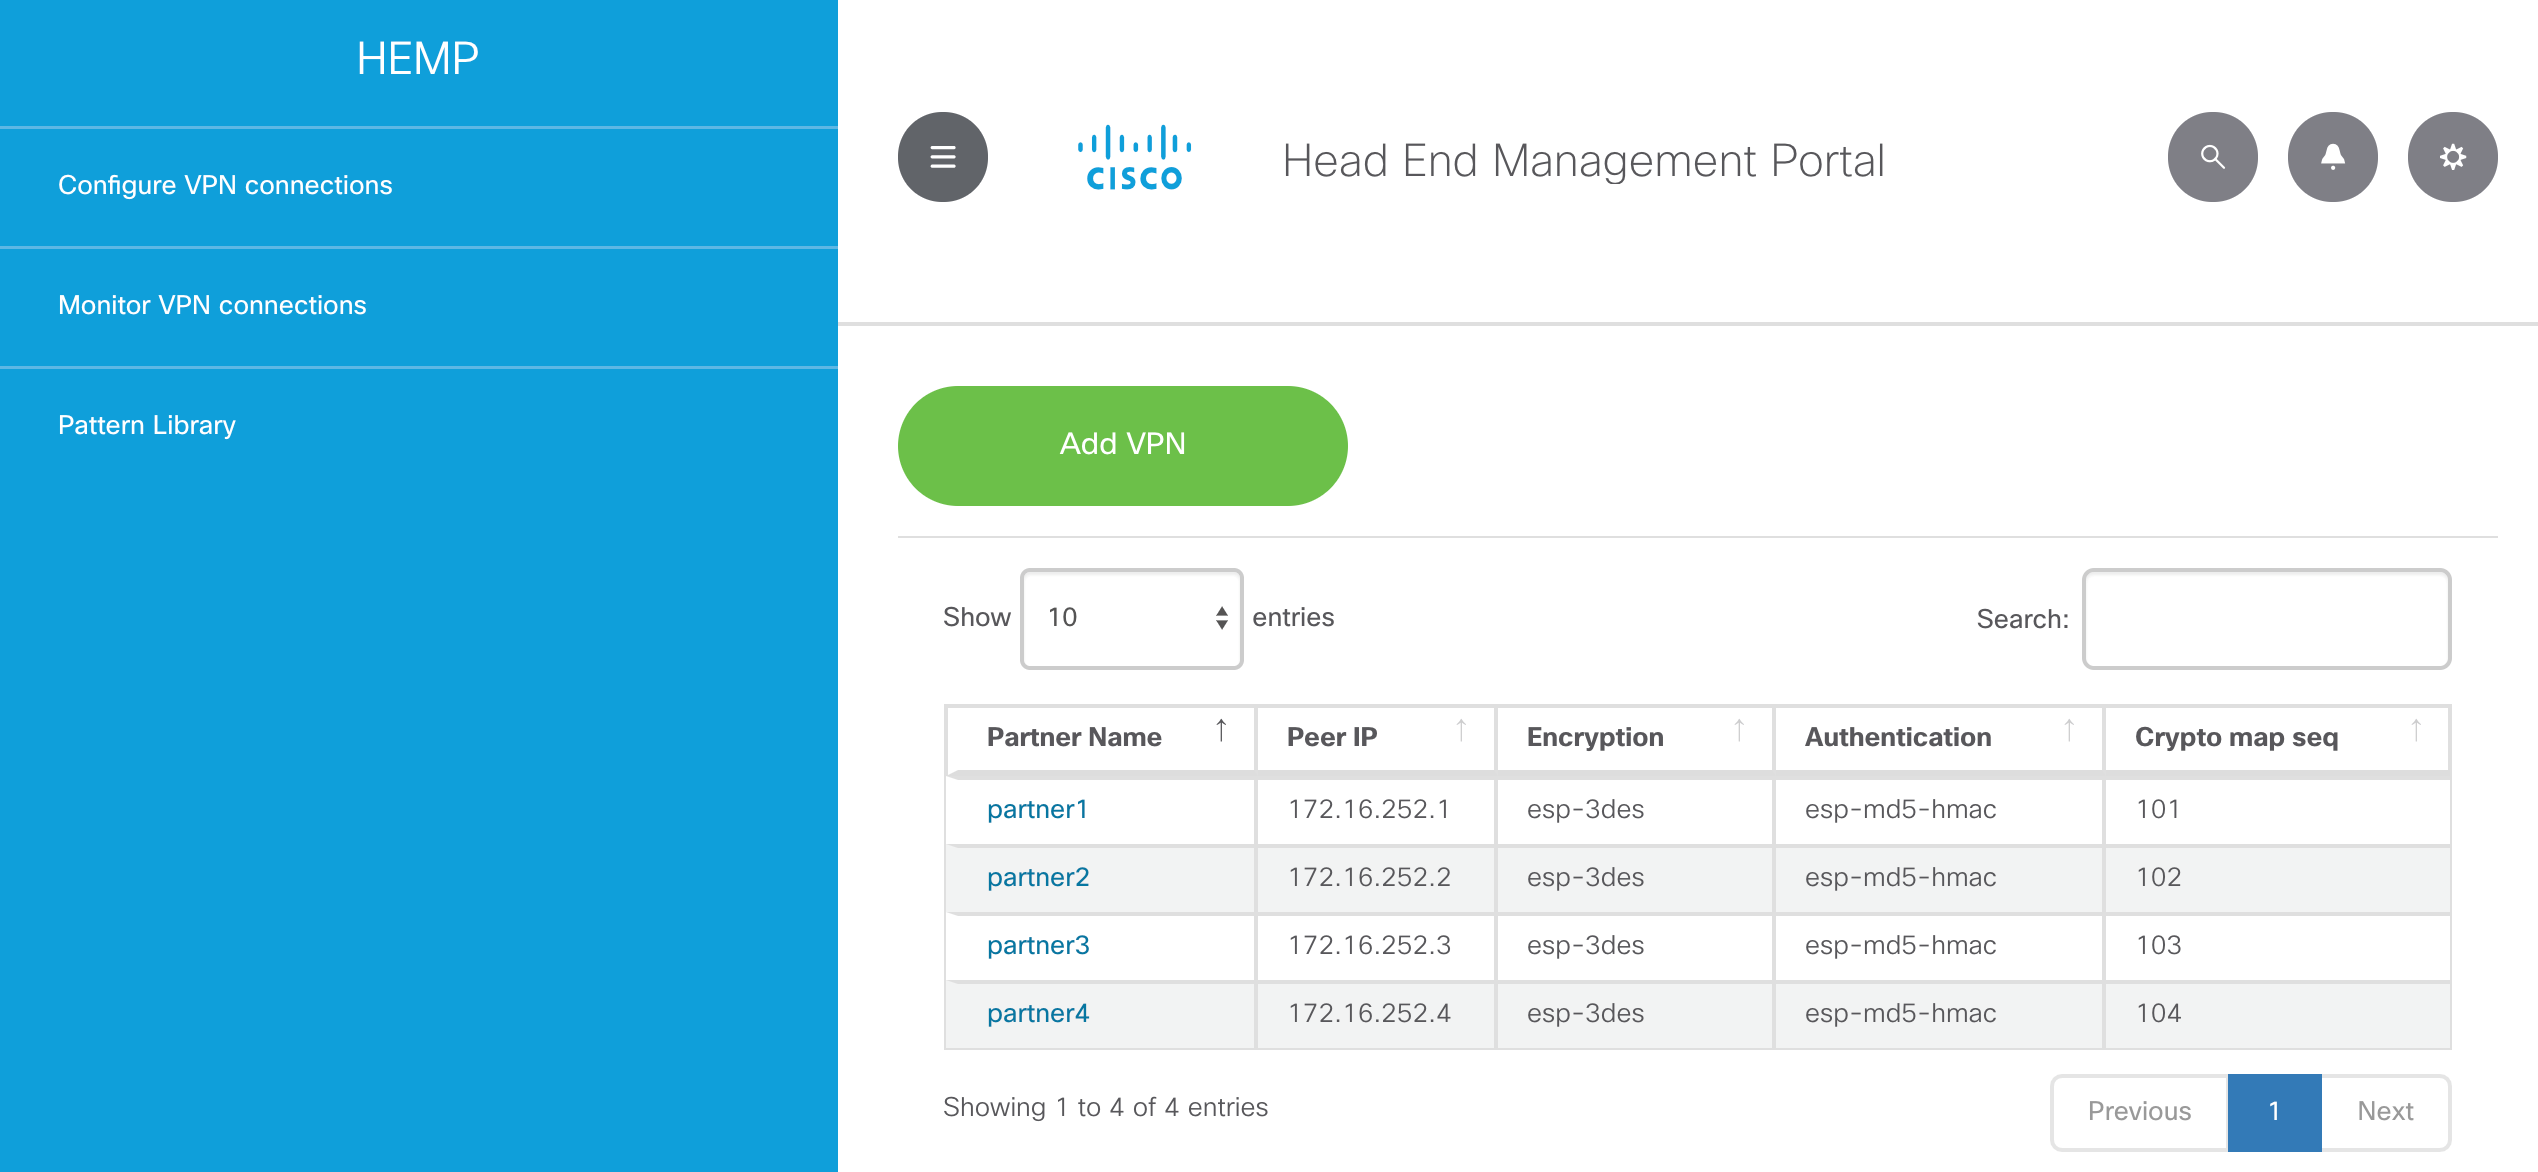
You may access the HEMP GUI portal by pointing your browser to http://10.10.20.50:5001
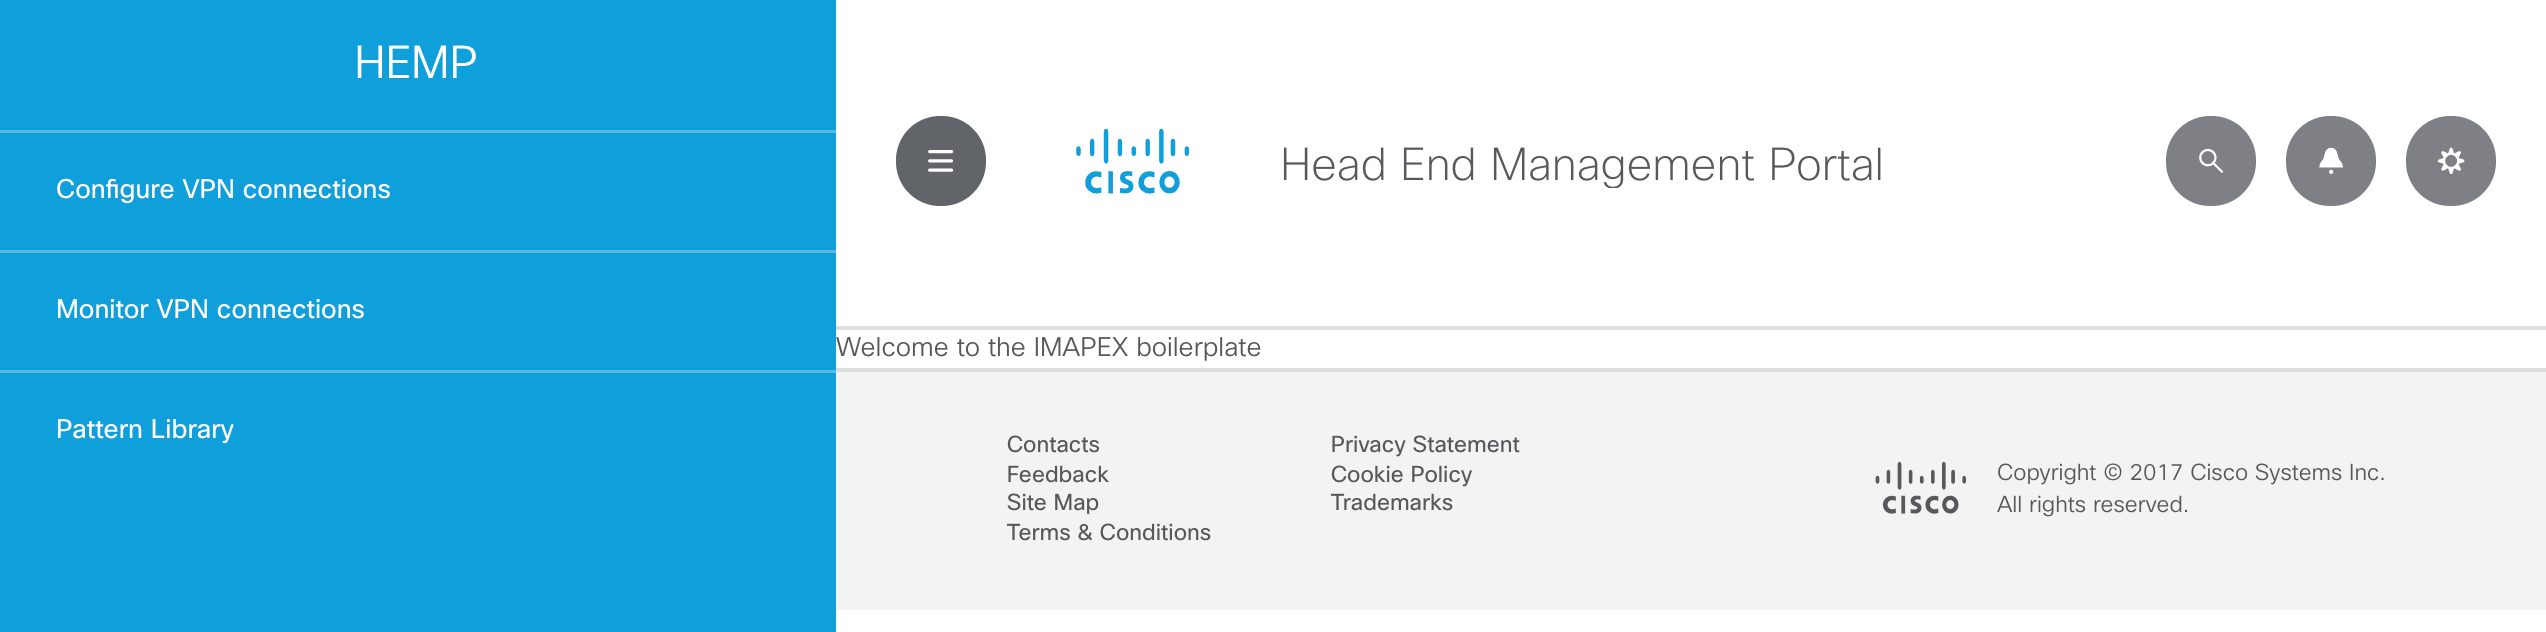
Please click on Configure VPN connections and there you will see the ones already configured on the headend router: partner1 and partner2.
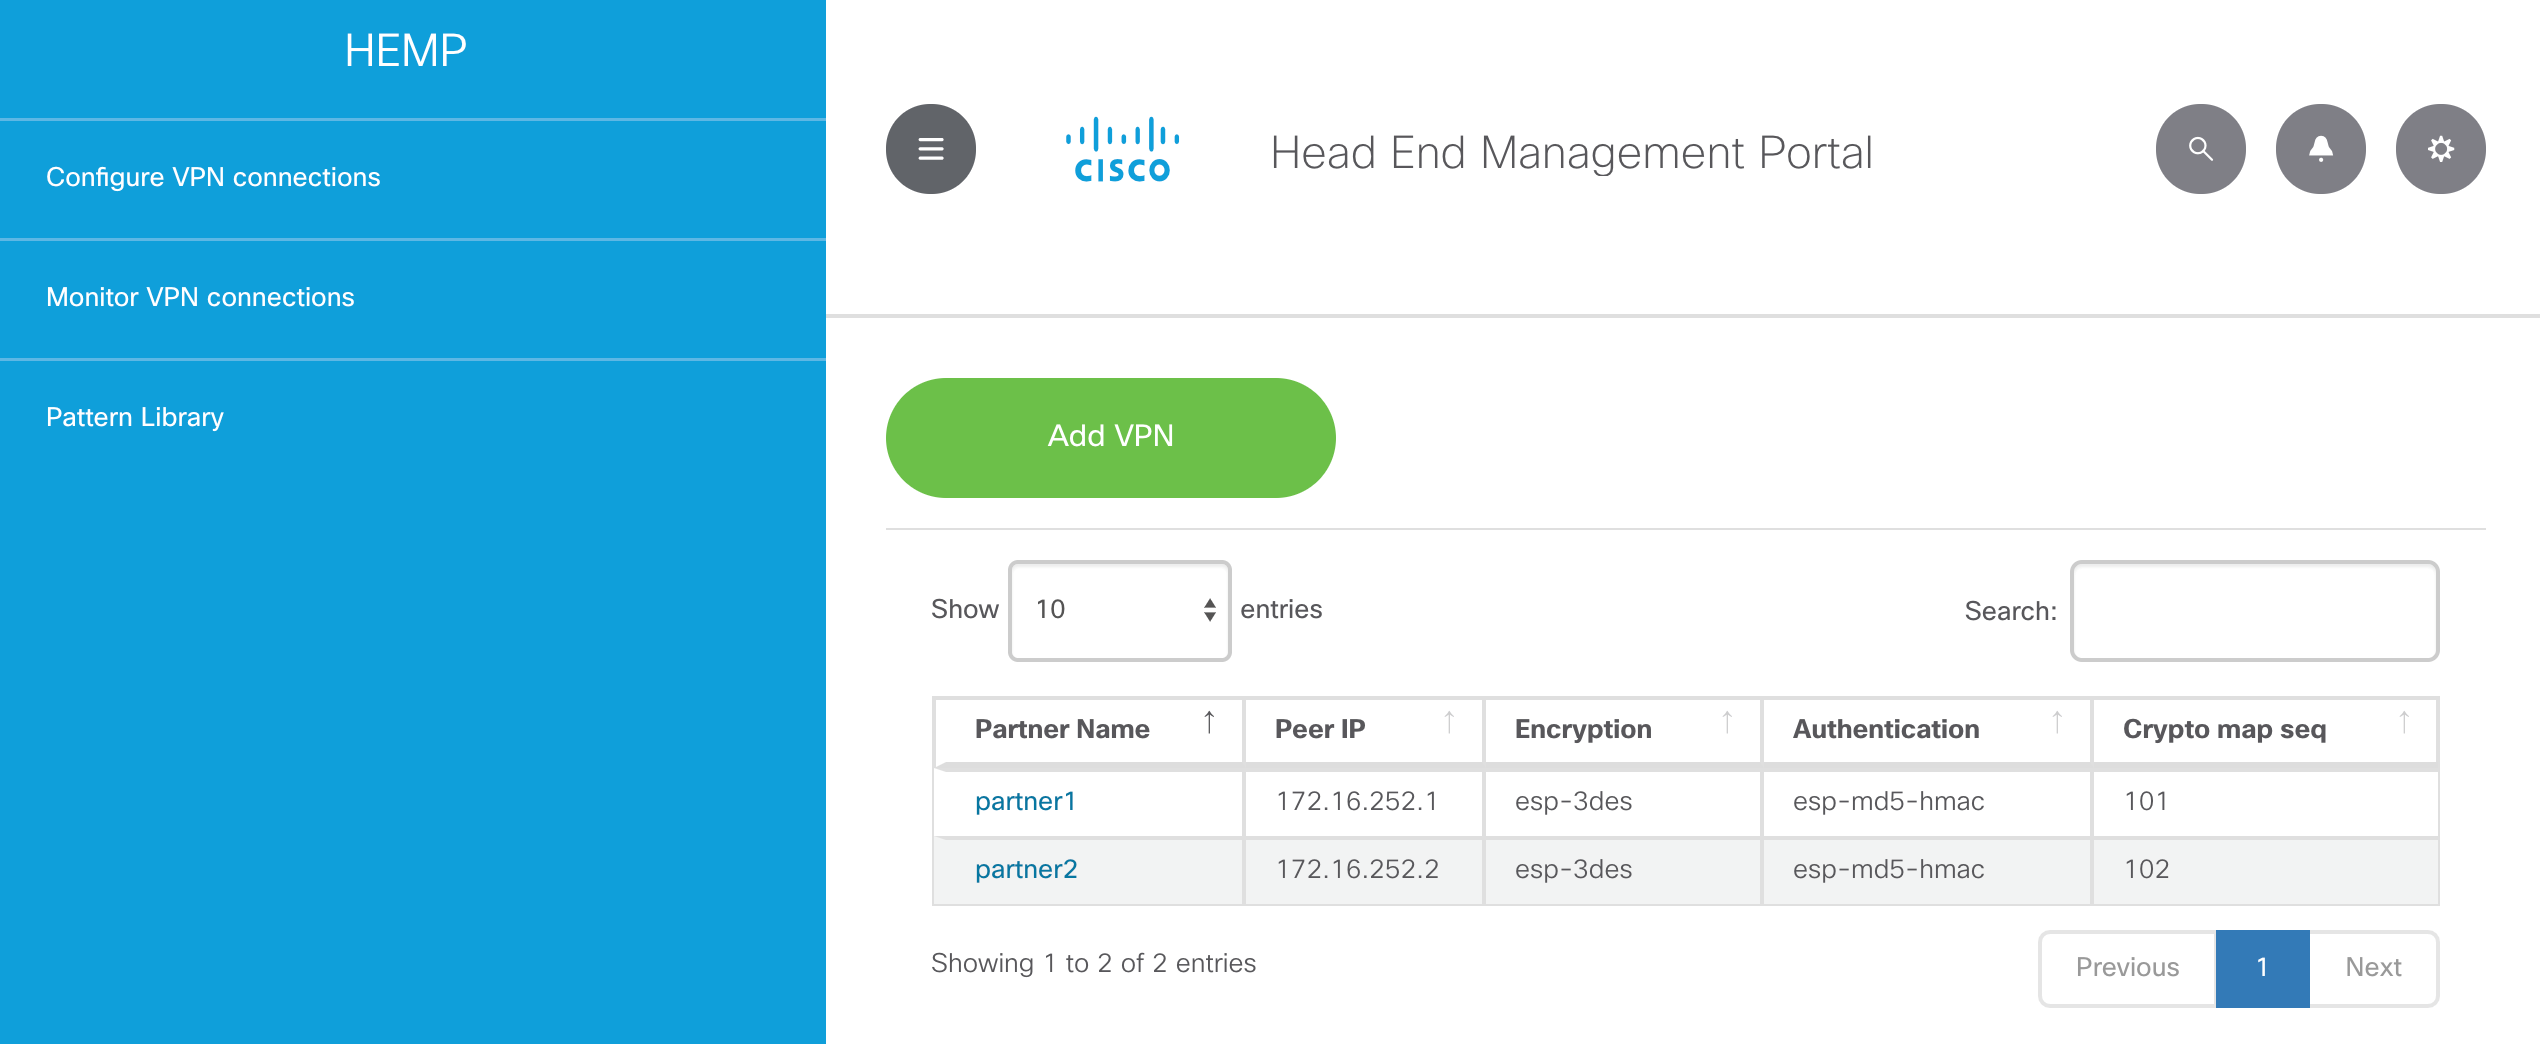
You may now click on one of them, for example partner1, and the GUI will display its configuration and metrics. The system will also allow you to perform some actions on that specific VPN:
- Check Sync: this will compare the configuration in NSO vs the one in the headend router
- Reactivate Re-Deploy: ask NSO to sync configuration again from NSO to the headend router
- Undeploy: remove configuration from the headend router, while conveniently keeping it in NSO in case you need to redeploy it later
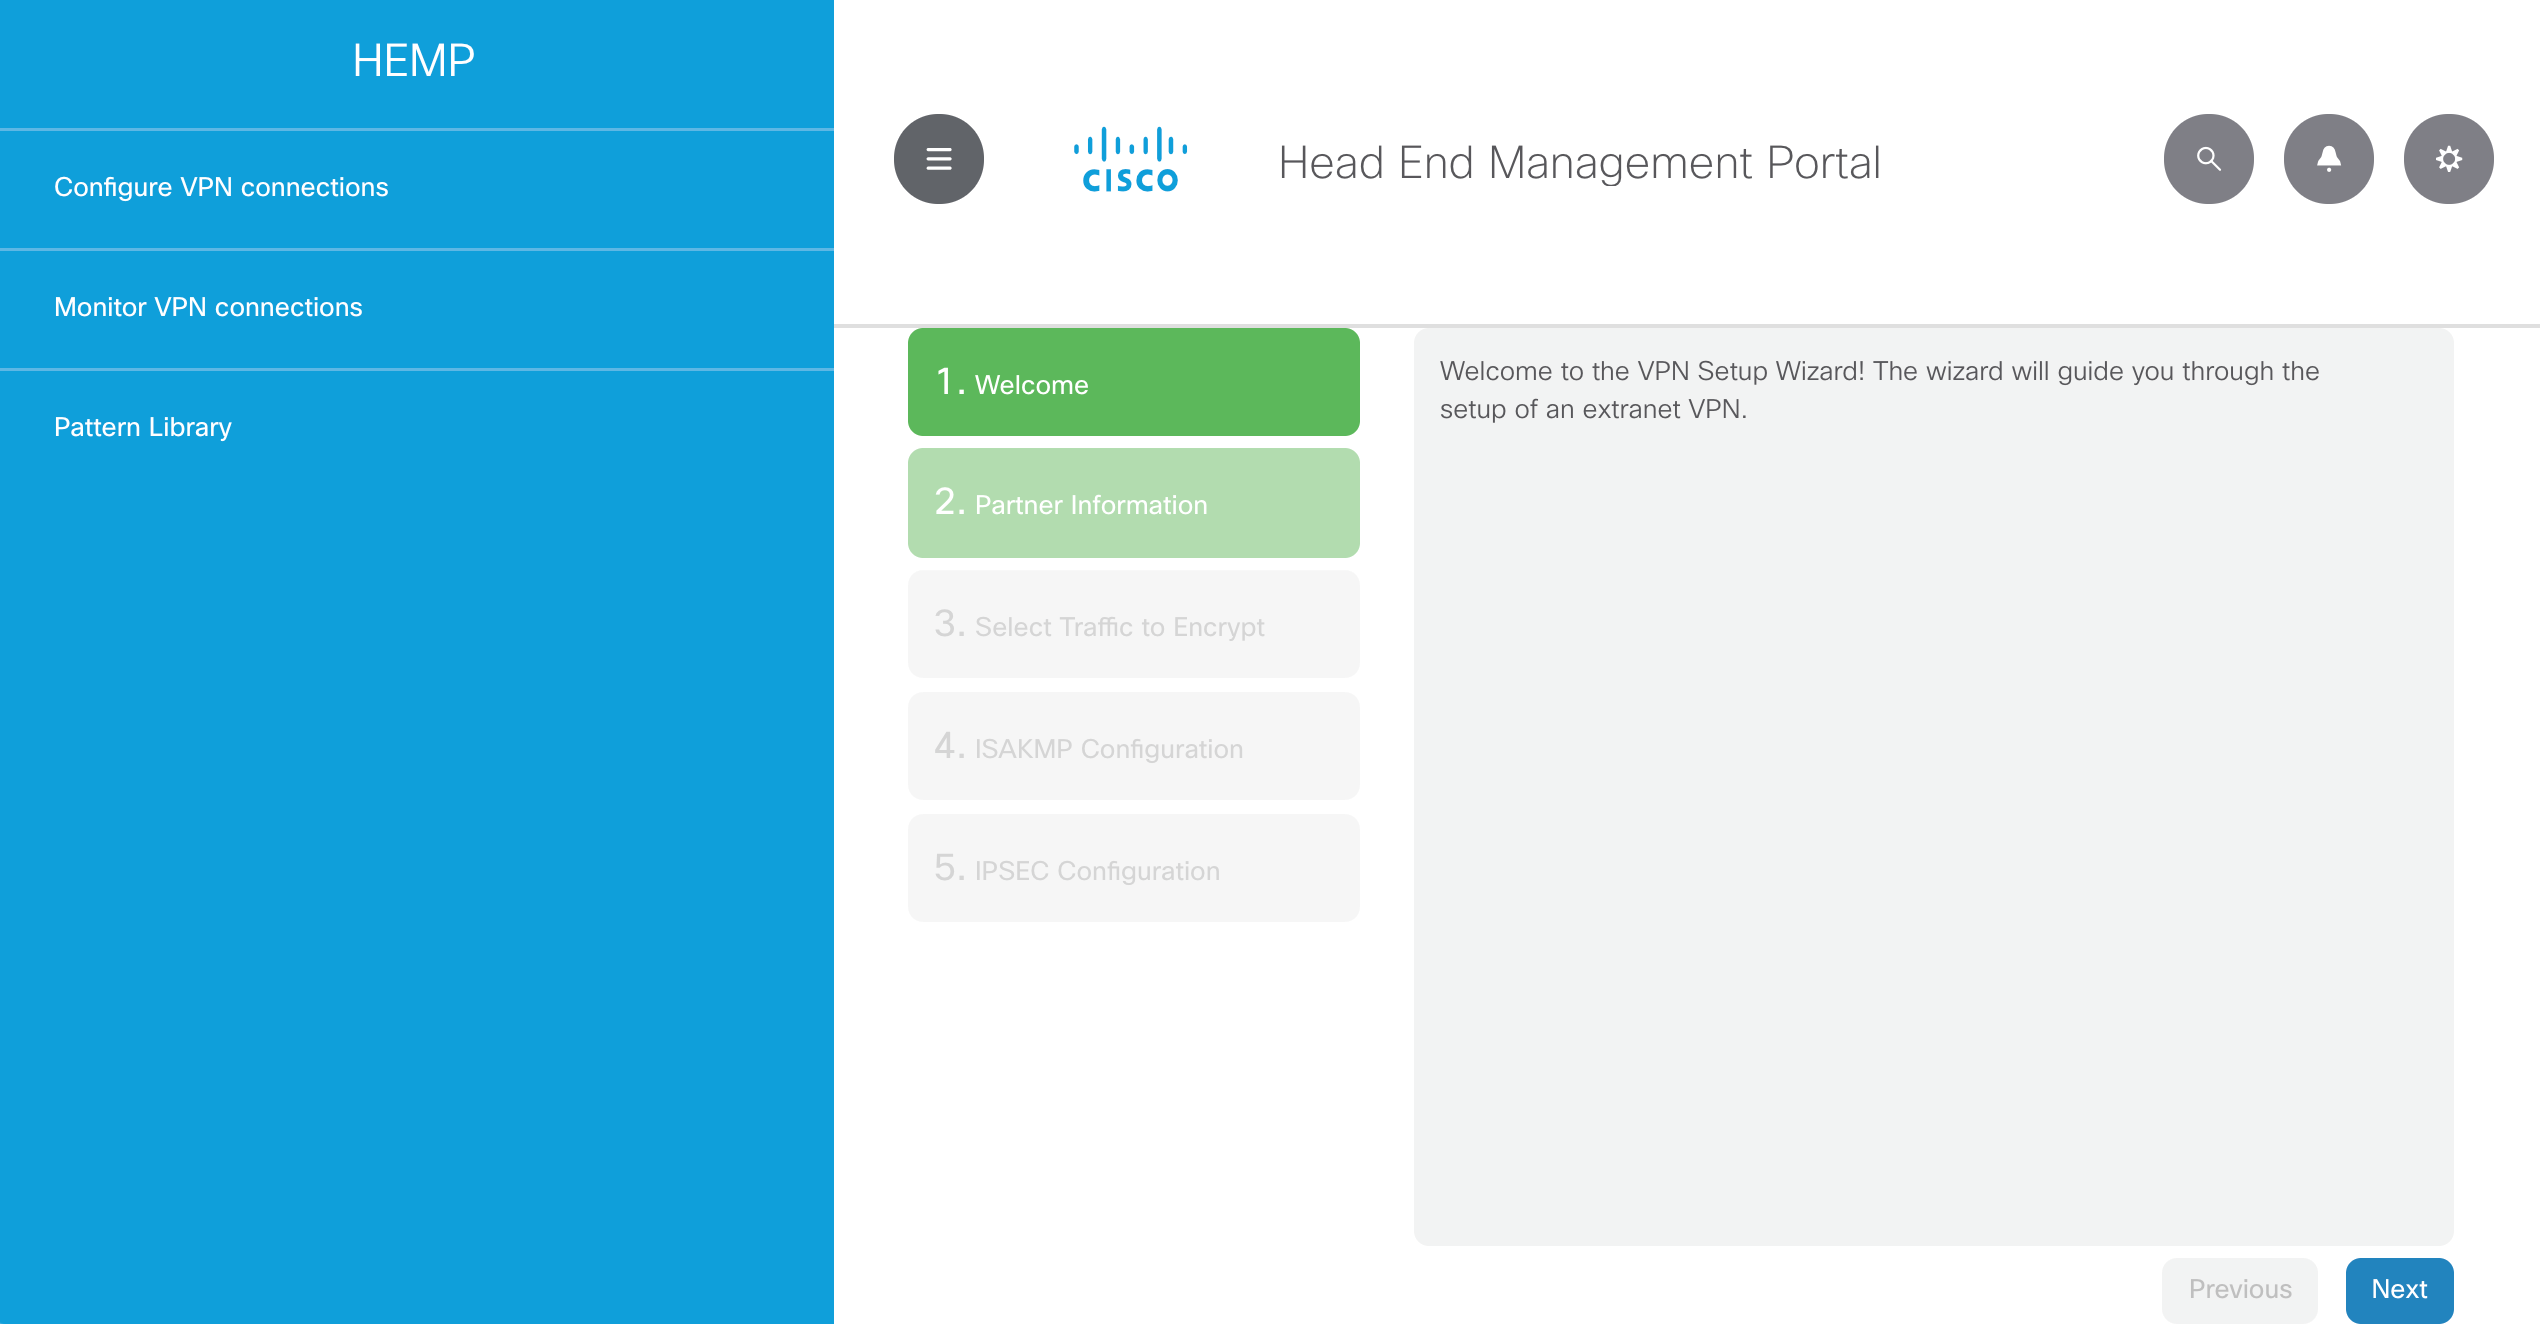
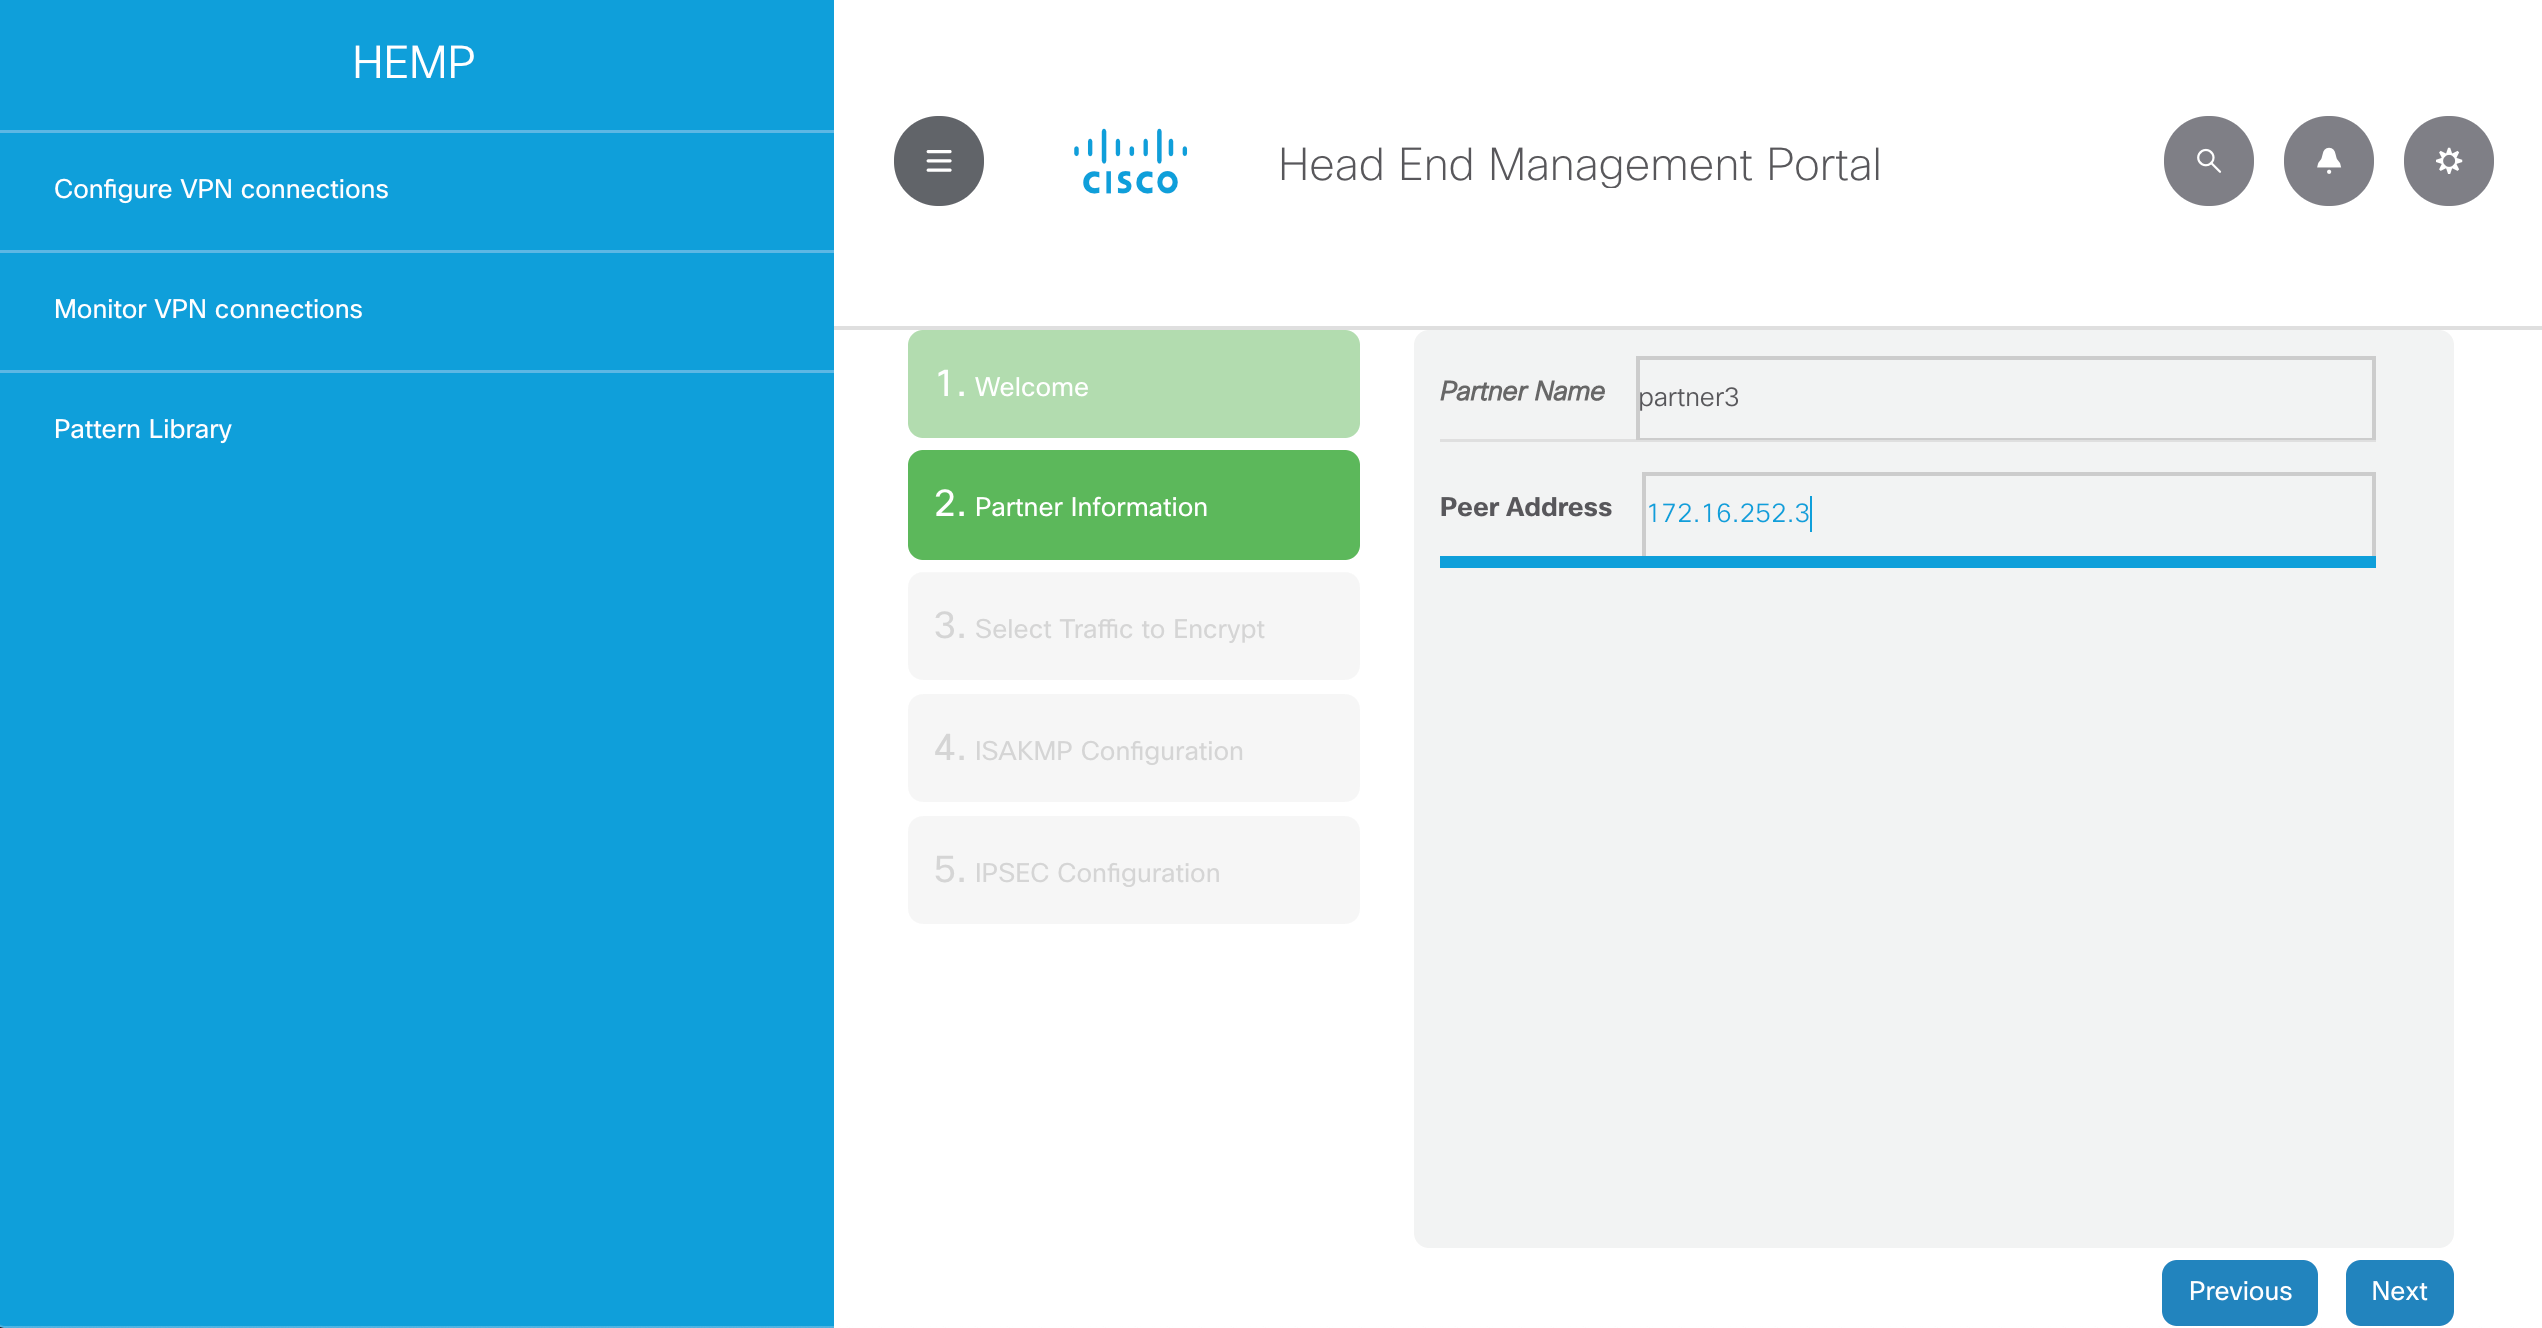
Now let’s go back to Configure VPN connections and click on Add VPN to start the “VPN Setup Wizard”. This will allow you to provide the required information to establish the VPN connection from the headend router to partner3.
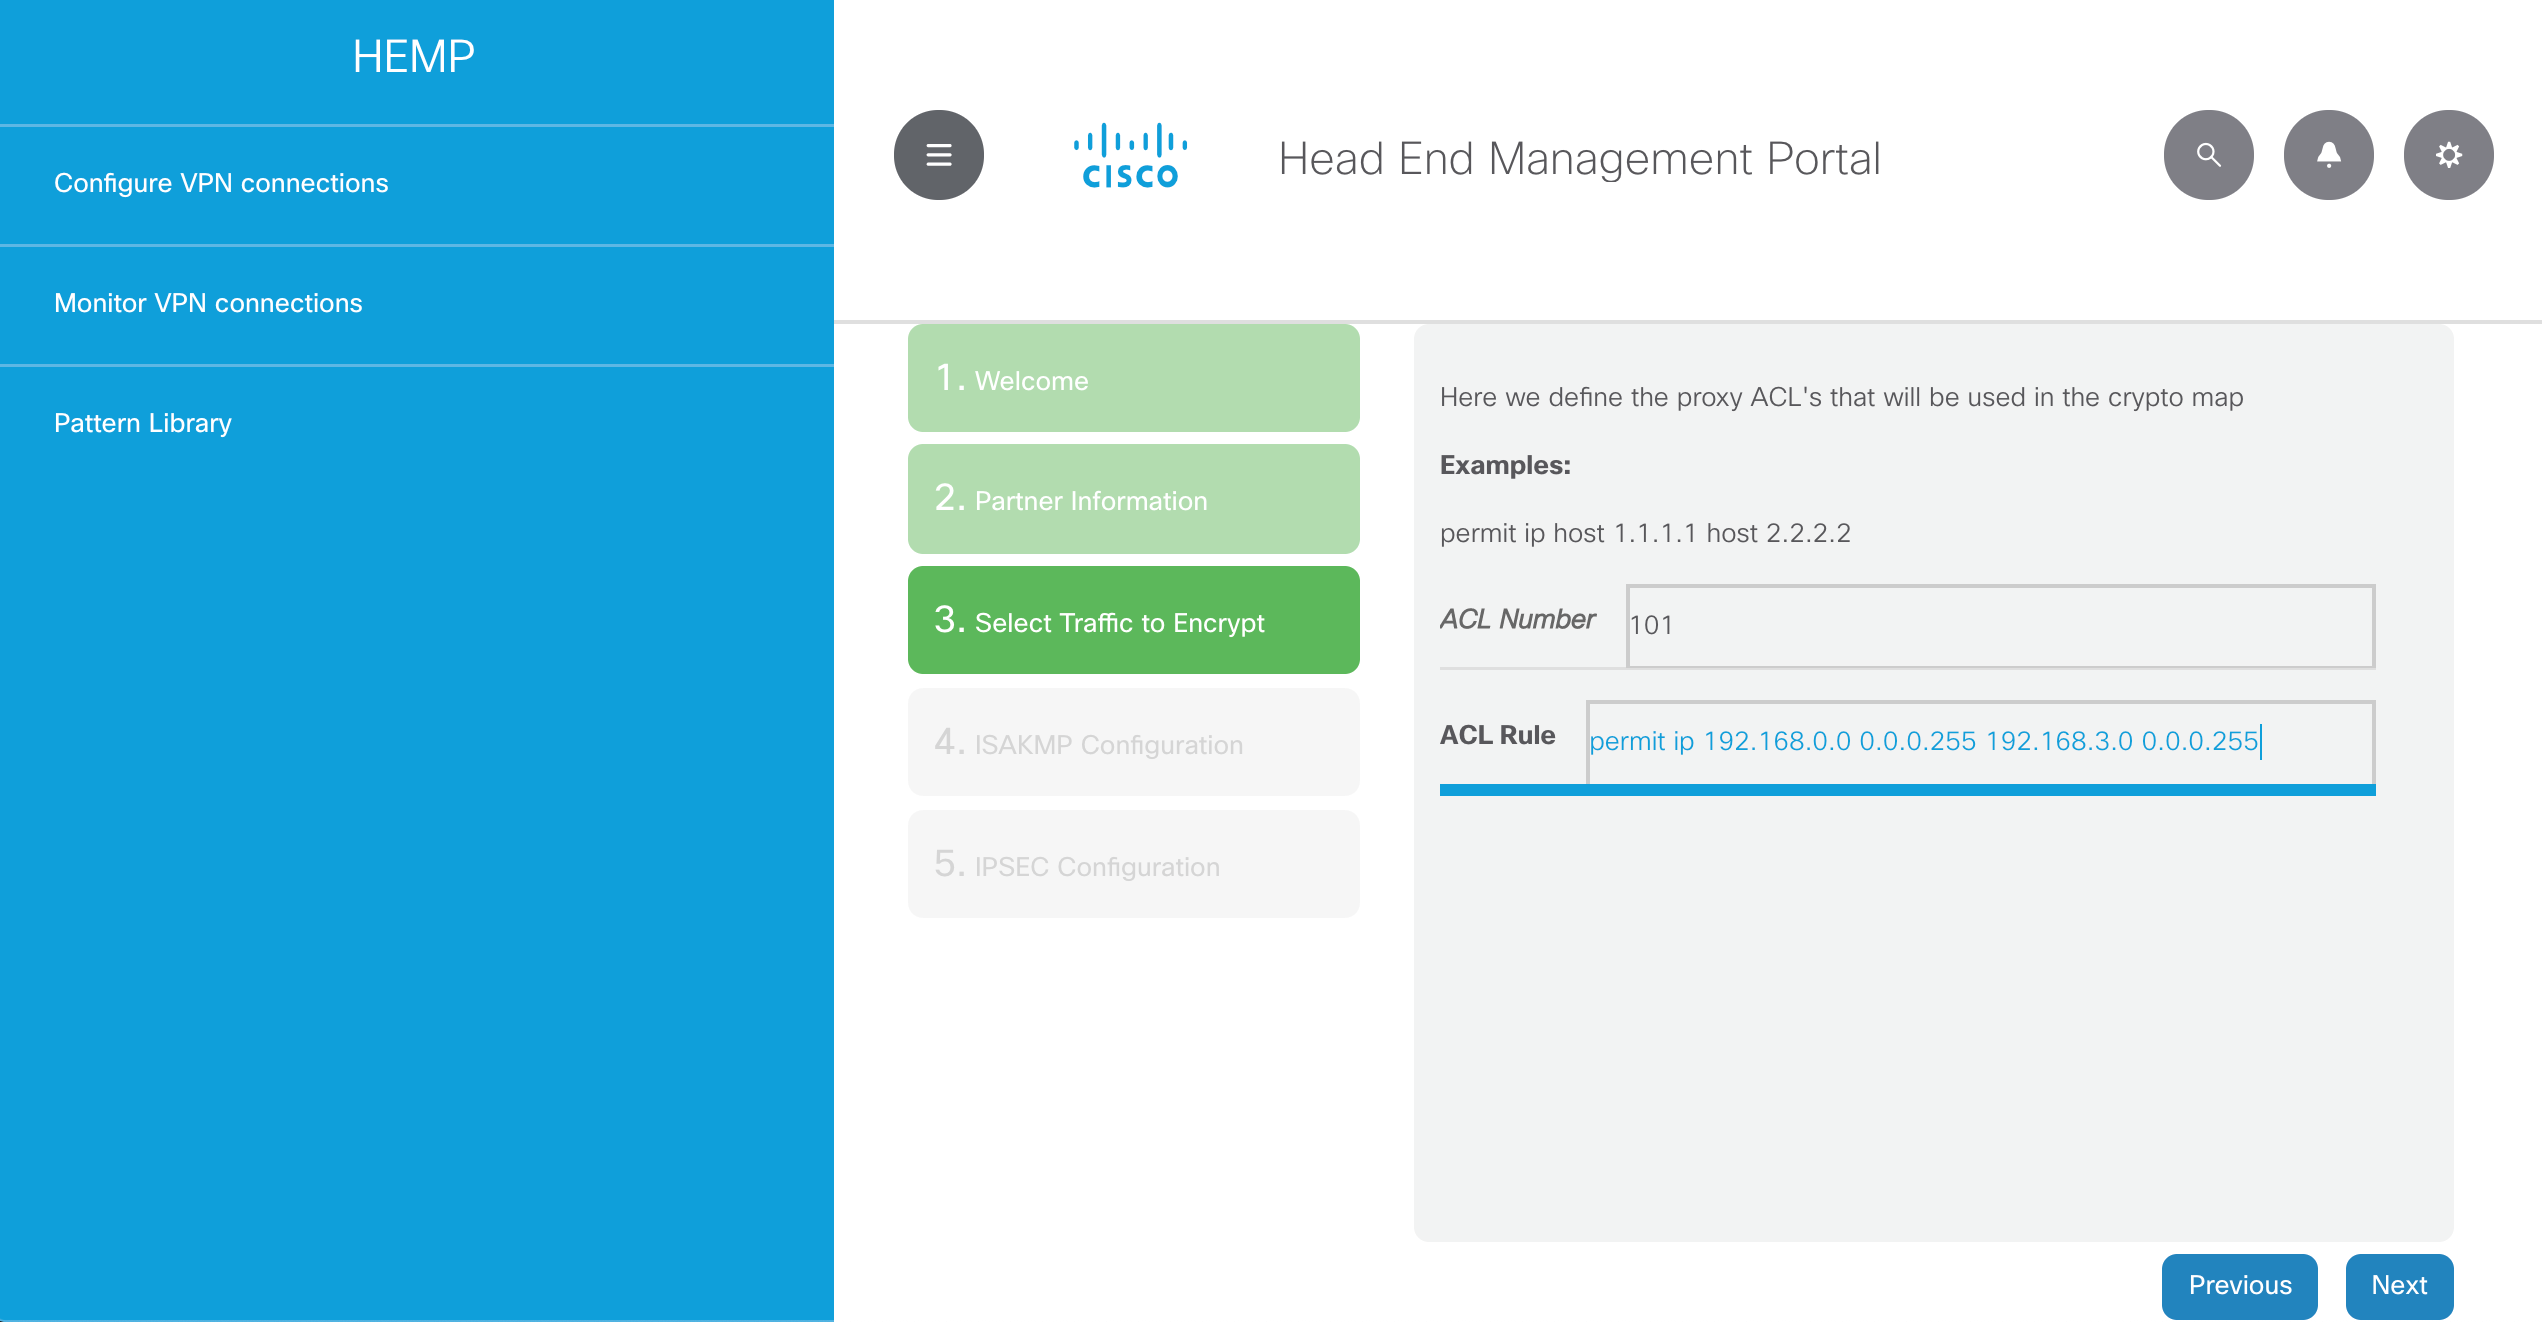
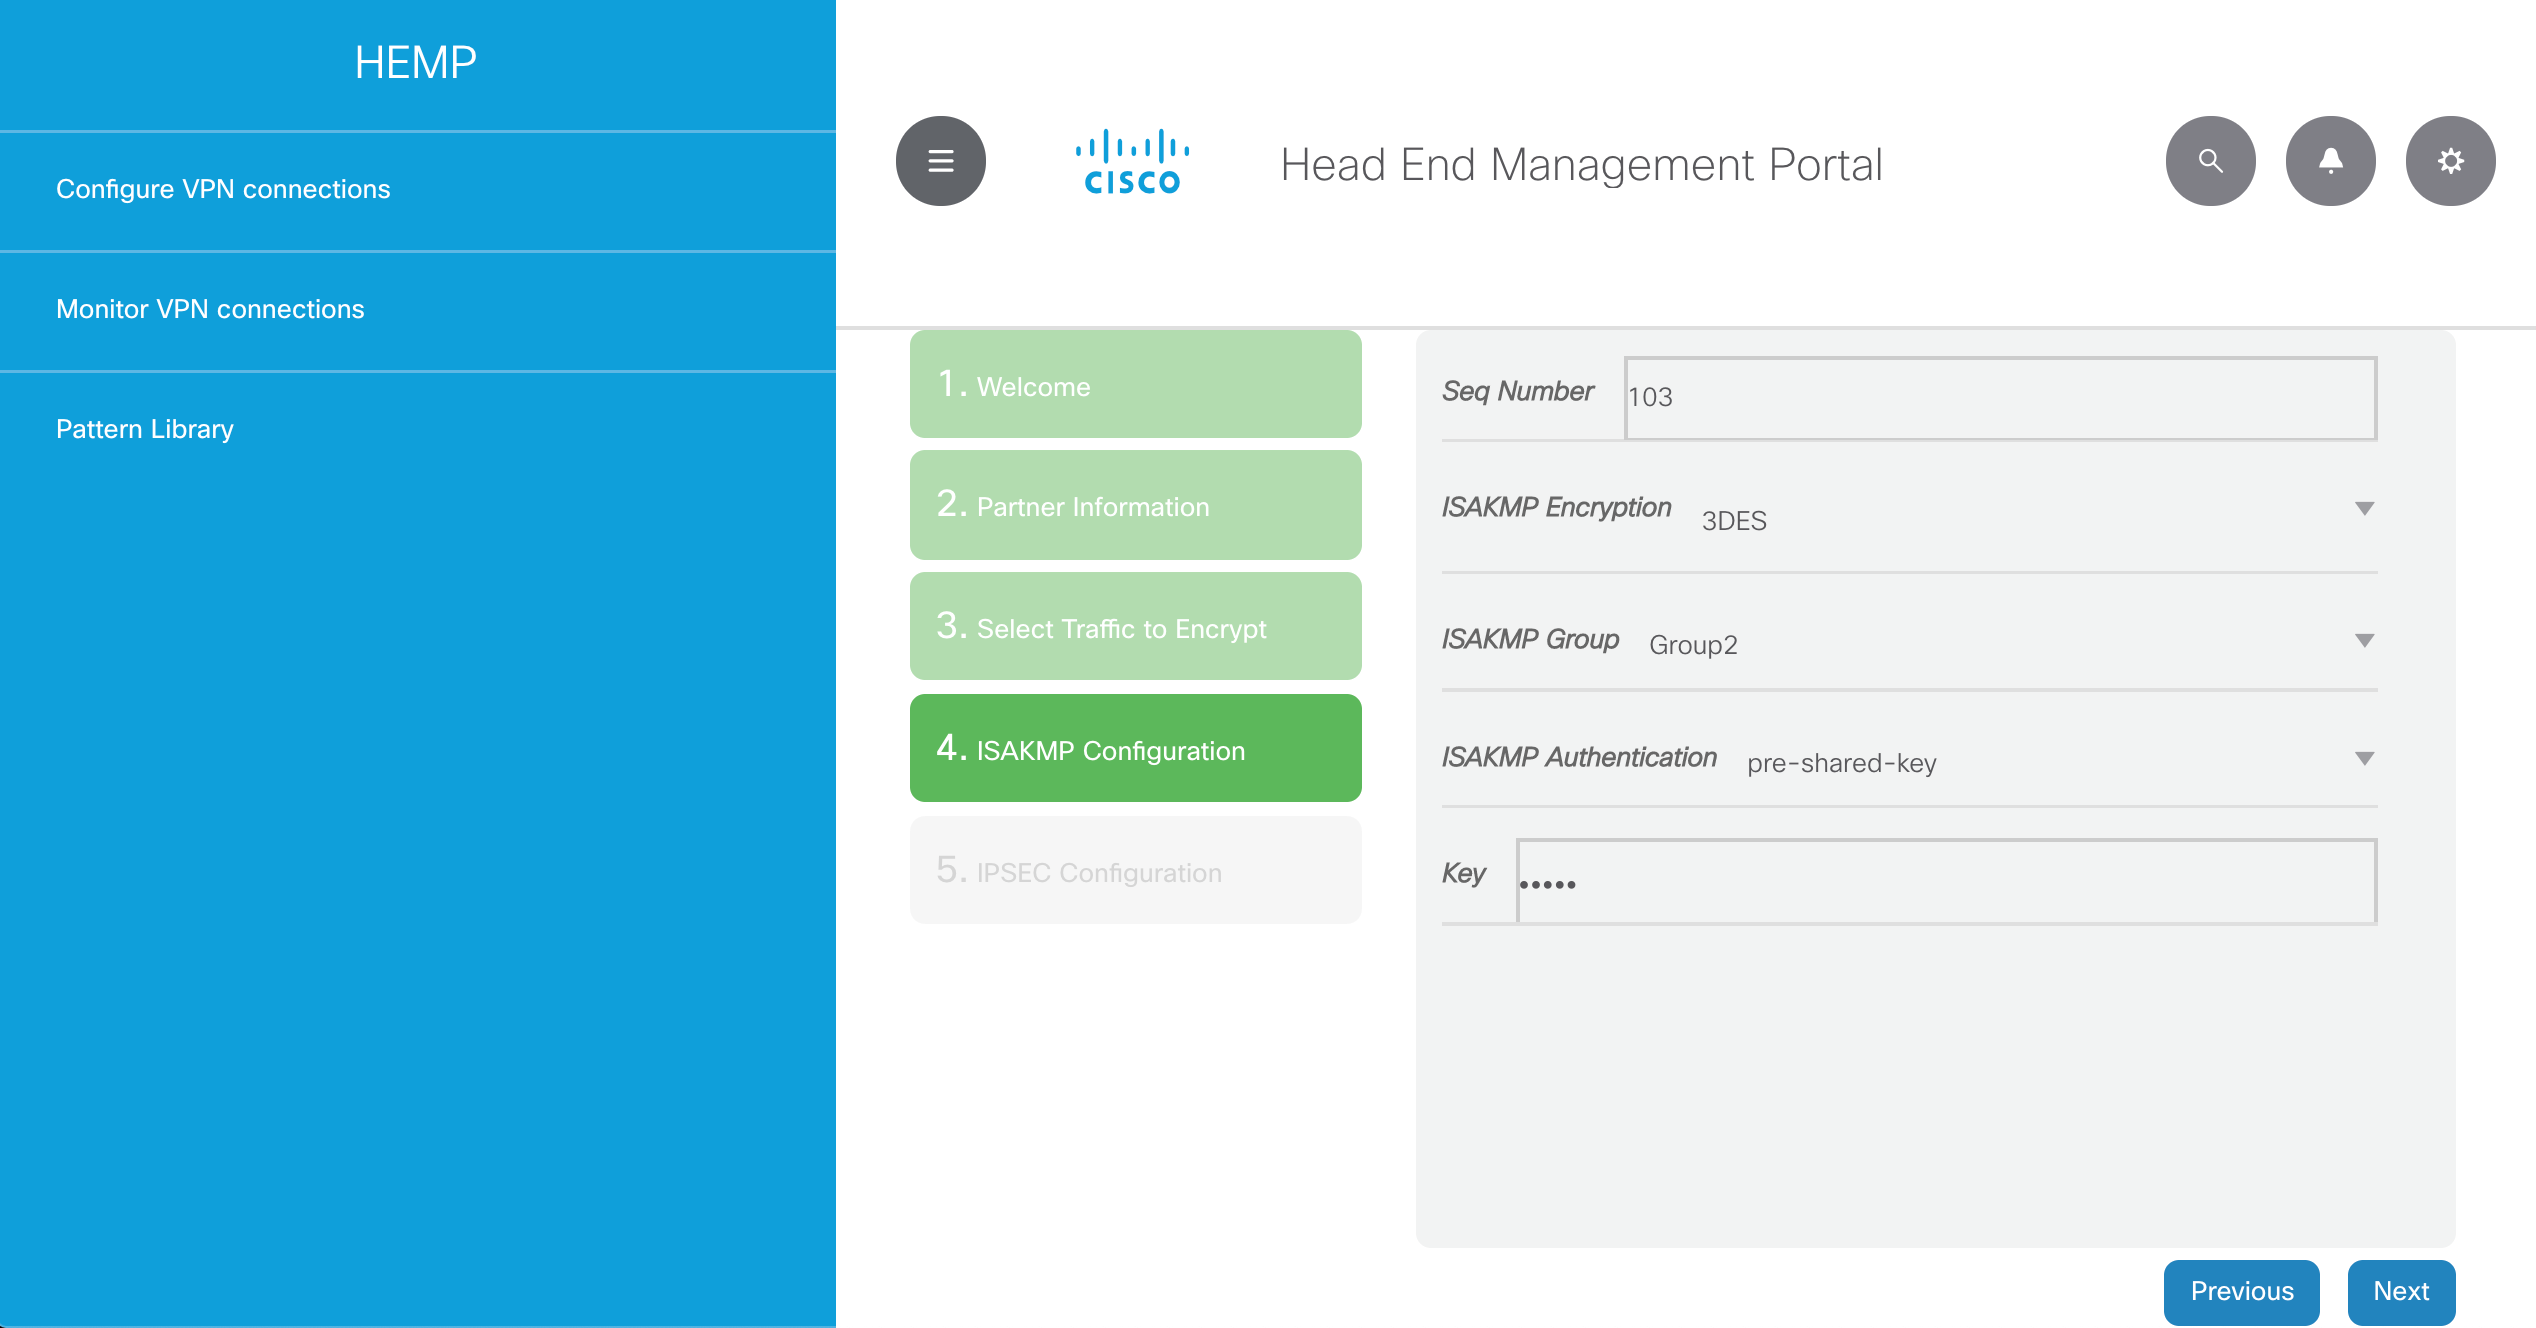
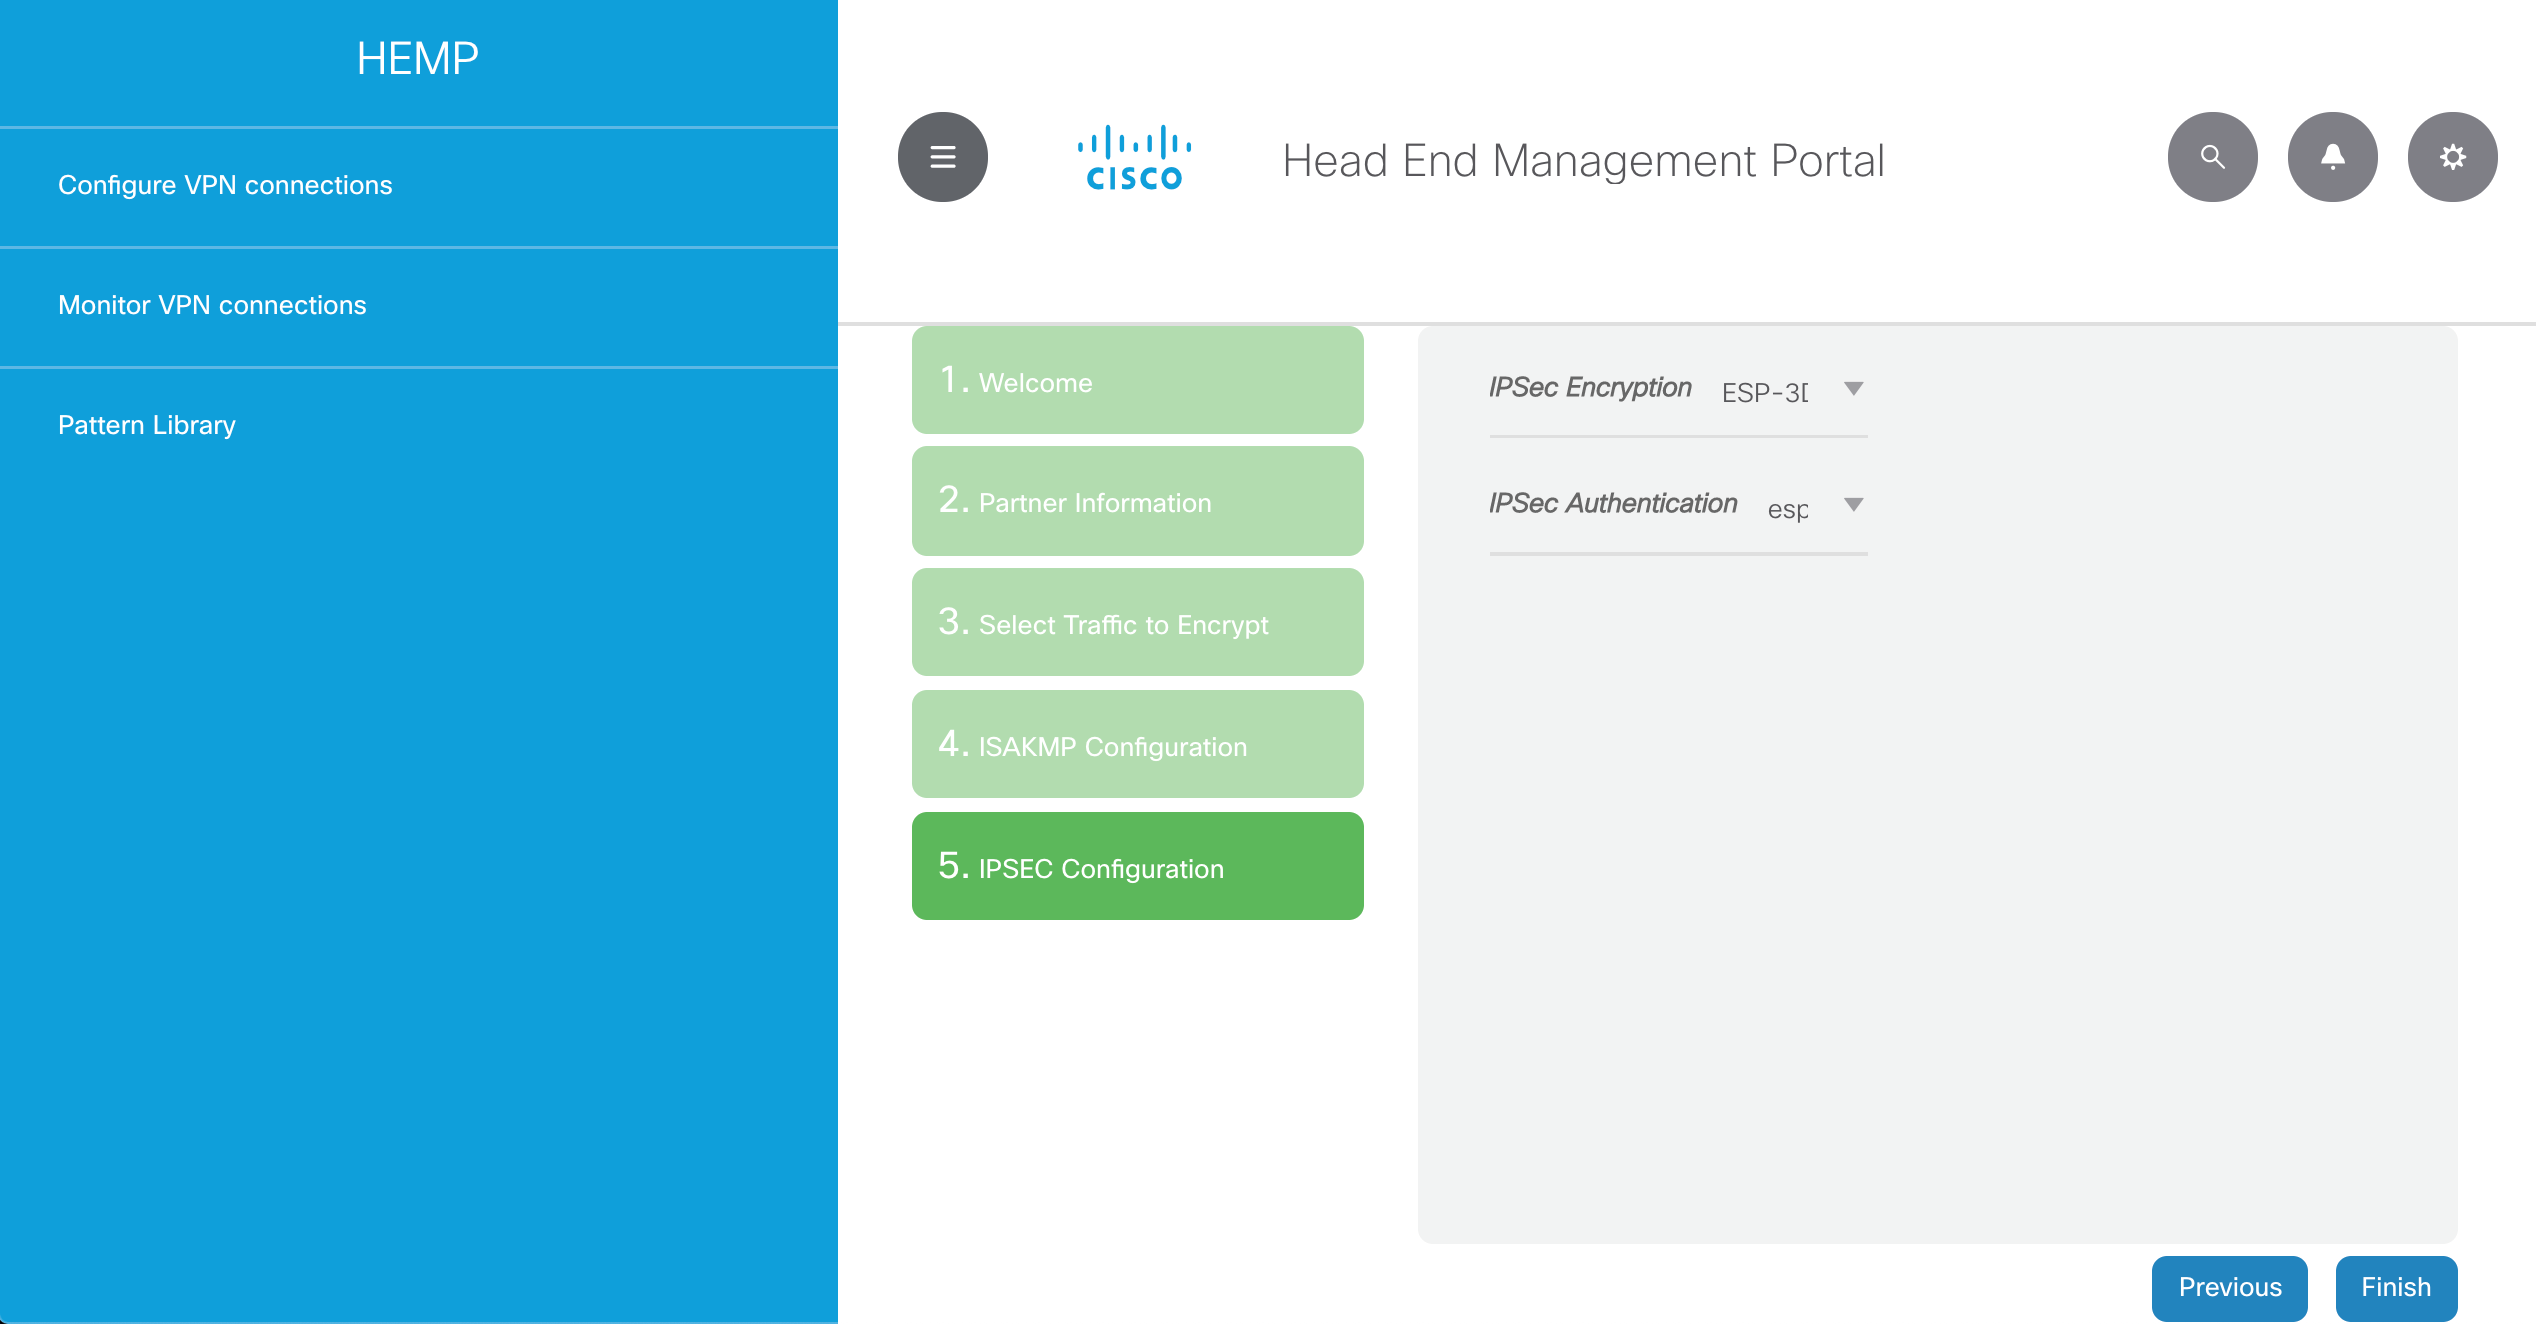
You may find below the required configuration that will be applied in the headend router, so that partner3 VPN connection is established:
partner3:
- partner_name: partner3
device:
- headend
sequence: 103
peer_ip: 172.16.252.3
isakmp_algo: 3des
isakmp_group: 2
pre_shared_key: cisco
transform_encryption: esp-3des
transform_auth: esp-md5-hmac
acl_number: "101"
acl_rule: "permit ip 192.168.0.0 0.0.0.255 192.168.3.0 0.0.0.255"
This is the sequence of steps you will need to follow in the GUI:

Once you are done with partner3 please repeat the process for the partner4 VPN connection, using the parameters below:
partner4:
- partner_name: partner4
device:
- headend
sequence: 104
peer_ip: 172.16.252.4
isakmp_algo: 3des
isakmp_group: 2
pre_shared_key: cisco
transform_encryption: esp-3des
transform_auth: esp-md5-hmac
acl_number: "104"
acl_rule: "permit ip 192.168.0.0 0.0.0.255 192.168.4.0 0.0.0.255"
By the end of the process you should have something like this in the Configure VPN connections section:
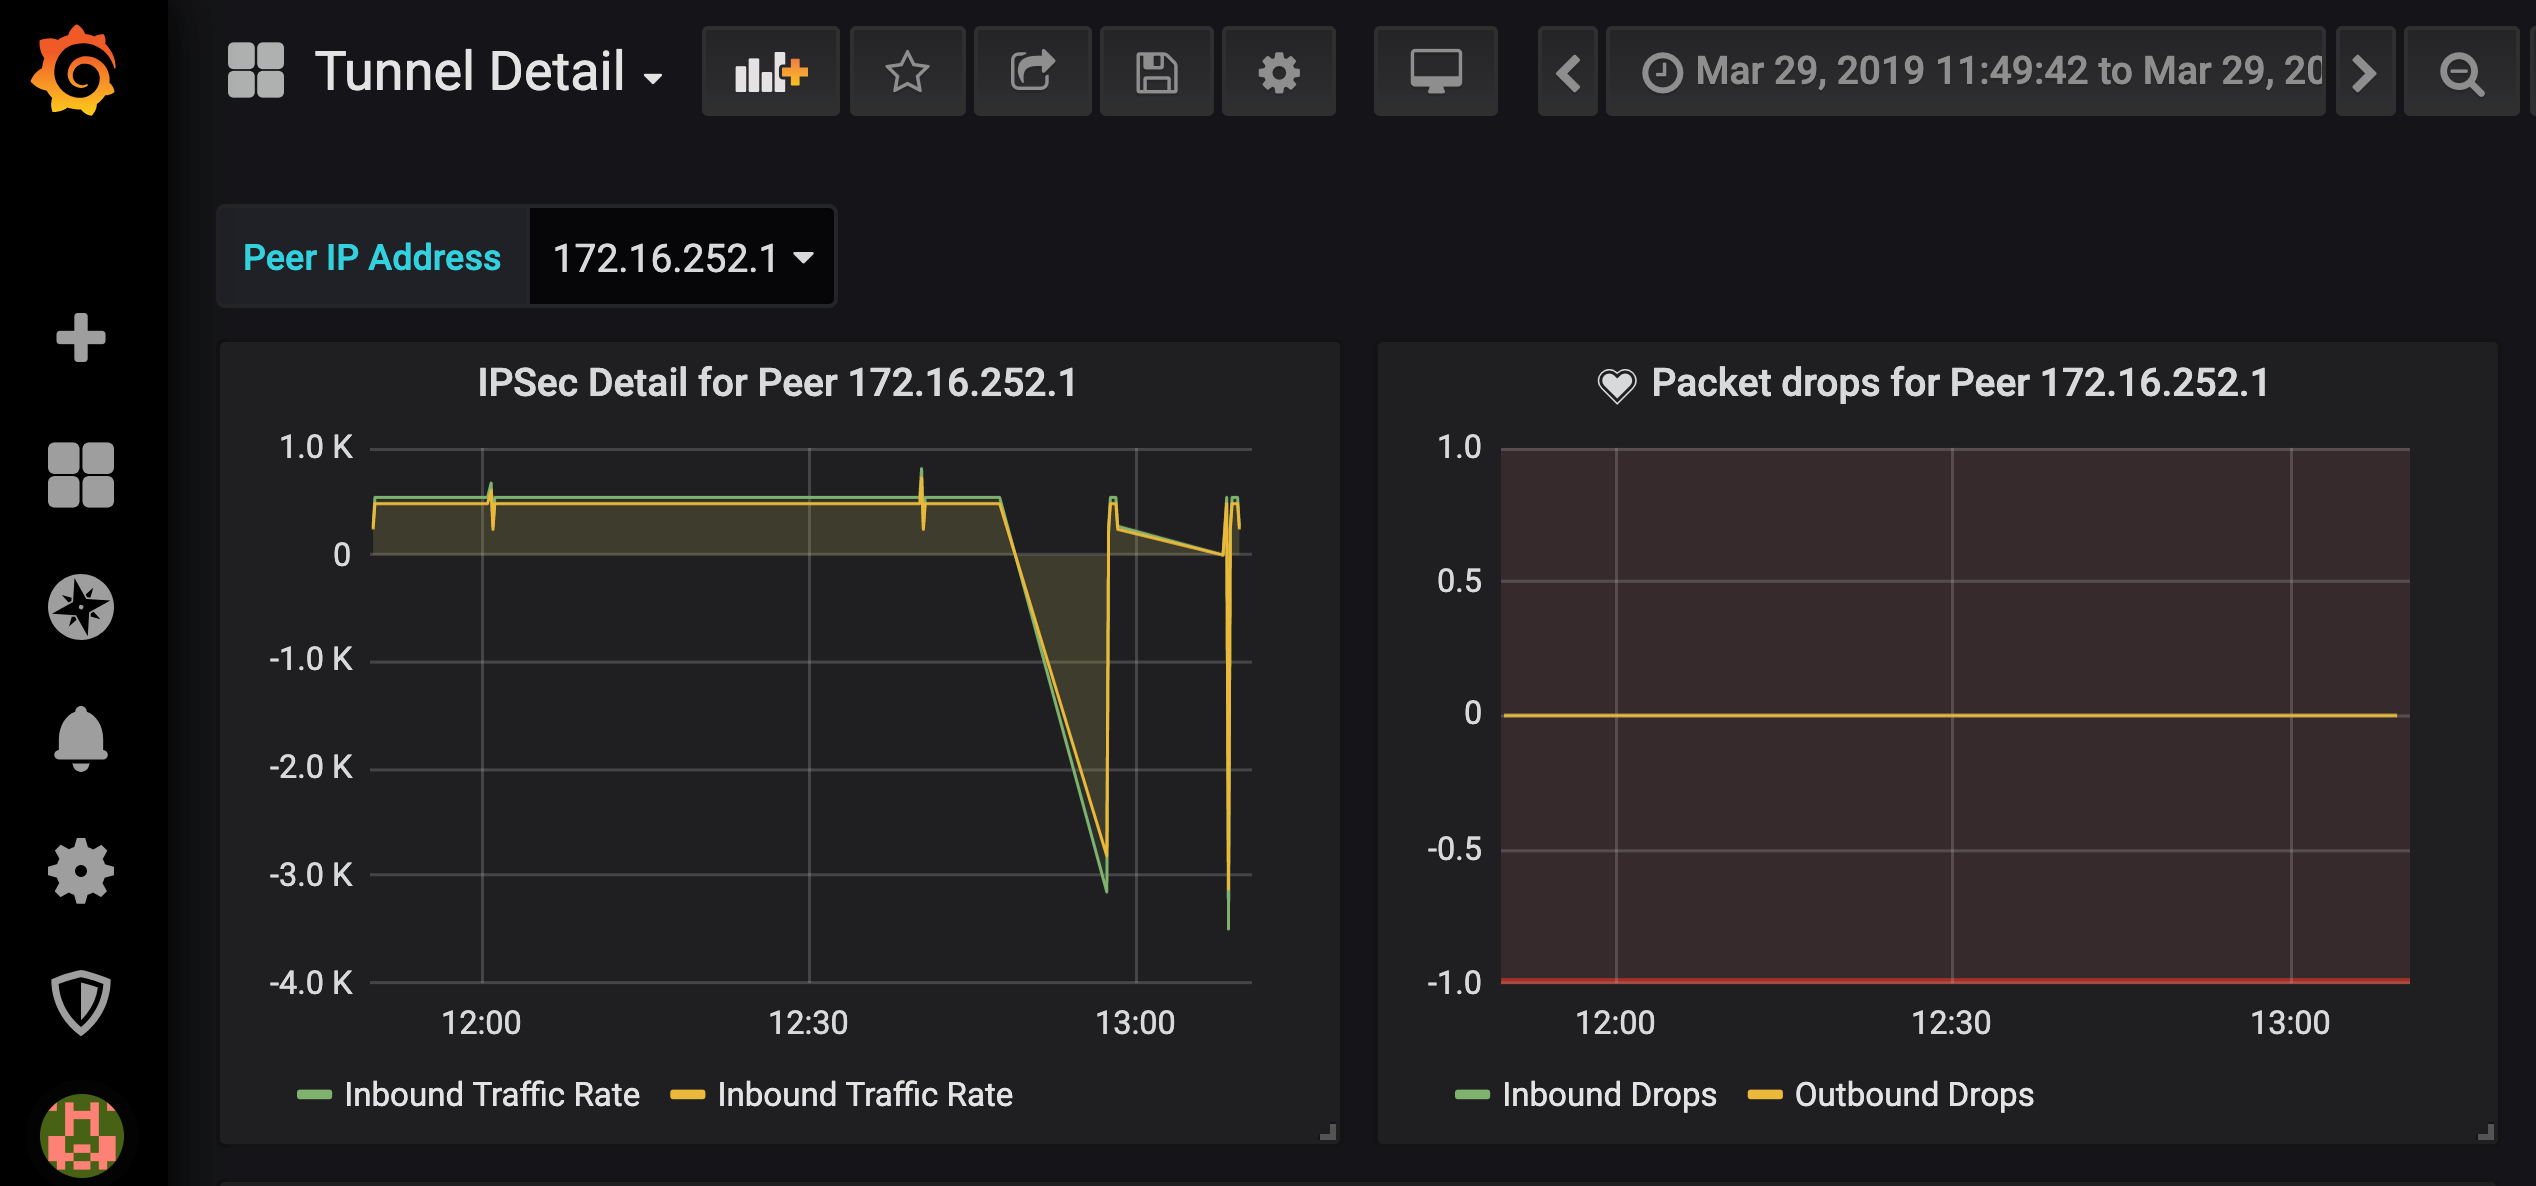
You may now click on Monitor VPN Connections and the GUI will load a Grafana dashboard. Please login there with admin/admin, and change the password. If it does not work correctly (error message Dashboard not found) you may still access the Grafana dashboard by pointing your browser directly to http://10.10.20.50:3000
Selecting the Tunnel Detail dashboard will show you information about each specific tunnel, just by choosing the peer IP address:
The Extranet Monitoring dashboard will show you all information about how the headend router is doing:

As the final step, please restore the NCS configuration file we modified at the beginning of this demo, in case you want to use the sandbox reservation later for other demos.
[developer@devbox hemp]$cp /opt/nso/etc/ncs/ncs.conf.bak /opt/nso/etc/ncs/ncs.conf
Summary
This automation demo shows how you can leverage APIs to easily provision and monitor Extranet VPNs from a simple custom GUI. With this kind of approach network operators would not need to:
- Understand network architecture details
- Remotely connect to devices
- Be experts on each underlying device CLI
- Configure those devices via a myriad of repetitive CLI commands
CONGRATULATIONS! You have now completed your second NetDevOps demo on how to leverage APIs to automate Extranet VPNs management!
See you in 2020 for more awesome NetDevOps. Stay tuned and happy new year!
Any questions or comments please let me know in the comments section below, Twitter or LinkedIn.
Related resources
- Learn about NetDevOps
- Hands-0n learning courses for Cisco technologies
- Learn about Cisco DevNet Certifications
We’d love to hear what you think. Ask a question or leave a comment below.
And stay connected with Cisco DevNet on social!
Twitter @CiscoDevNet | Facebook | LinkedIn
Visit the new Developer Video Channel


