
Welcome back everyone to the second part of the “Using CI/CD pipelines for infrastructure configuration and management” blog series. As you might remember from the previous blog, the pipeline we are building is using GitLab CE, pyATS, Ansible, and Cisco CML. In this blog, we will install GitLab CE and get it ready for the next steps.
Installing GitLab CE
For my environment I have used the GitLab CE and GitLab runner Docker images on CentOS 8.4. Check here for a complete list of supported operating systems for GitLab. Since I am using this environment for demo purposes, I will install both GitLab CE and the GitLab runner on the same virtual machine. In a production environment you might want to install GitLab CE and the runner on separate machines for security, performance, and scalability purposes.
GitLab CE (Community Edition) is a complete DevOps platform that has all the critical features needed in the software development lifecycle: version control and hosted git repositories, project management features and a built-in CI/CD. GitLab runner is a separate application that works with GitLab CI/CD to run the jobs in a pipeline and return the results back to GitLab. Both GitLab and the runner support several different installation models: from Linux packages, on Kubernetes through Helm charts, compiling from source or as Docker containers. I have chosen the Docker installation for simplicity.
The Docker file definition for running GitLab and the runner as containers should look like the one below. Save this information in a file named docker-compose.yml.
version: '3.4'

services:
 gitlab:
  restart: always
  image: gitlab/gitlab-ce
  hostname: gitlab
  volumes:
   - gitlab-config:/etc/gitlab
   - gitlab-data:/var/opt/gitlab
  ports:
   - "80:80"
  environment:
   - GITLAB_ROOT_PASSWORD=C1sco12345
   - GITLAB_SHARED_RUNNERS_REGISTRATION_TOKEN=gitlabrunners
   - GITLAB_HOST=http://devbox
   - VIRTUAL_HOST=devbox
 runner1:
  restart: always
  image: gitlab/gitlab-runner
  environment:
    - REGISTRATION_TOKEN=gitlabrunners
    - RUNNER_NAME=runner1
    - RUNNER_EXECUTOR=docker
    - CI_SERVER_URL=http://devbox
    - CLONE_URL=http://devbox
    - REGISTER_NON_INTERACTIVE=true
    - DOCKER_IMAGE=alpine
    - DOCKER_EXTRA_HOSTS=devbox:192.168.0.148
    - DOCKER_PULL_POLICY=if-not-present
   volumes:
    - /var/run/docker.sock:/var/run/docker.sock
   extra_hosts:
    - "devbox:192.168.0.148"
 volumes:
  gitlab-config:
   driver: local
  gitlab-data:
   driver: local
From this docker-compose file definition we can see that two services are being instantiated: gitlab and runner1. Both of them should be running at all times (restart:always) and will use the official gitlab images gitlab-ce and gitlab-runner respectively. Volumes are mounted from the host operating system to the container and port 80 is exposed for HTTP access to the gitlab web interface. Several environment variables are defined and passed to the containers, including the gitlab root account password, the runner registration token as well as the runner executor which in this case is Docker. Once gitlab and the runner containers are instantiated and started, the runner will have to register with the gitlab instance using the token specified in this file. The GitLab runner implements several executors that can be used to run the builds and the pipeline in different scenarios such as: shell, SSH, Kubernetes, Parallels, VirtualBox, Docker, etc.
Since after instantiating the two containers there are extra steps needed to bring the GitLab instance online and register the runner, let’s combine all these steps in a setup.sh shell script. The shell script will run the “docker-compose up” command first and once GitLab CE becomes available, it reconfigures the external_url in /etc/gitlab/gitlab.rb to point to the correct IP address. Your environment will most certainly have a different IP address so make sure you edit the gitlab_host entry to reflect the IP address from your own setup. Once GitLab is reconfigured with the correct external_url, the runner will register with GitLab. The shell script below contains all the steps described so far.
#!/usr/bin/env bash

gitlab_host="http://192.168.0.148"
gitlab_wait_time=25
# prints colored text
success () {
    COLOR="92m"; # green
    STARTCOLOR="\e[$COLOR";
    ENDCOLOR="\e[0m";
    printf "$STARTCOLOR%b$ENDCOLOR" "done\n";
}

echo ""
printf "Launching Gitlab CE..."
docker-compose up -d 2> gitlab_setup.log
success

printf "Waiting for Gitlab CE to become available..."

until $(curl --output /dev/null --silent --head --fail ${gitlab_host}); do
    printf '.'
    sleep 10
done
success

printf "Configuring external URL for GitLab..."
docker-compose exec gitlab /bin/bash -c "echo external_url \'${gitlab_host}\' >> /etc/gitlab/gitlab.rb"
docker-compose exec gitlab gitlab-ctl reconfigure 2>&1 >> gitlab_setup.log
success

printf "Registering GitLab Runner, waiting ${gitlab_wait_time} second(s) for gitlab to become available..."
sleep ${gitlab_wait_time}
docker-compose exec runner1 gitlab-runner register 2>&1 >> gitlab_setup.log
success
Make sure the shell script is executable: chmod u+x ./setup.sh and then execute it with ./setup.sh. The gitlab_setup.log file that is generated contains all the logs and should be reviewed at the end of the script run. The two containers should be up and running:
![]()
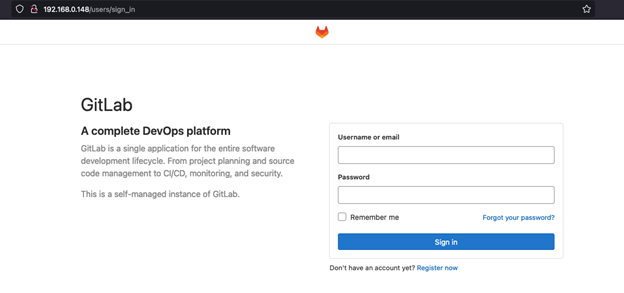
The GitLab web interface is available at http://192.168.0.148 in my case. Make sure you login with the root account and password C1sco12345 and create a new “developer” user account that will be used in the next steps.
Stay tuned for the next part
In part three of this blog series we will configure the GitLab CI/CD pipeline component. In the meantime, if you have any questions or comments, please leave me a comment in the section below.
Related resources
- Learn more about pyATS
- Learn more about Cisco Modeling Labs (CML)
We’d love to hear what you think. Ask a question or leave a comment below.
And stay connected with Cisco DevNet on social!
LinkedIn | Twitter @CiscoDevNet | Facebook | YouTube Channel


