
Background
Over the past few months I have been writing a series of blogs about the PnP process on Cisco DNA Center.
In the past, PnP was a standalone application within Cisco DNA Center, with a dedicated workflow for onboarding devices. Now, in the most recent 1.2.8 release, PnP has been integrated into the main provisioning screen. This blog documents this change.
In a following blog I will document the API changes. For those using the current PnP workflow approach, the APIs are still available, but there is no UI for creating PnP workflows.
Key Changes
The changes in PnP are illustrated below
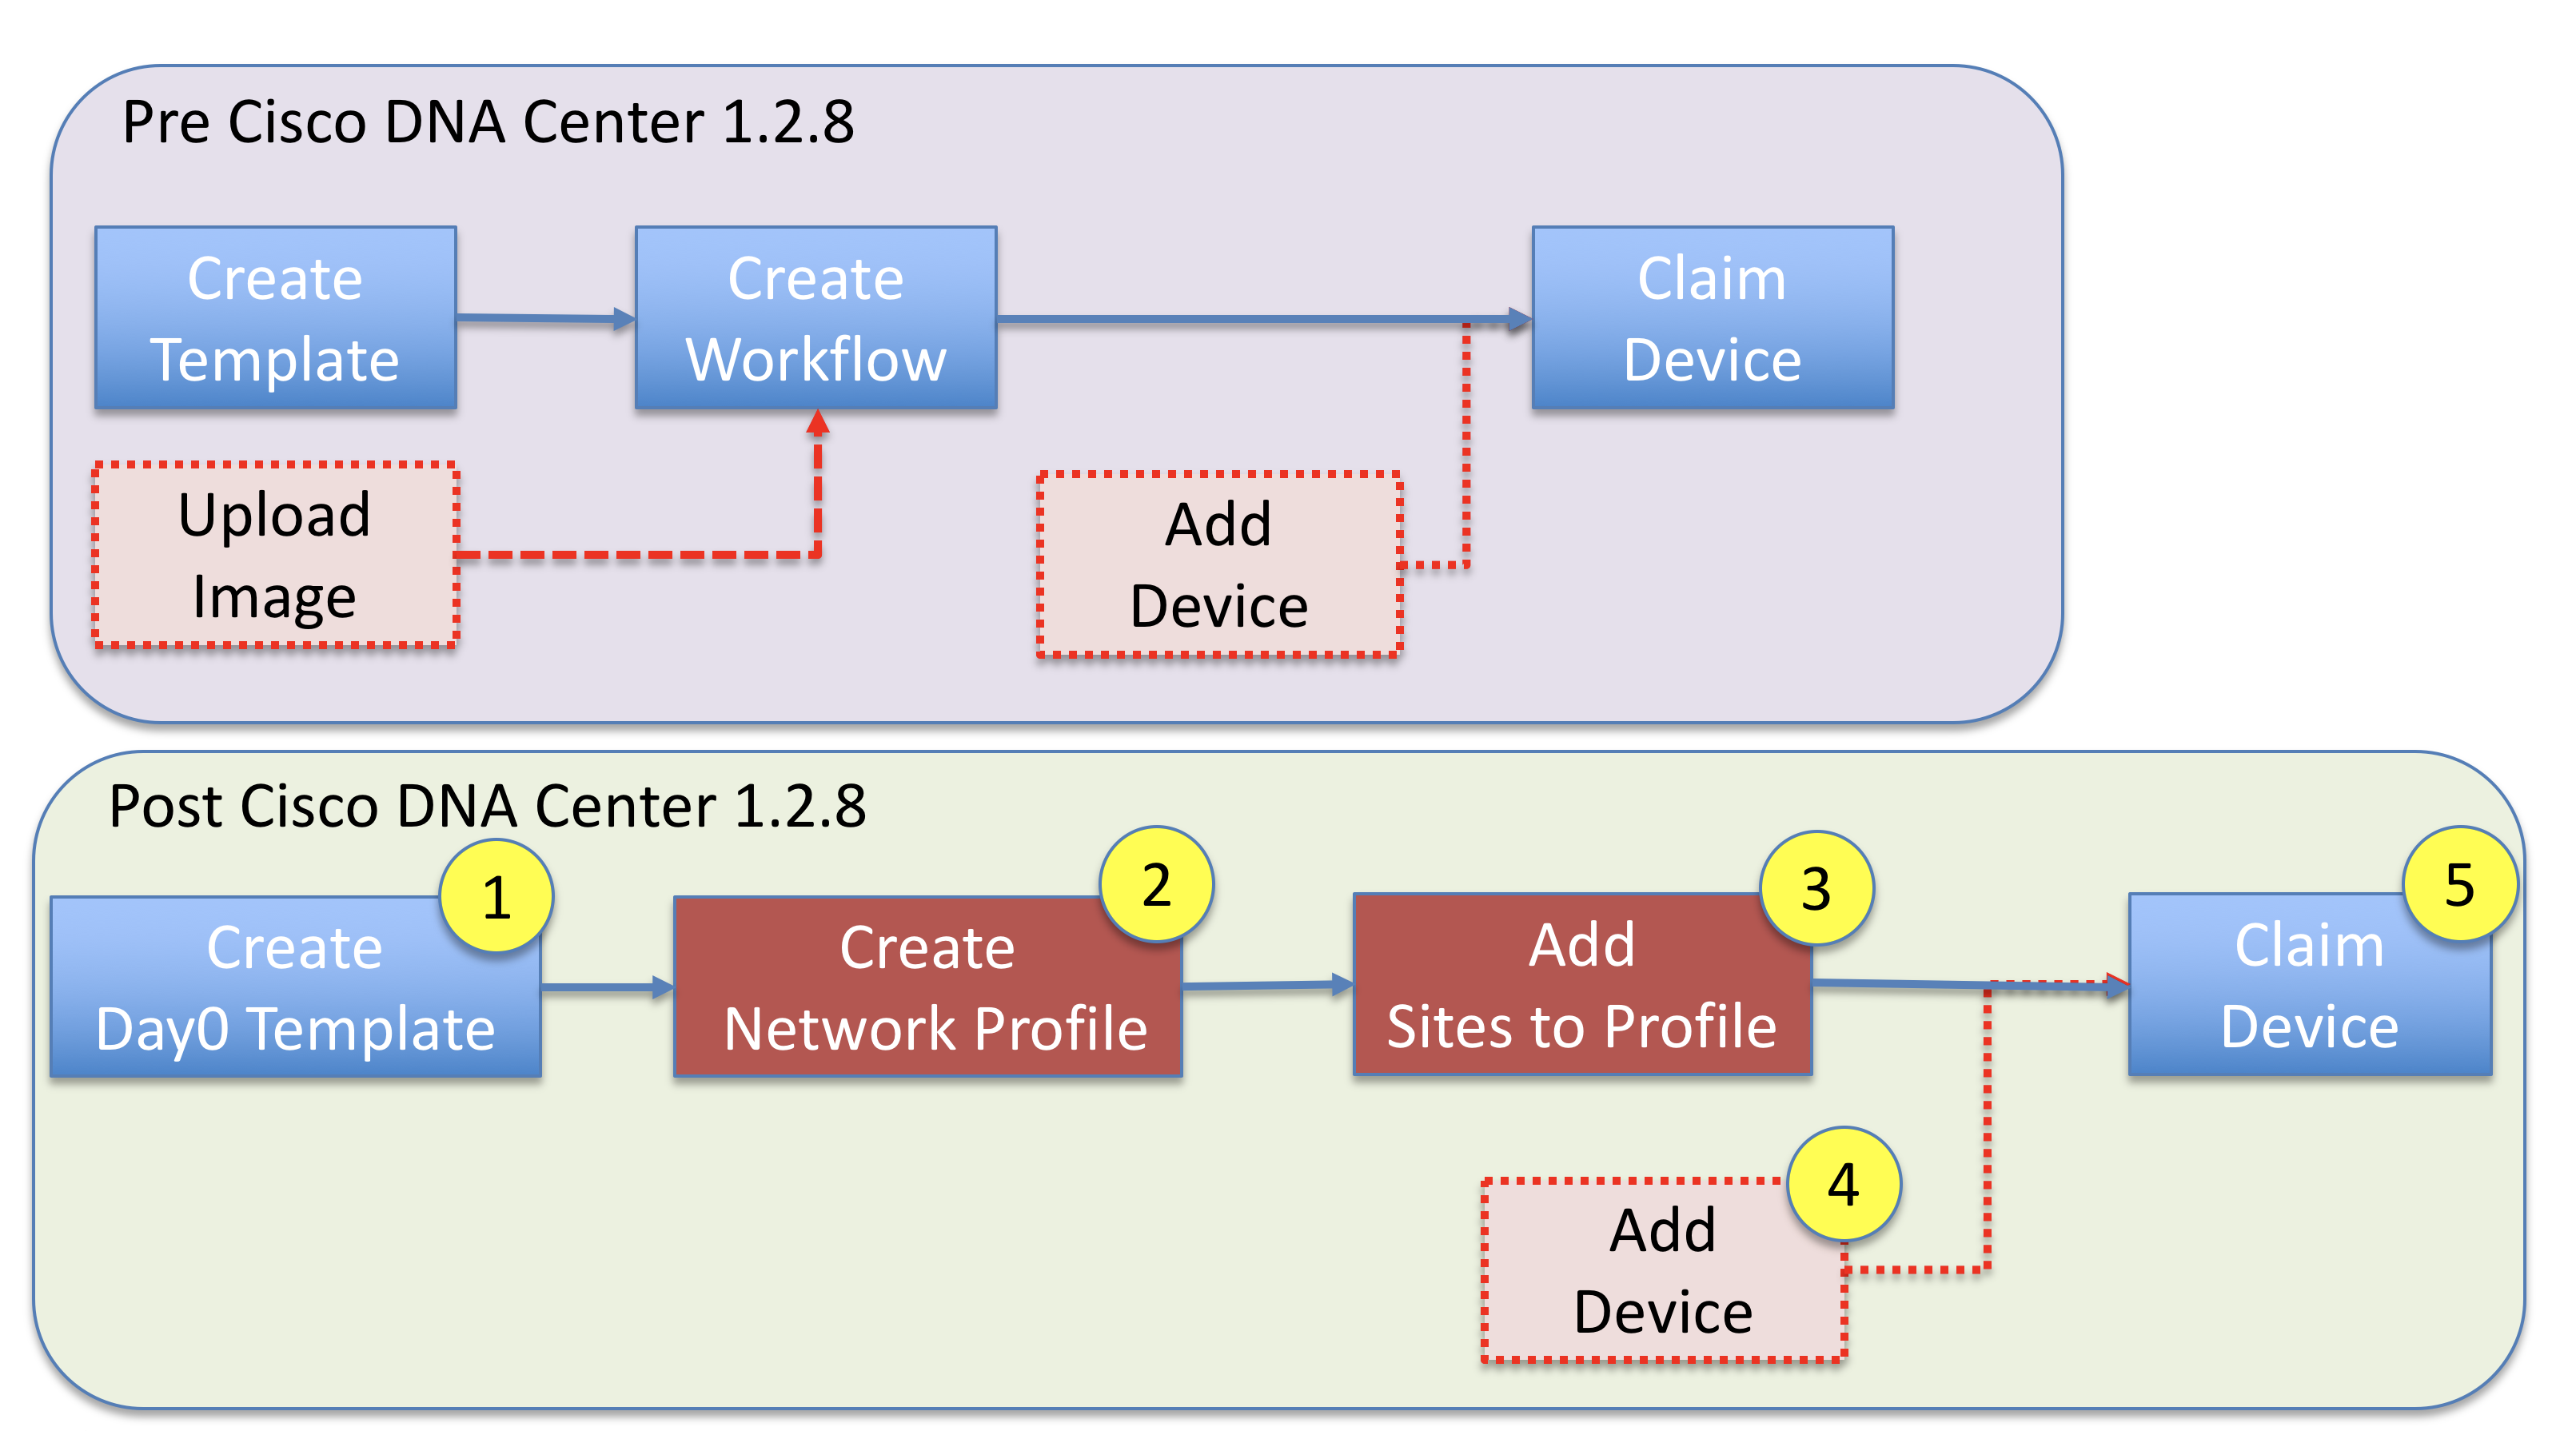
The key changes are:
- PnP application has been removed and PnP appears as a tab under “Provisioning”.
- PnP Workflow is replaced by a network-profile which is assigned to a site
- When a device in onboarded, it is added to a site.
- Cisco DNAC credentials for SSH and SNMP are automatically applied to the device. This simplifies the Day0 template.
- Day0 Templates are defined in the Onboarding template folder and are assigned to a network-profile (which in turn is bound to a site)
- Golden images (which can be assigned to a site, or globally) can be used to upgrade the operating system of the device. This step is optional.
- Provisioned devices cannot be deleted from PnP tab. They need to be deleted from the inventory (you will get a warning to reflect this).
The rest of the blog will go through these steps in detail.
Step 1 – Create Day0 Template
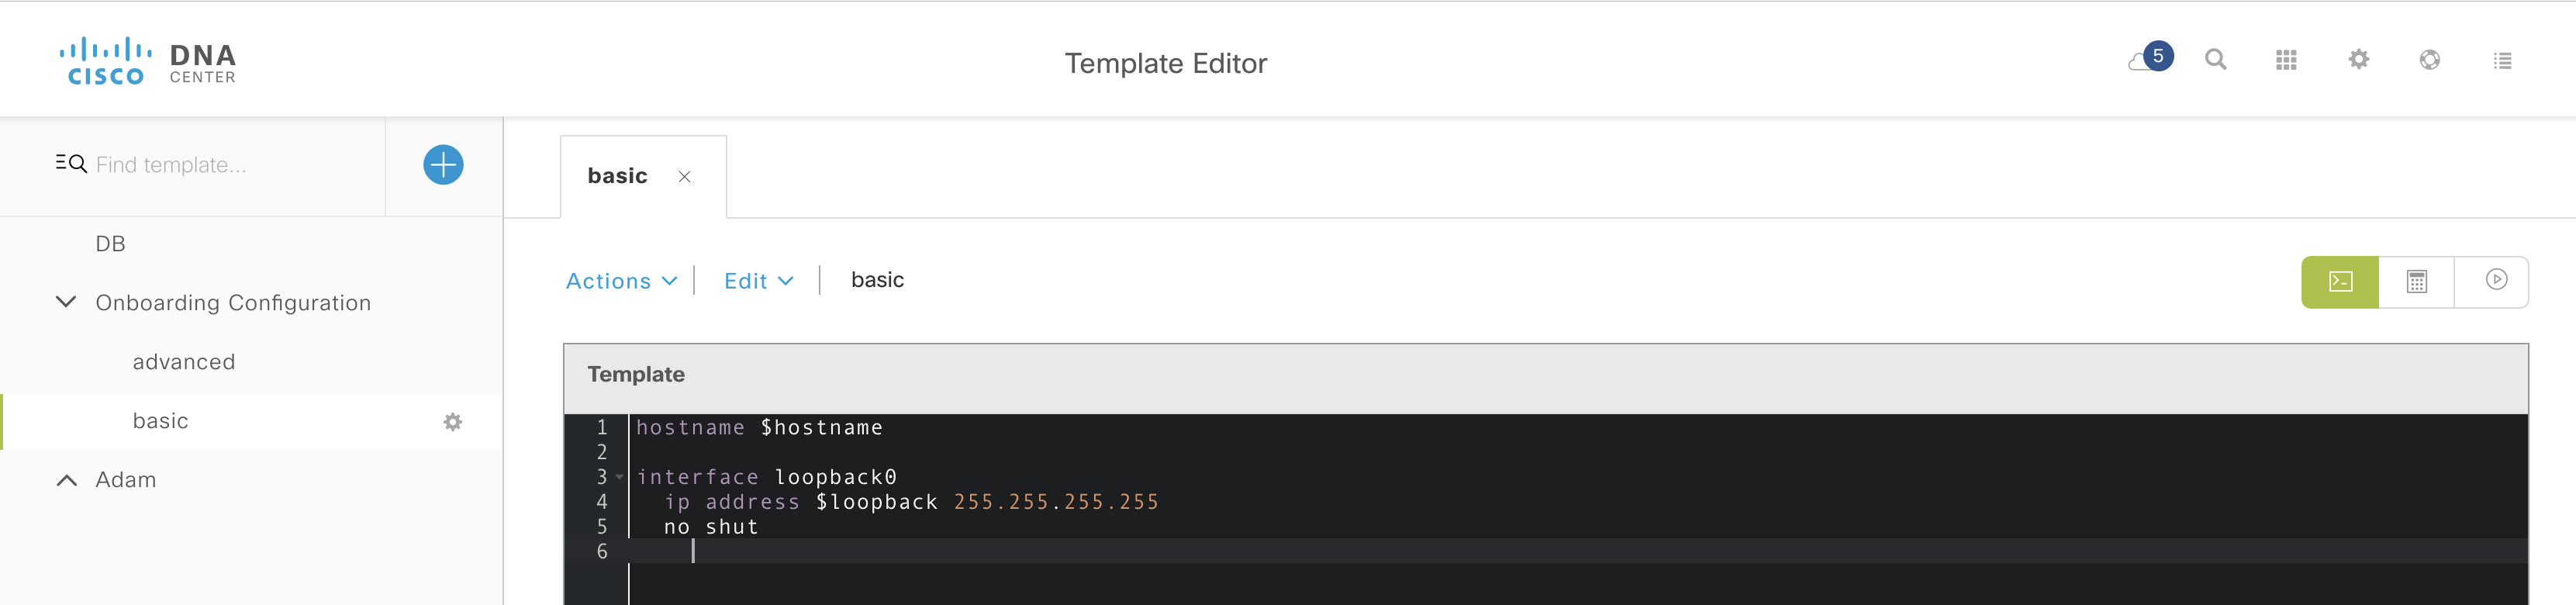
The day0 template is configured using the template editor as before. The two major changes are:
- The day0 template needs to be in the “Onboarding Configuration” folder.
- The template does not need to include device credentials or site specific settings, as these are added automatically as part of the provisioning process.
Here is an example of a very simple template. Make sure you both save AND commit the template. The template below has two variables, $hostname and $loopback.
Step 2 – Create a Network Profile
The next step is to create a network profile. This is a major part of the integration of the day0 process. In the past, Day-N templates were assigned using network profiles.
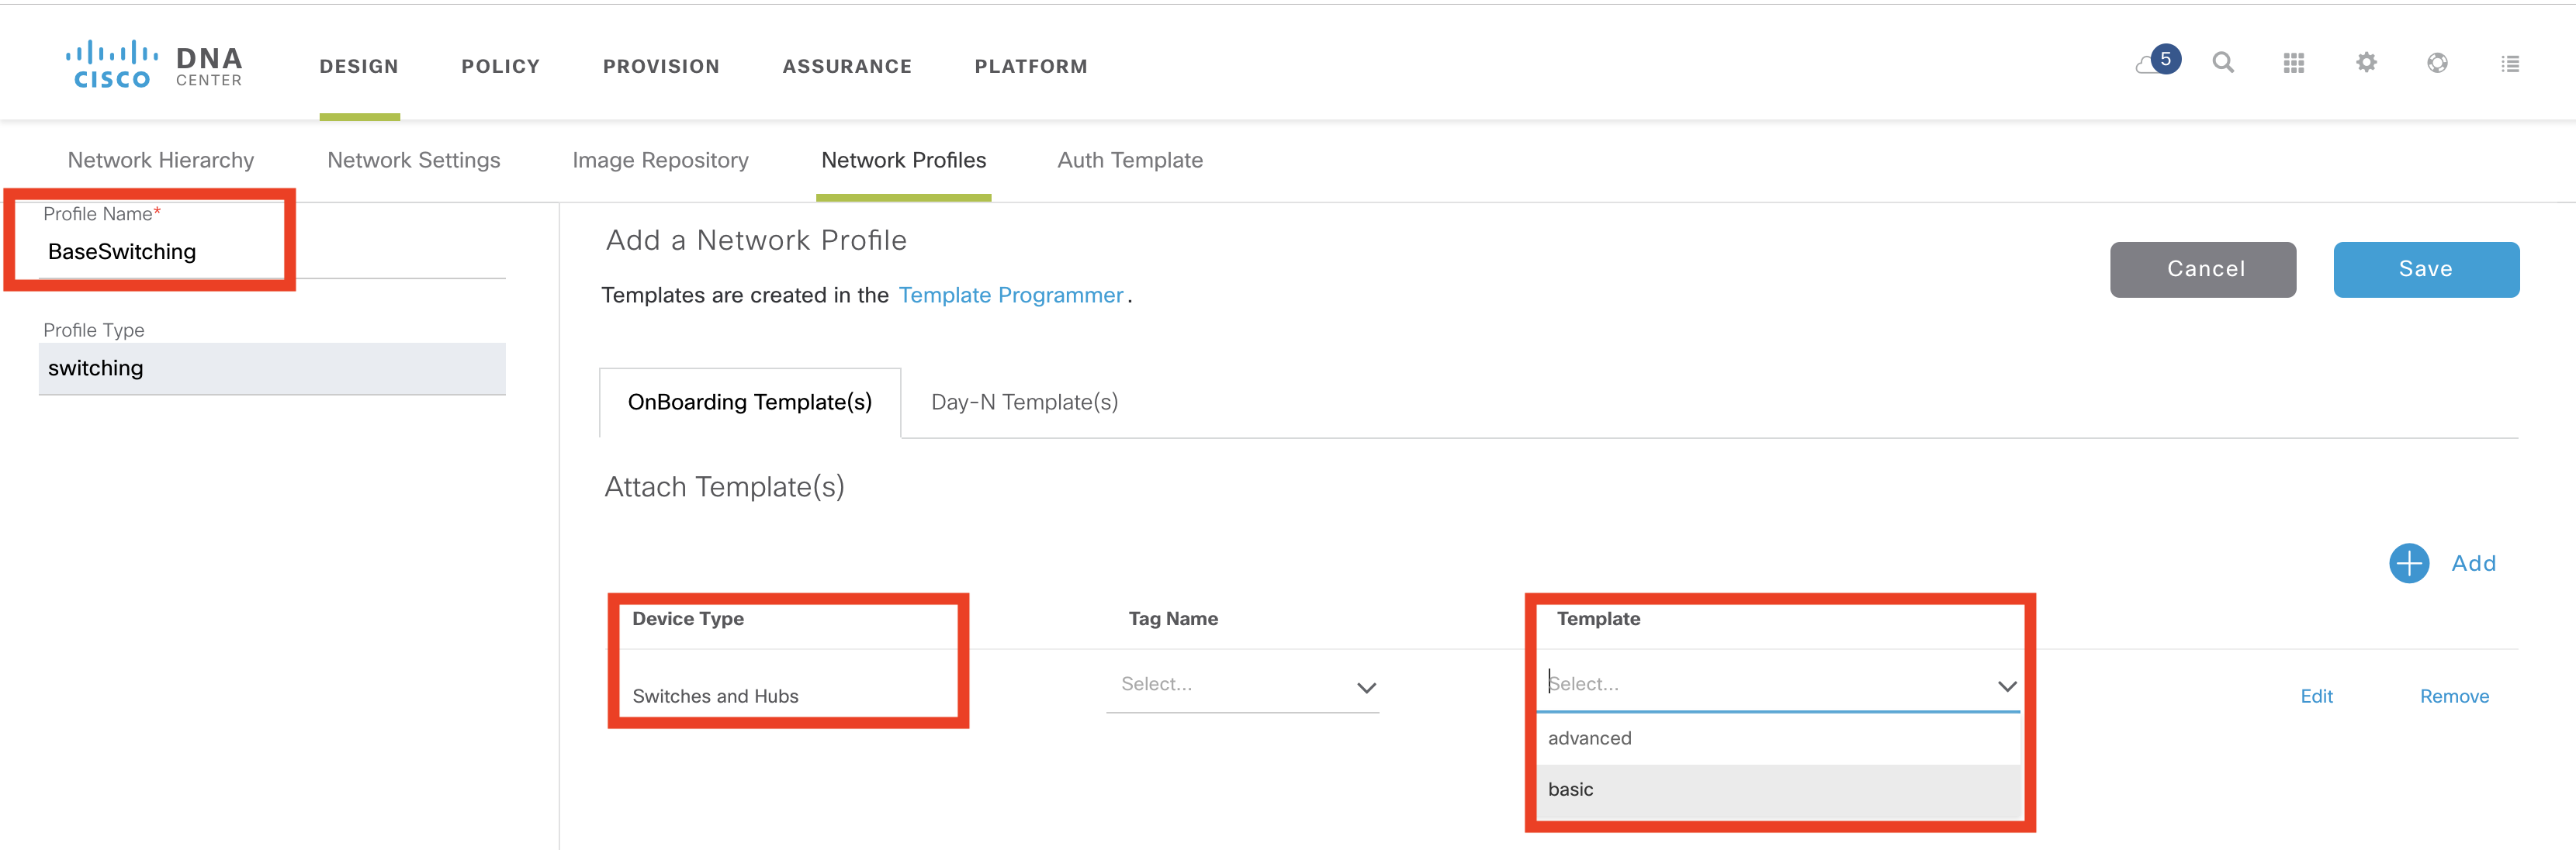
“Design -> Network Profiles” and the click on “Add Profile”. For this example I created a “Switching” profile.

Next provide a name for the profile (I choose “BaseSwitching”), the device type “Switches and Hubs” and choose the onboarding template defined in Step 1.
It is possible to define multiple Day0 templates as and the second tab allows selection of Day-N templates. Day-N templates are not applied during PnP, but during the provisioning process.
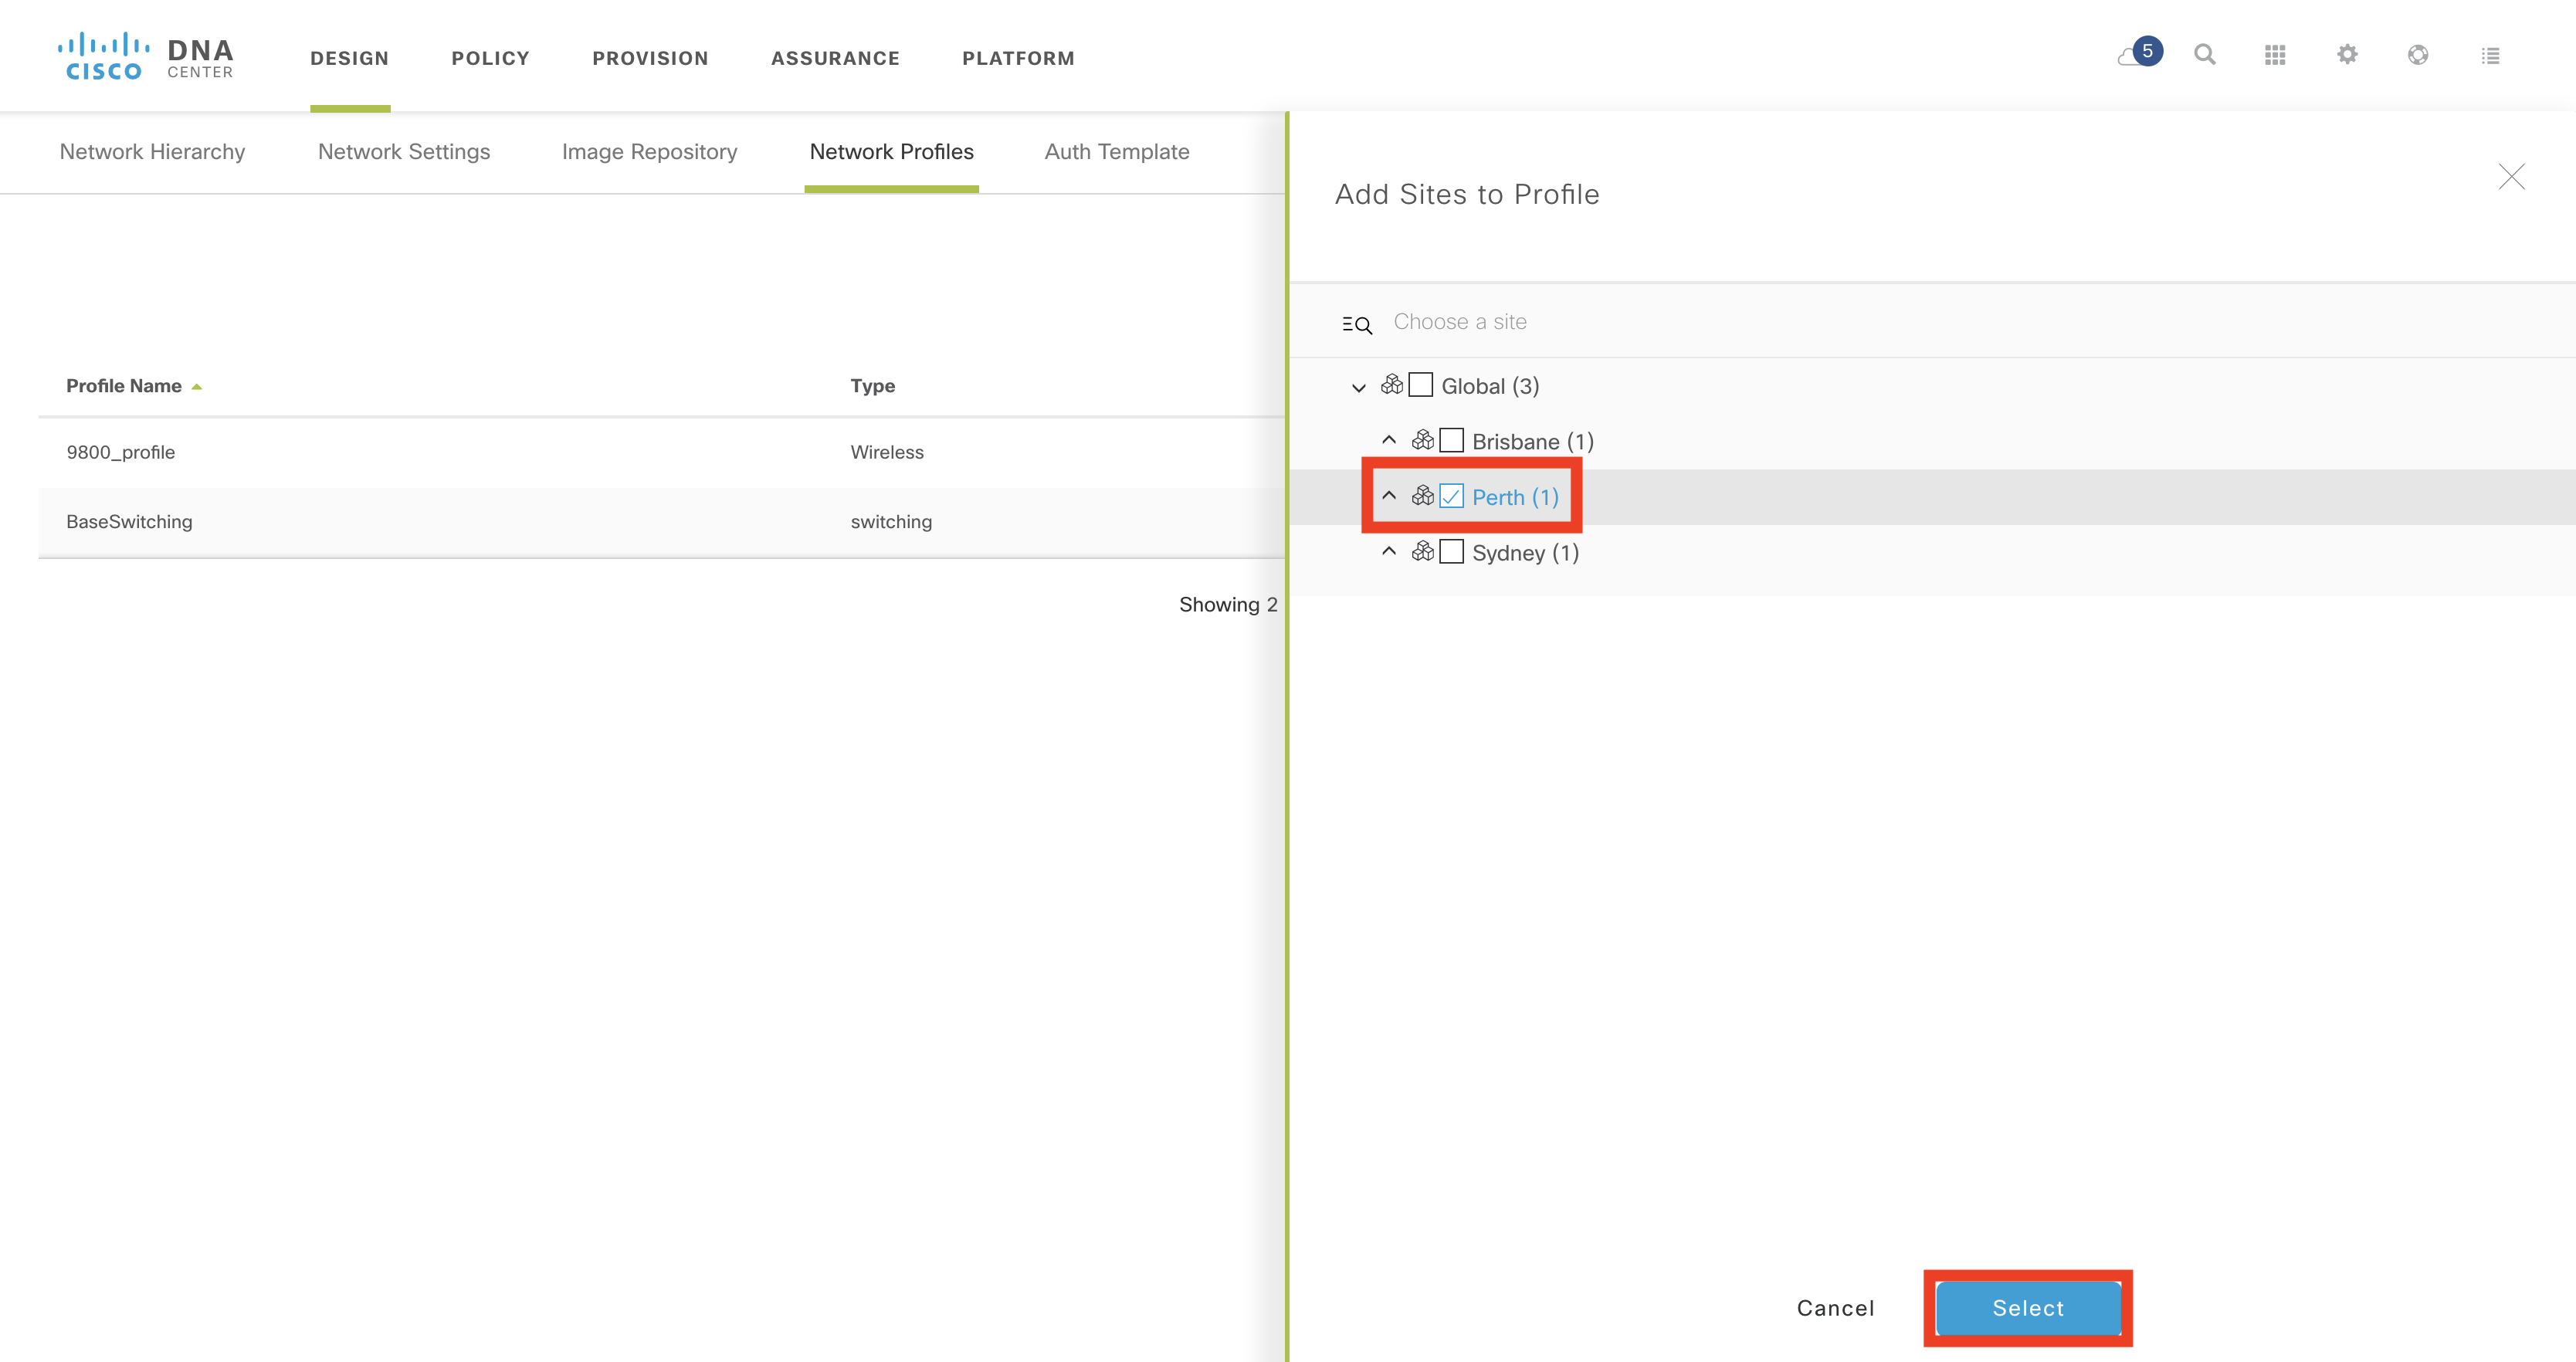
Step 3 – Assign Sites to Network Profile
Once the Network Profile has been created, sites need to be assigned to it. Click on the “Assign Site” link for the profile.
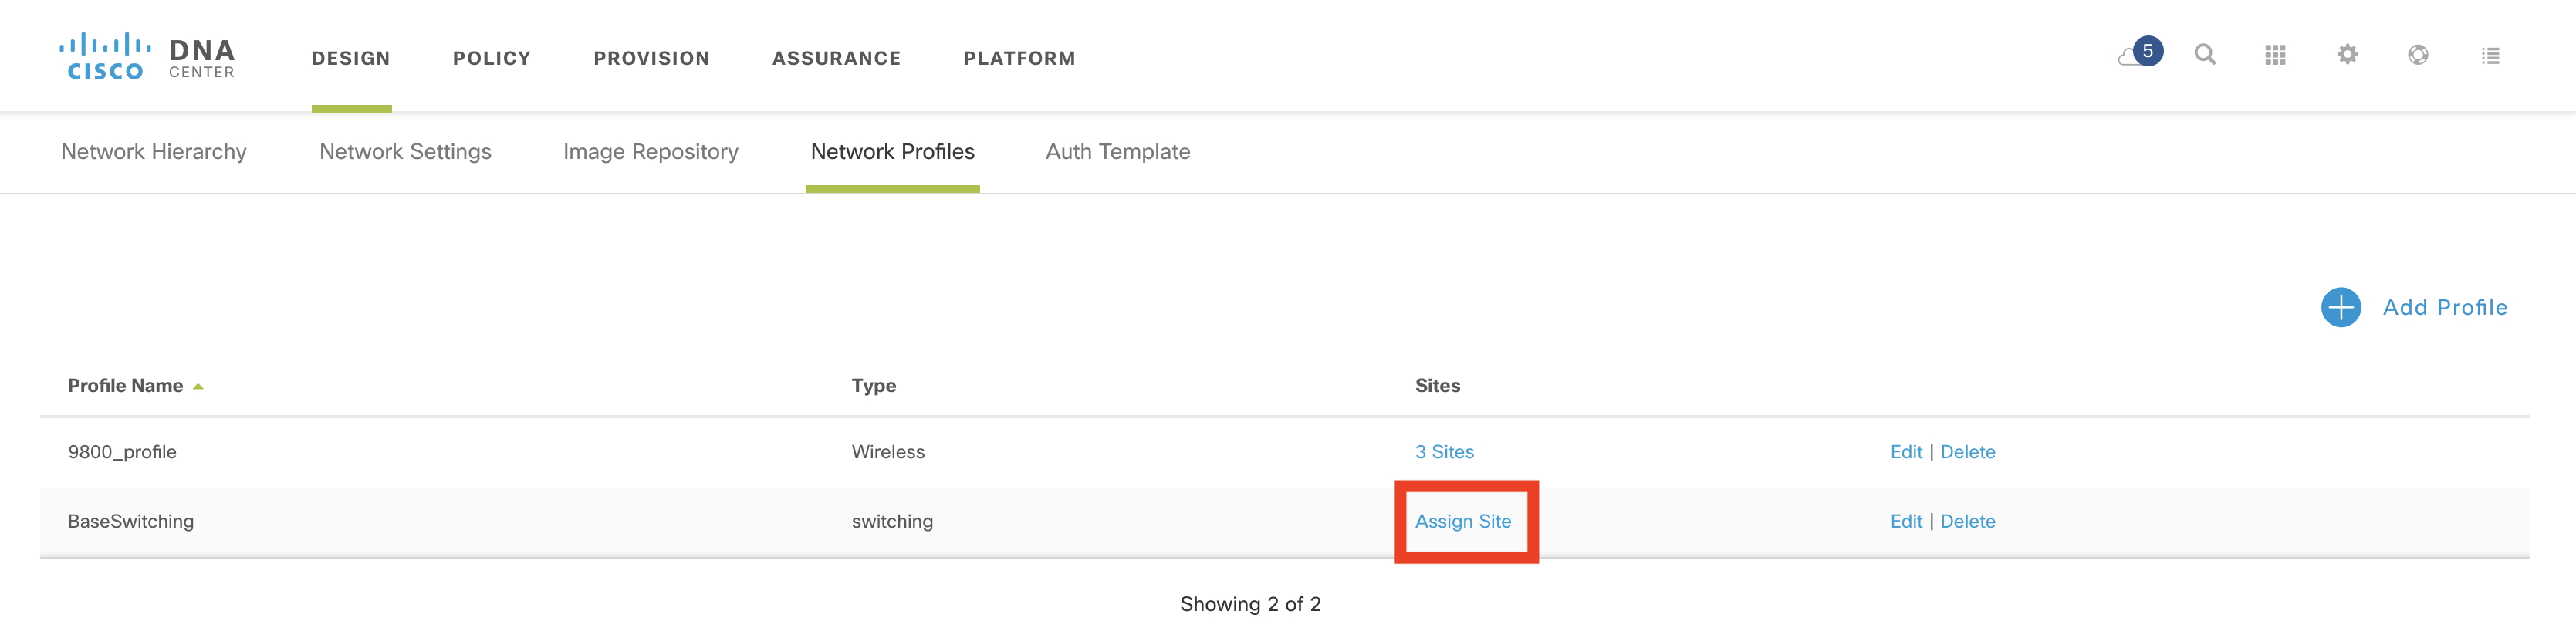
A list of sites will appear. You can select as many sites as you like. In this example I have selected the “Perth” hierarchy. This includes all buildings and floors in the Perth location.
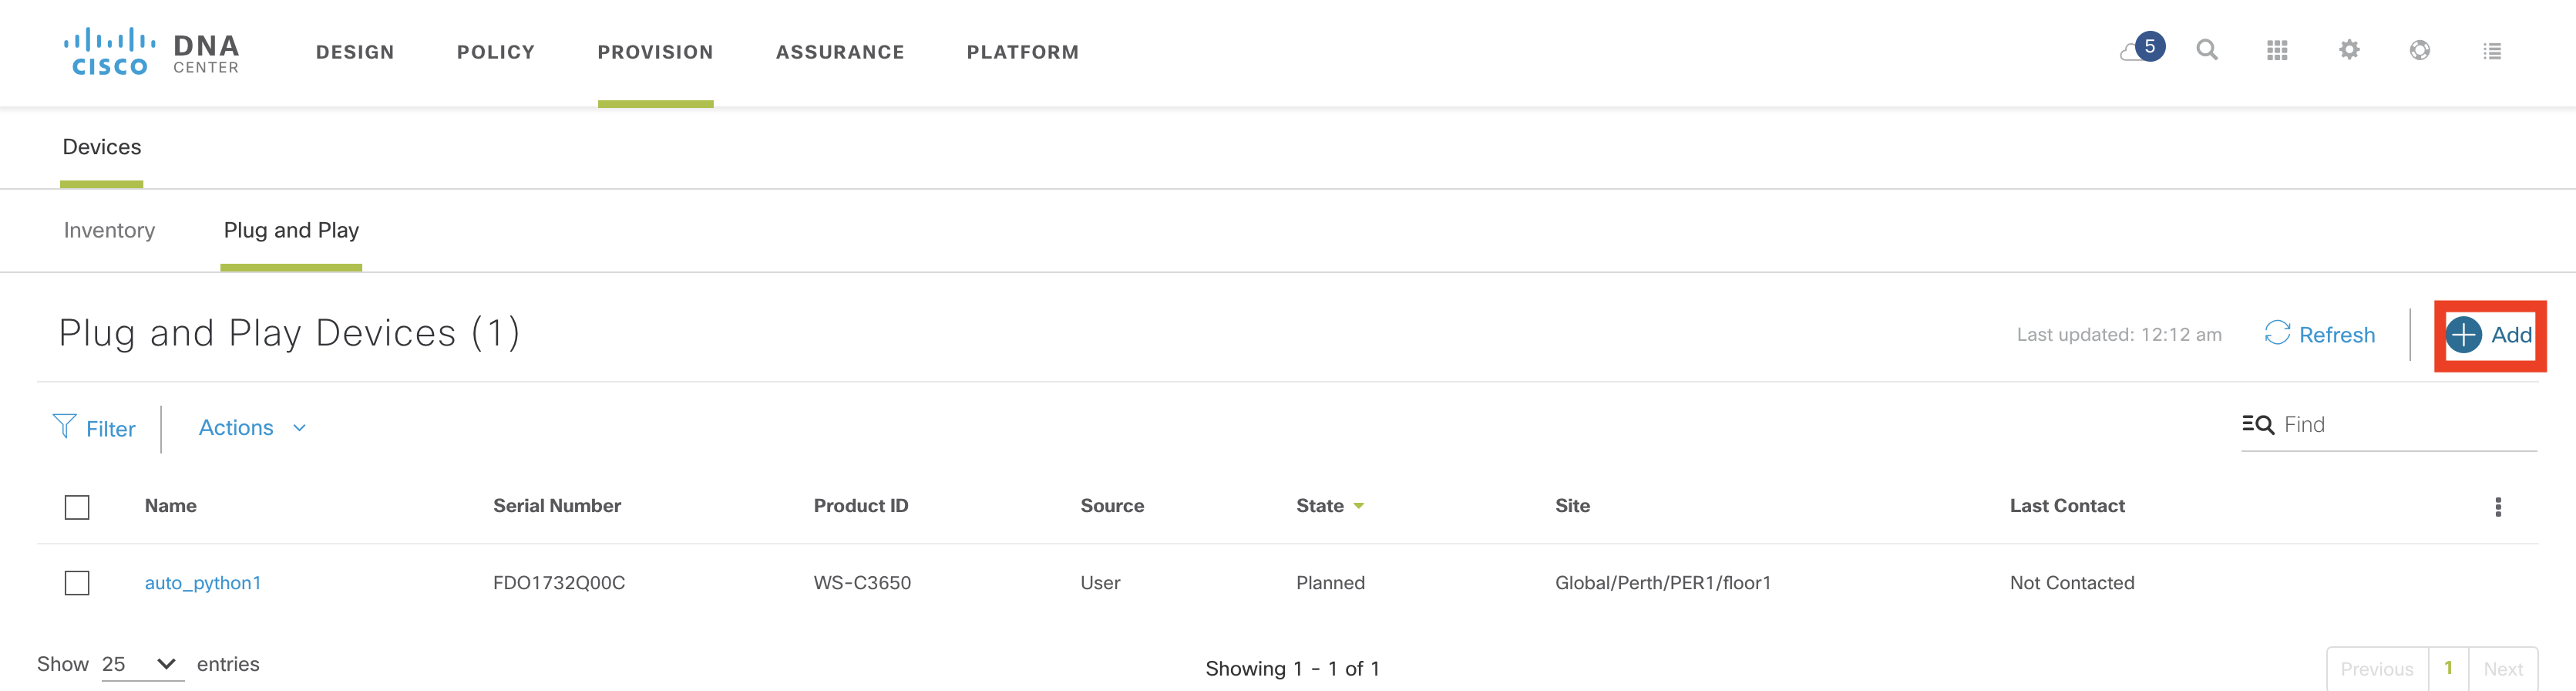
Step 4 – Add Device
Technically, this step is optional as a device can be “pre-provisioned” where a device is added prior to being connected, or “unclaimed” where the device contacts the controller as part of the PnP discovery process (and there is no matching PnP rule). This is identical to earlier versions of Cisco DNA Center.
In this example, I am going to add a device, then claim it. Go to “Provision -> Plug and Play”. The select the “Add” button.
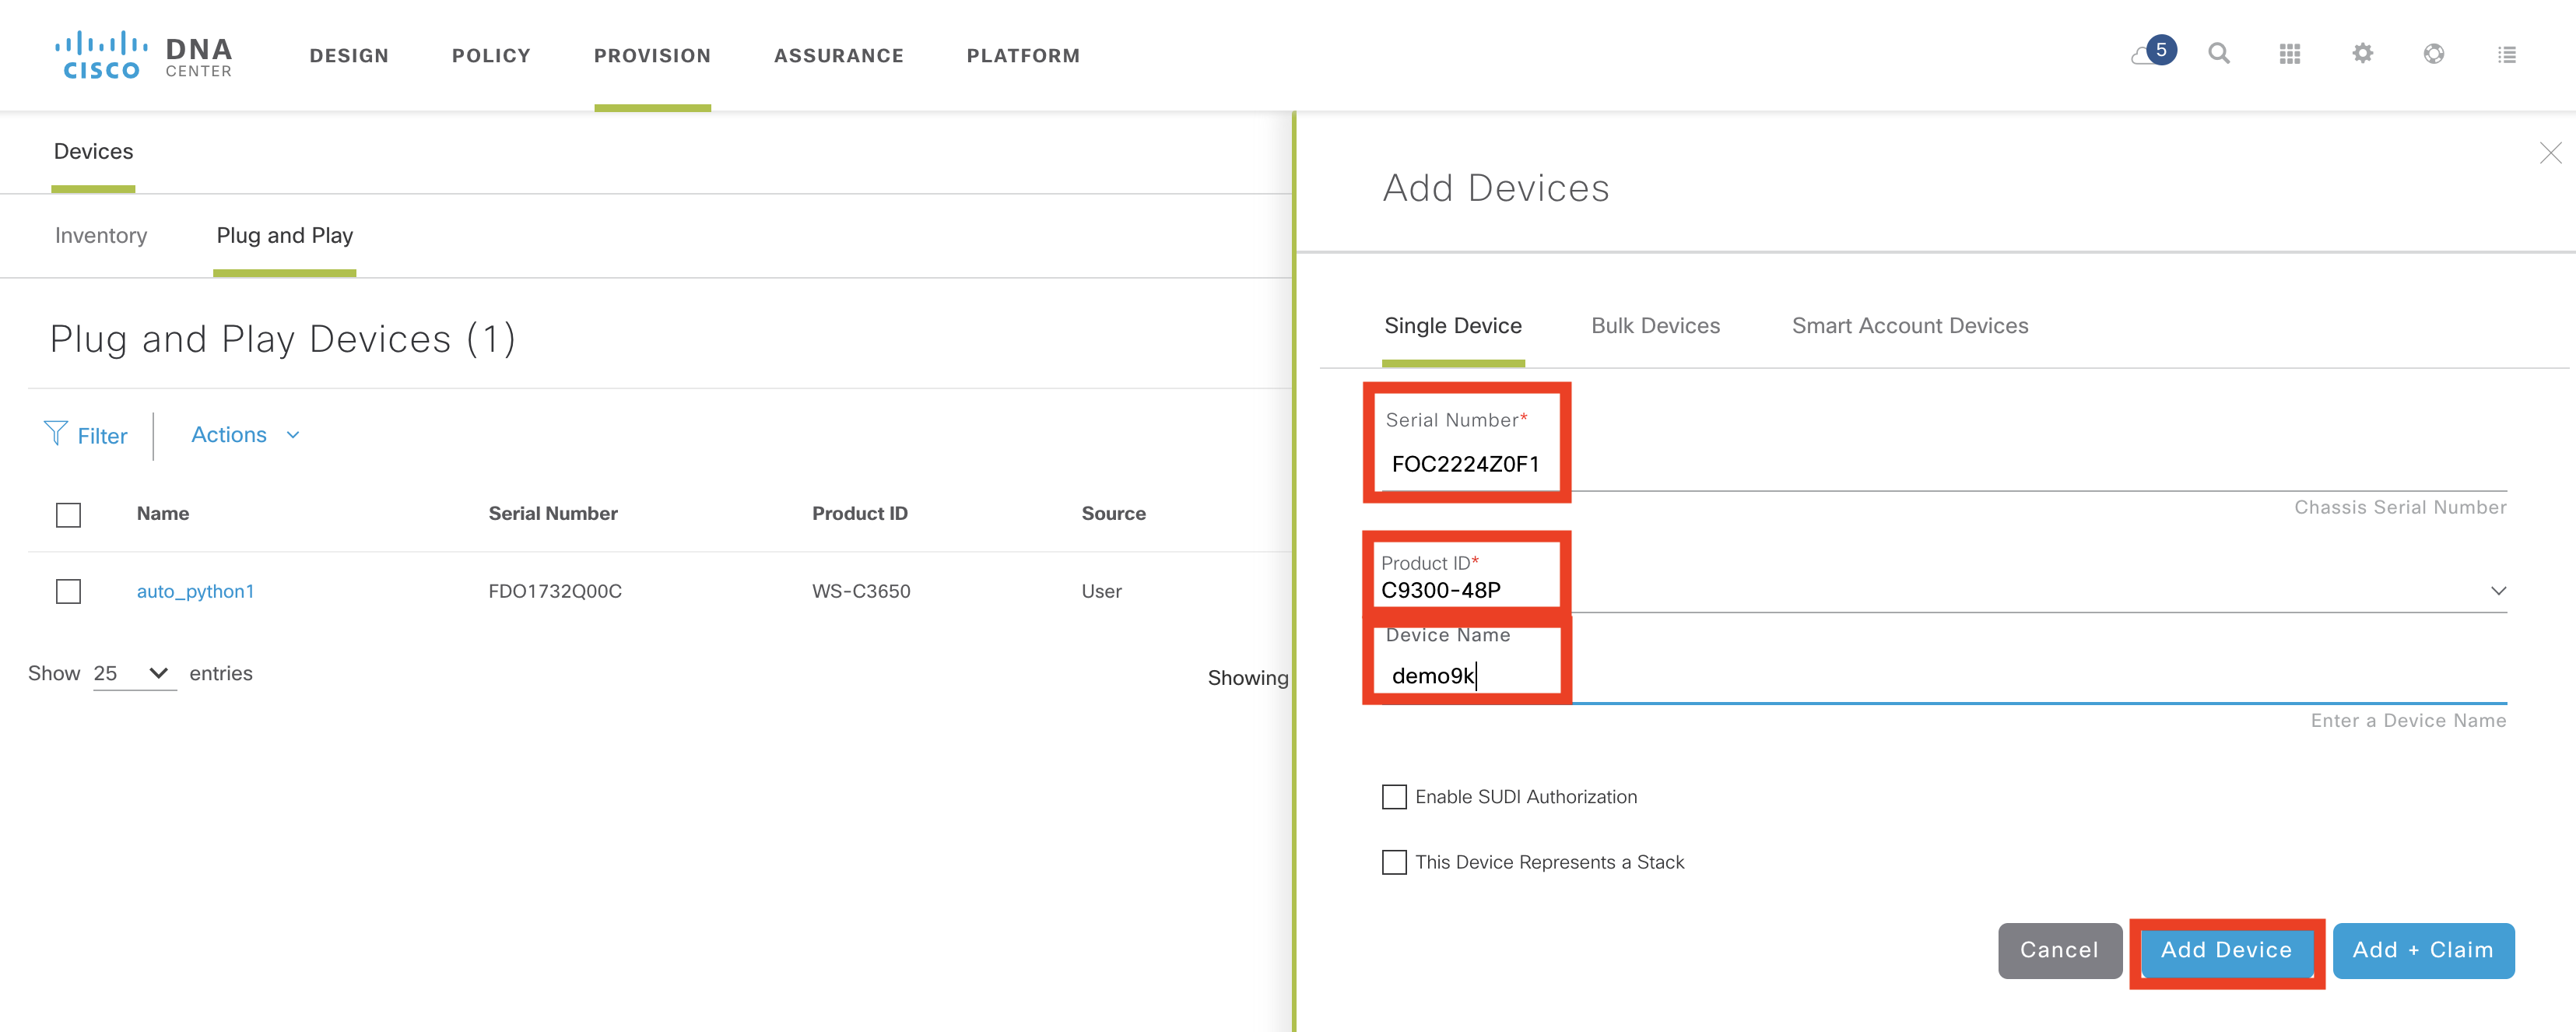
Now provide a serial number, a productId and a device name. In this example I am deliberately separating “Add” and the “Add + Claim”
The device will now appear as unclaimed in the Plug and Play list.
In the screen shot above, you can see the option to bulk upload devices and sync with a smart account.
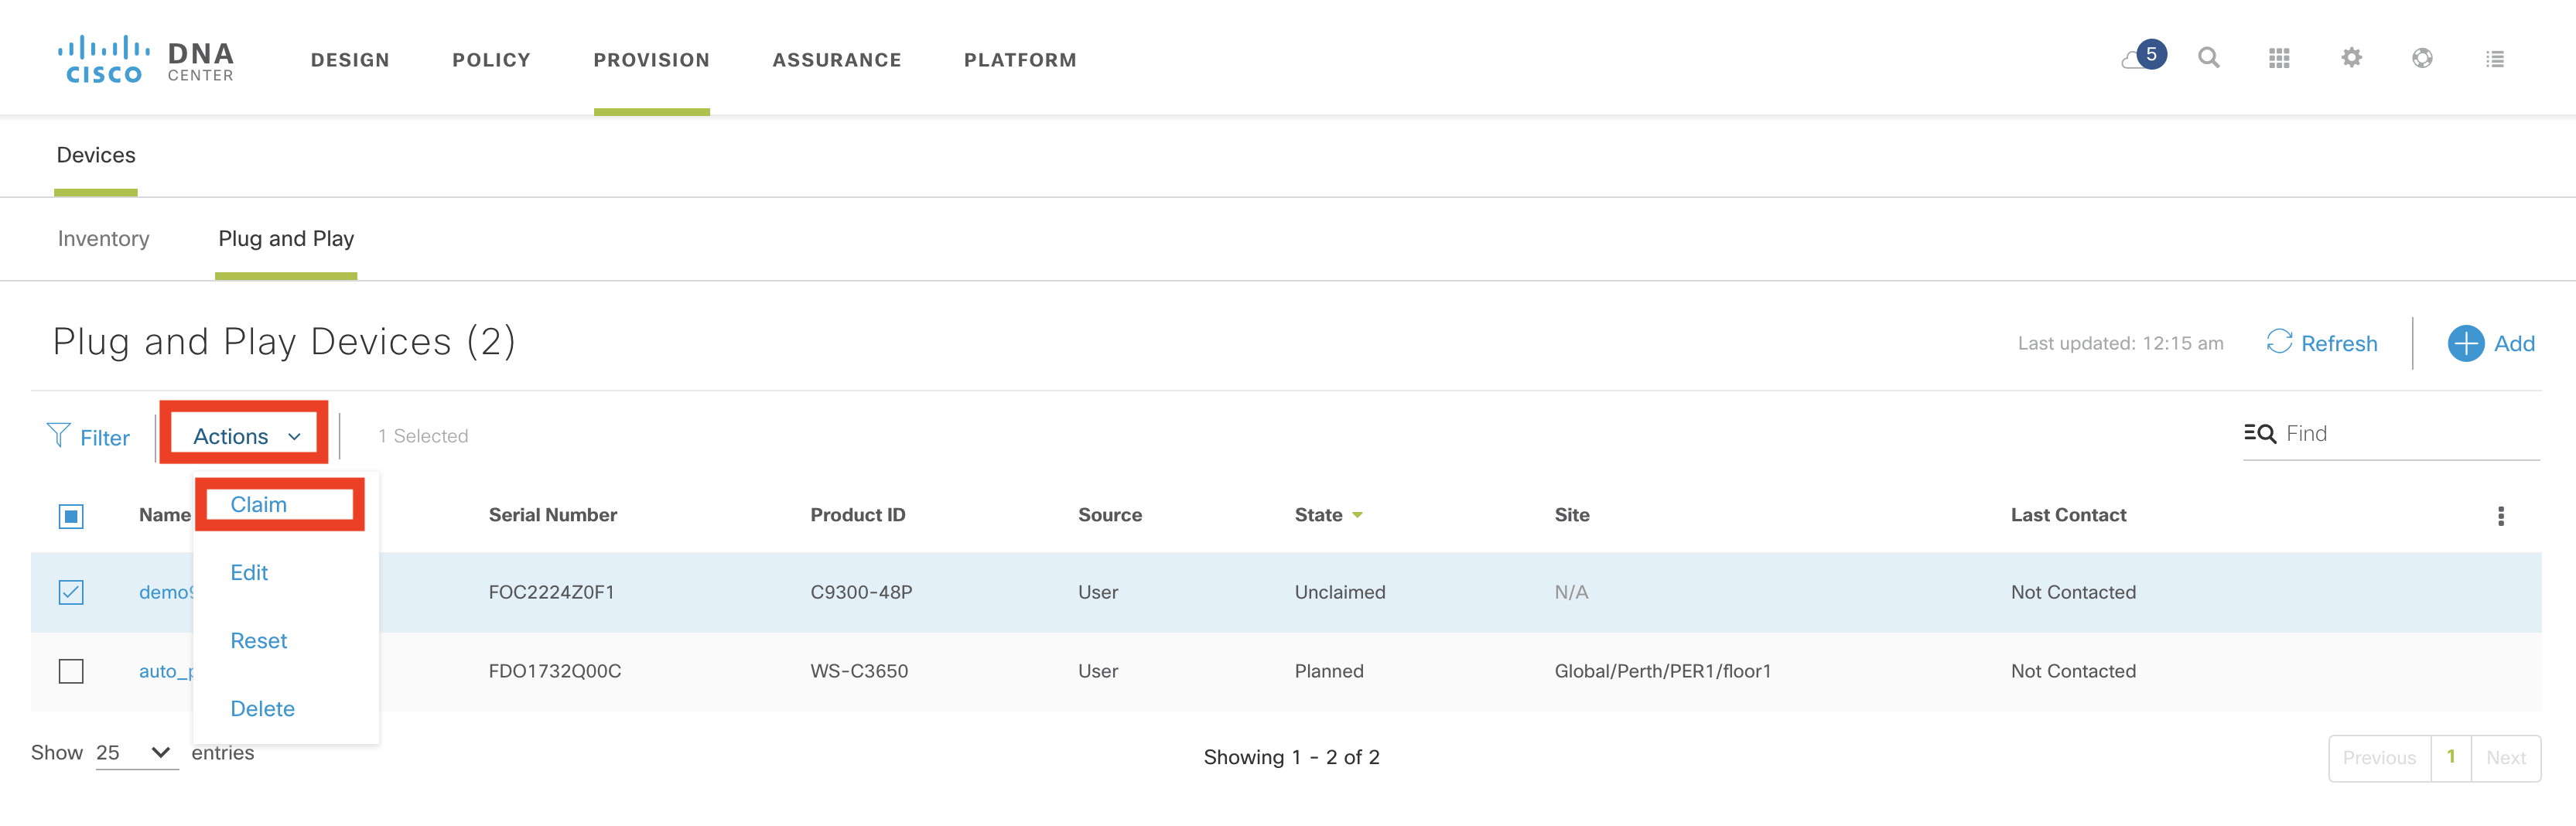
Step 5 – Claim the Device
The final step is to claim the device. This is similar to the earlier process,
First select the device added in Step 4. Then click on “Actions -> Claim”.
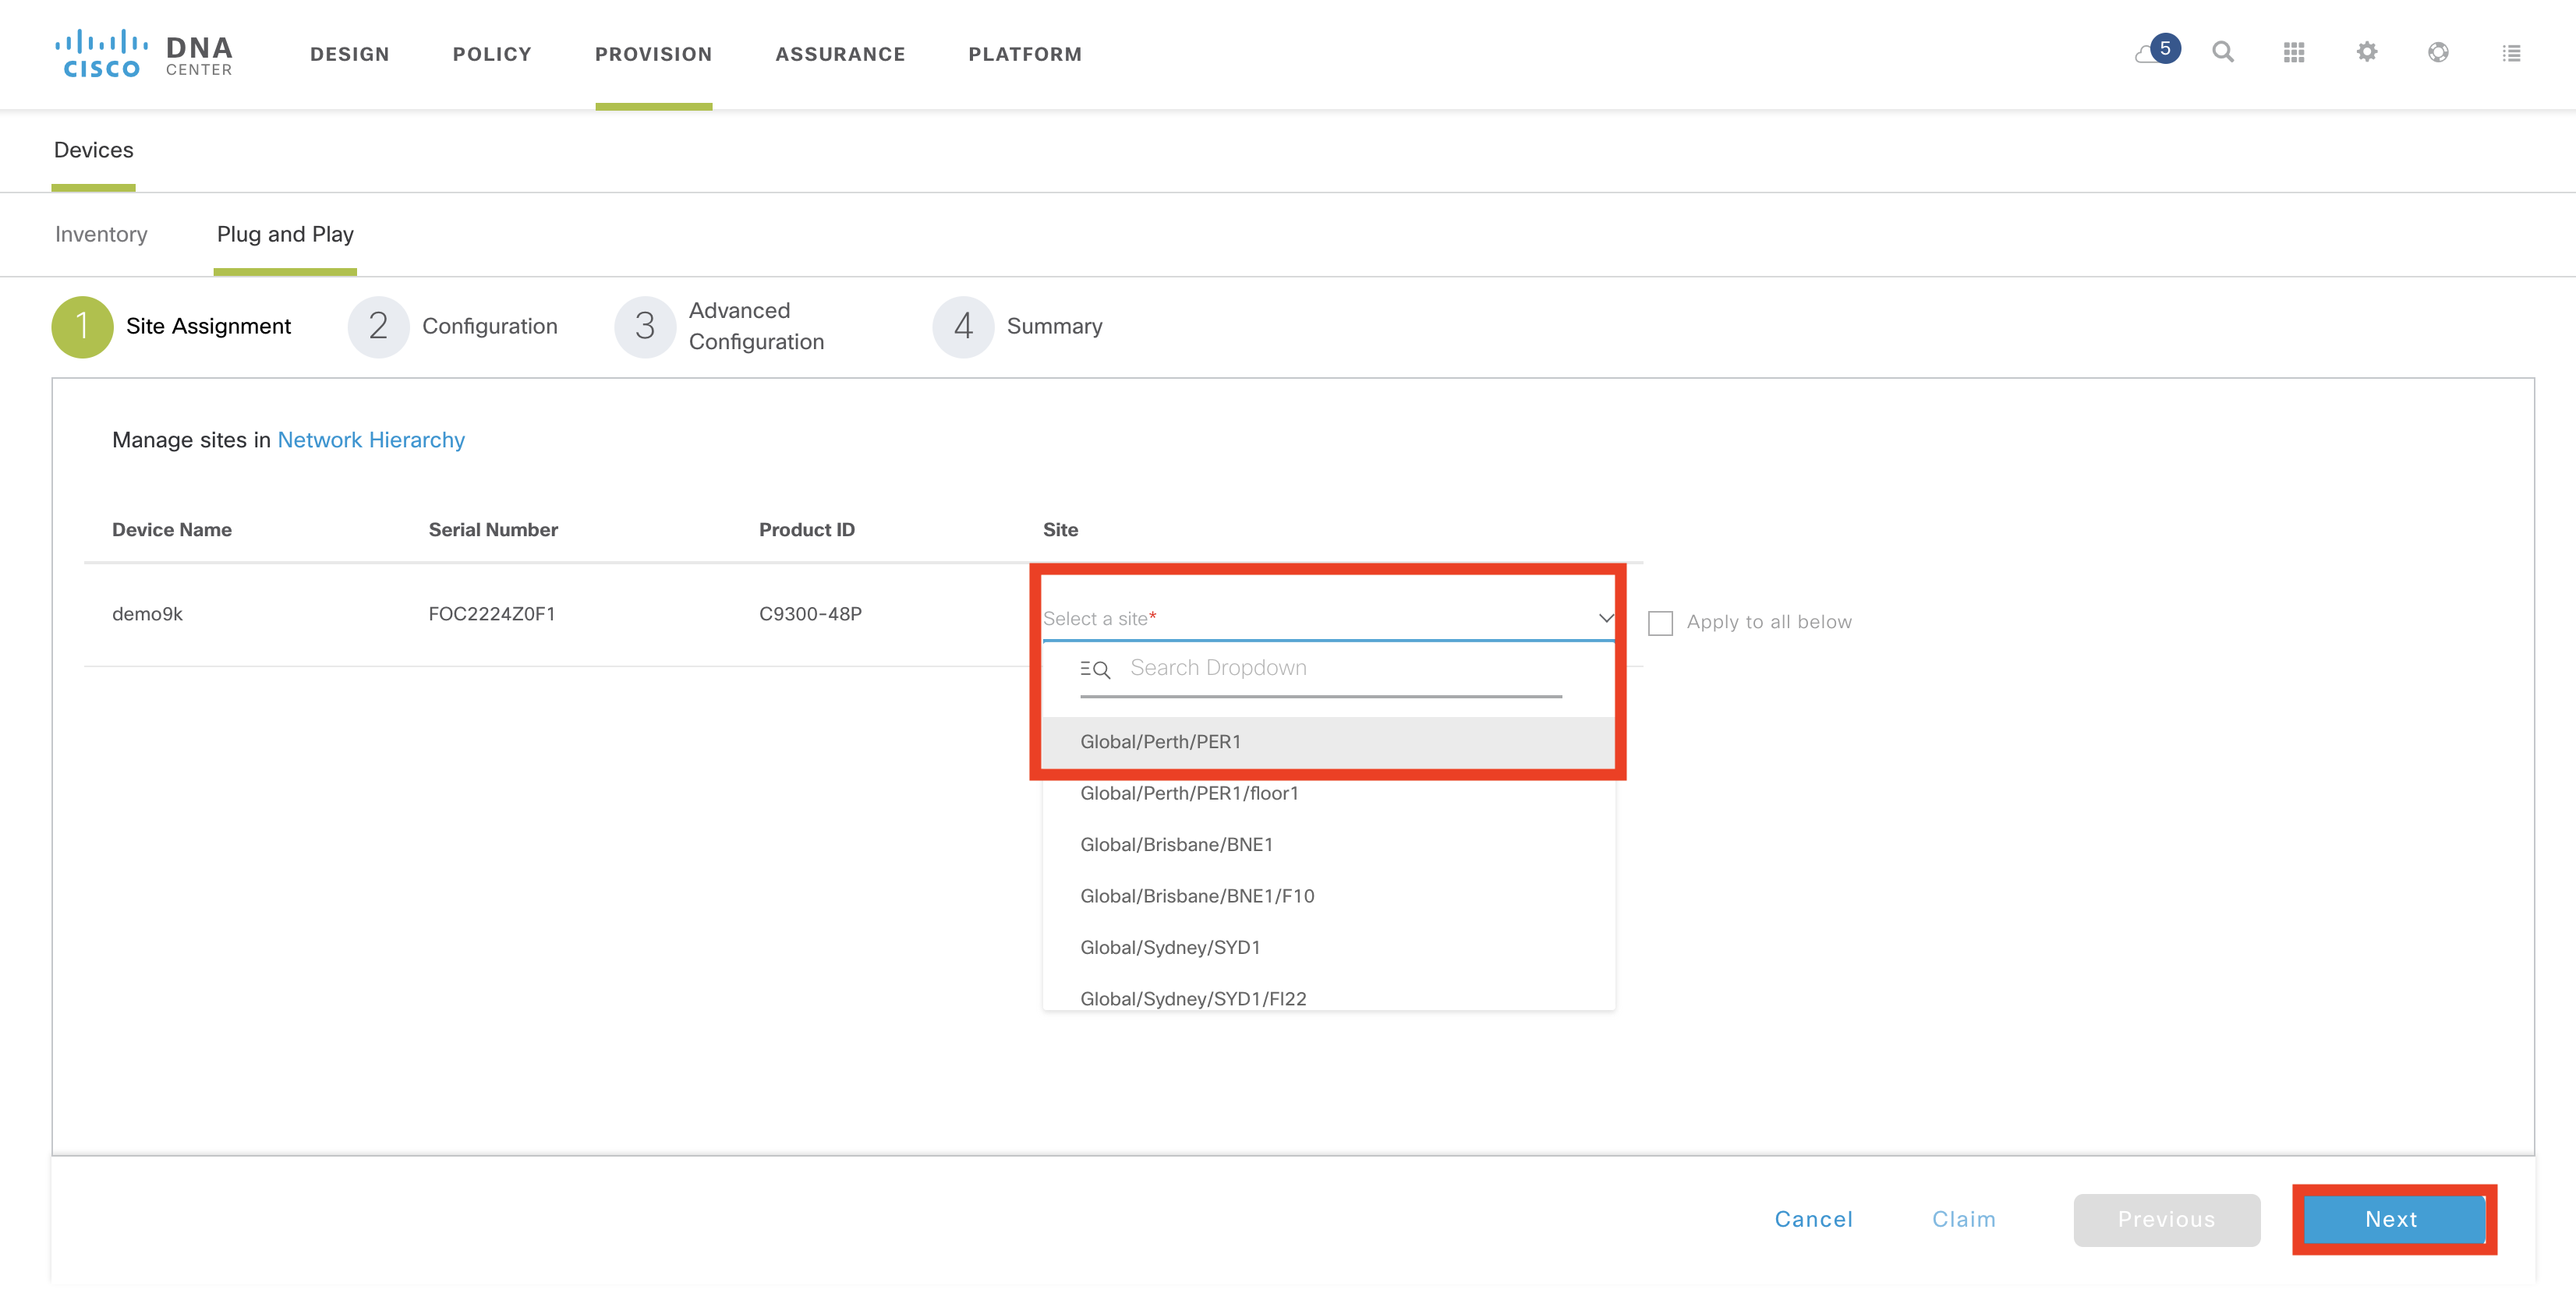
Now select a site from the list. In this example, I am selecting Global/Perth/PER1. Click Next.
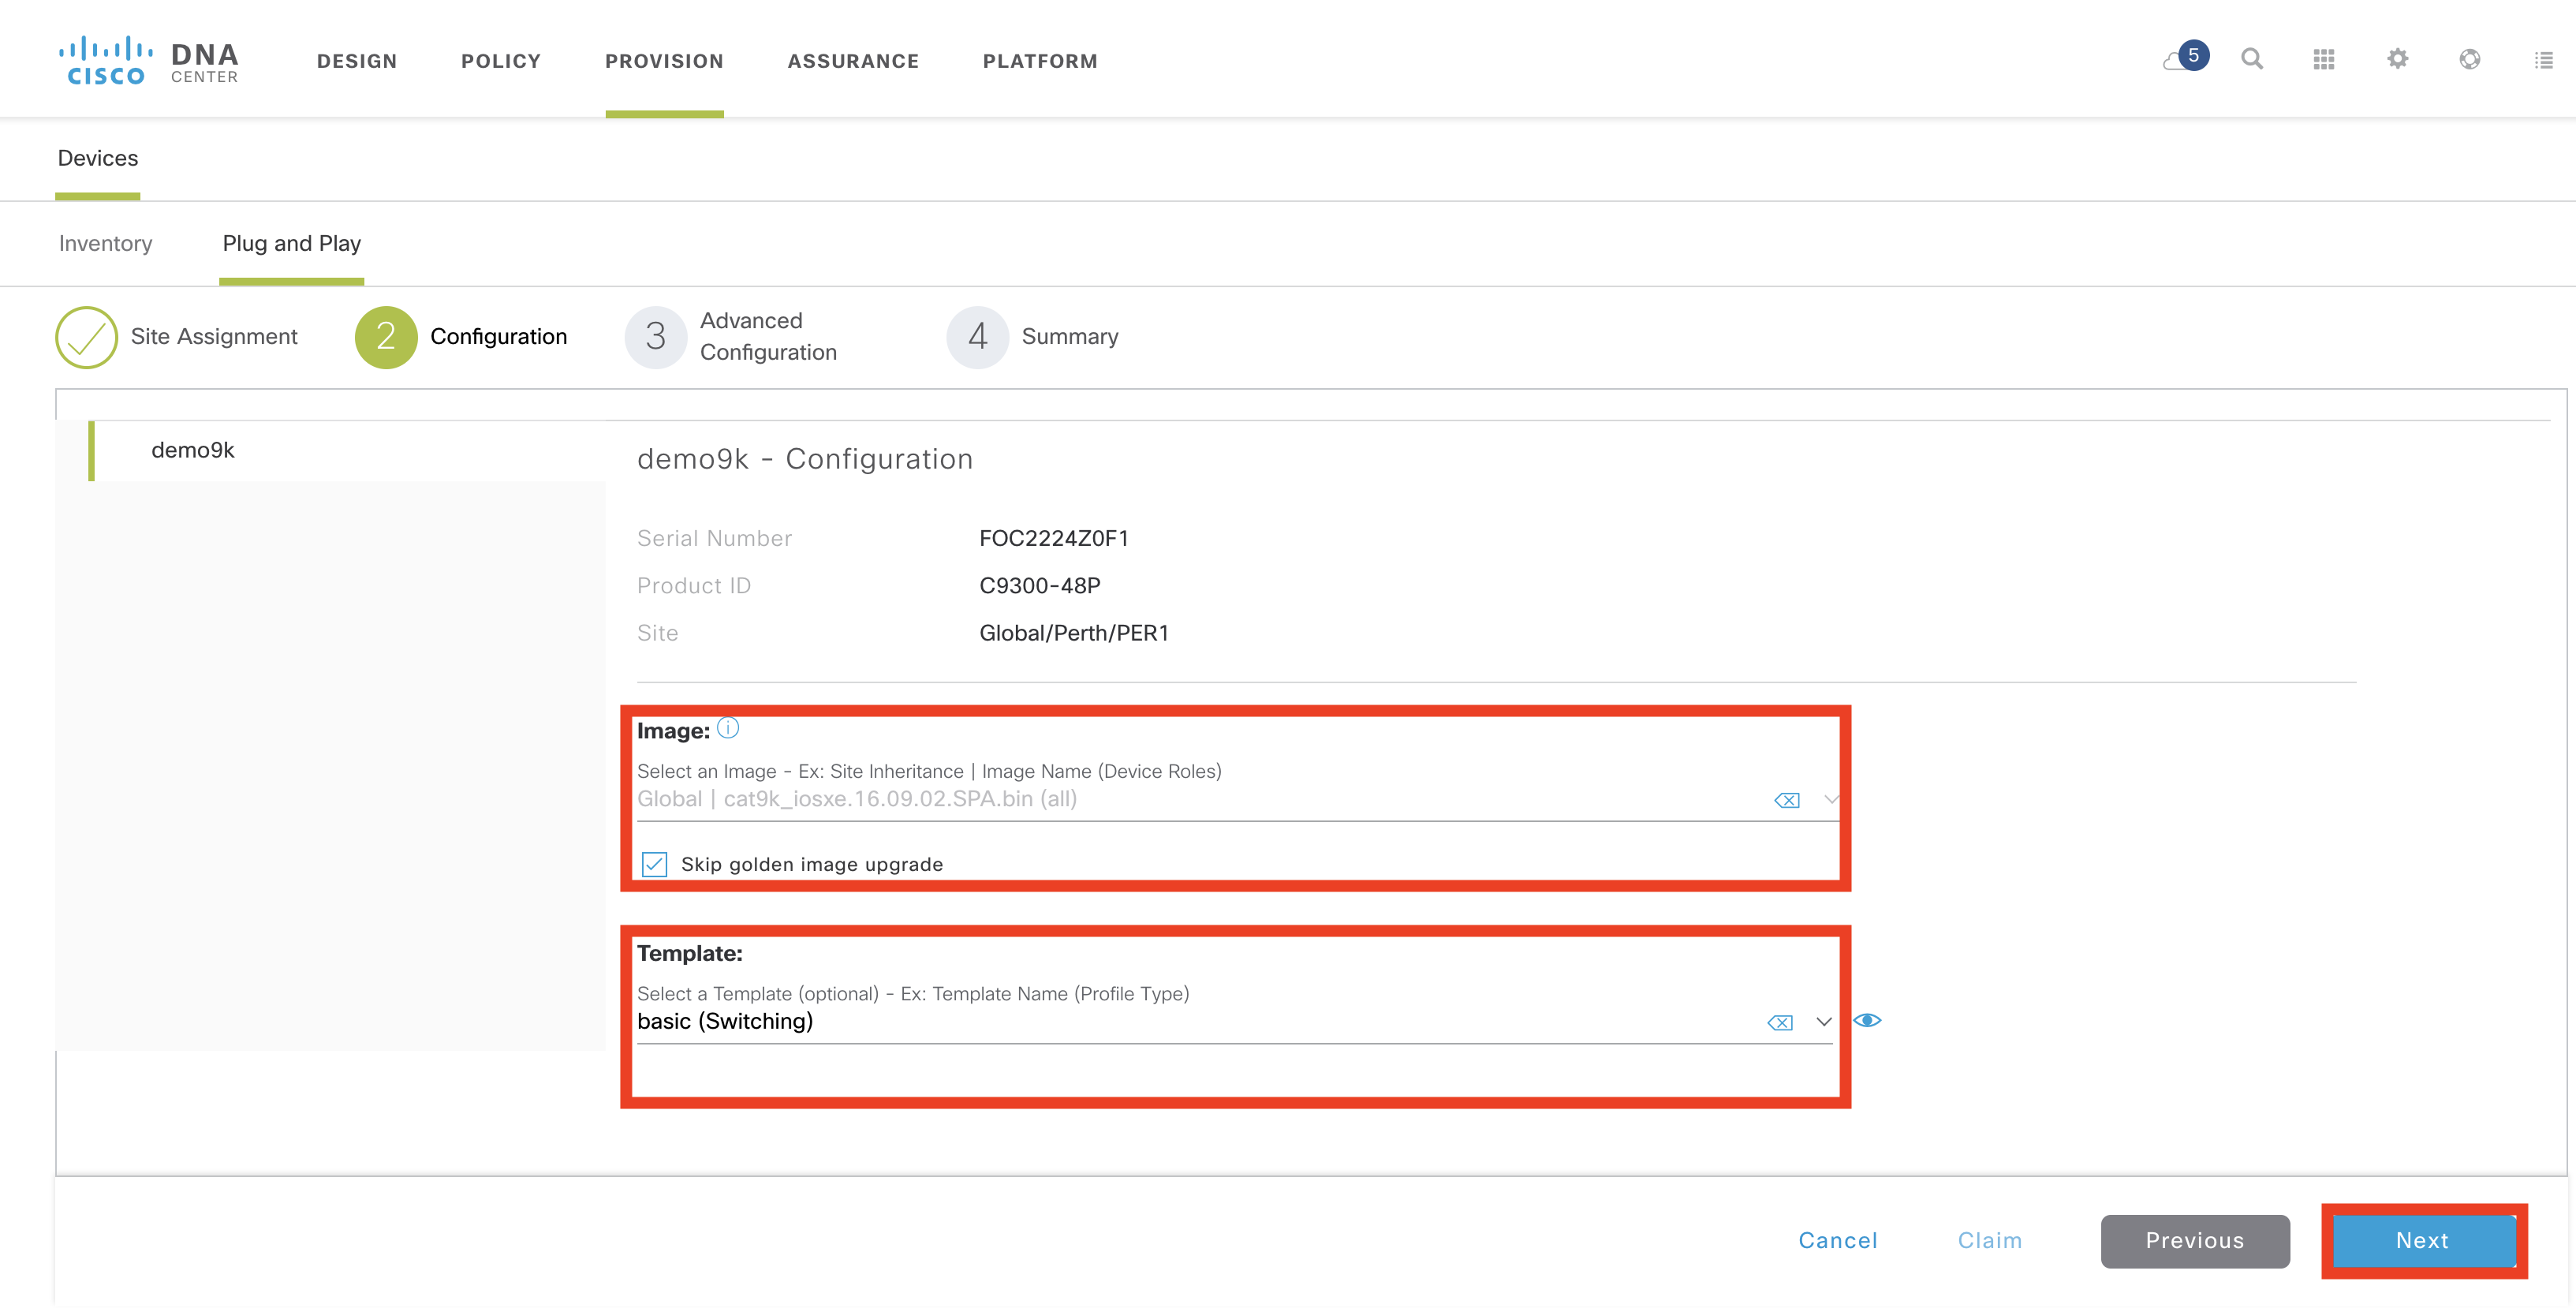
Next select the image and the template. In this example, I am skipping the image upgrade and there was only one Day0 template to choose (“basic”). Click Next.
NOTE: You need to select the template below. You will get a list to choose from (in this case a single template), but you still need to select it. Other wise the configuration will be empty.
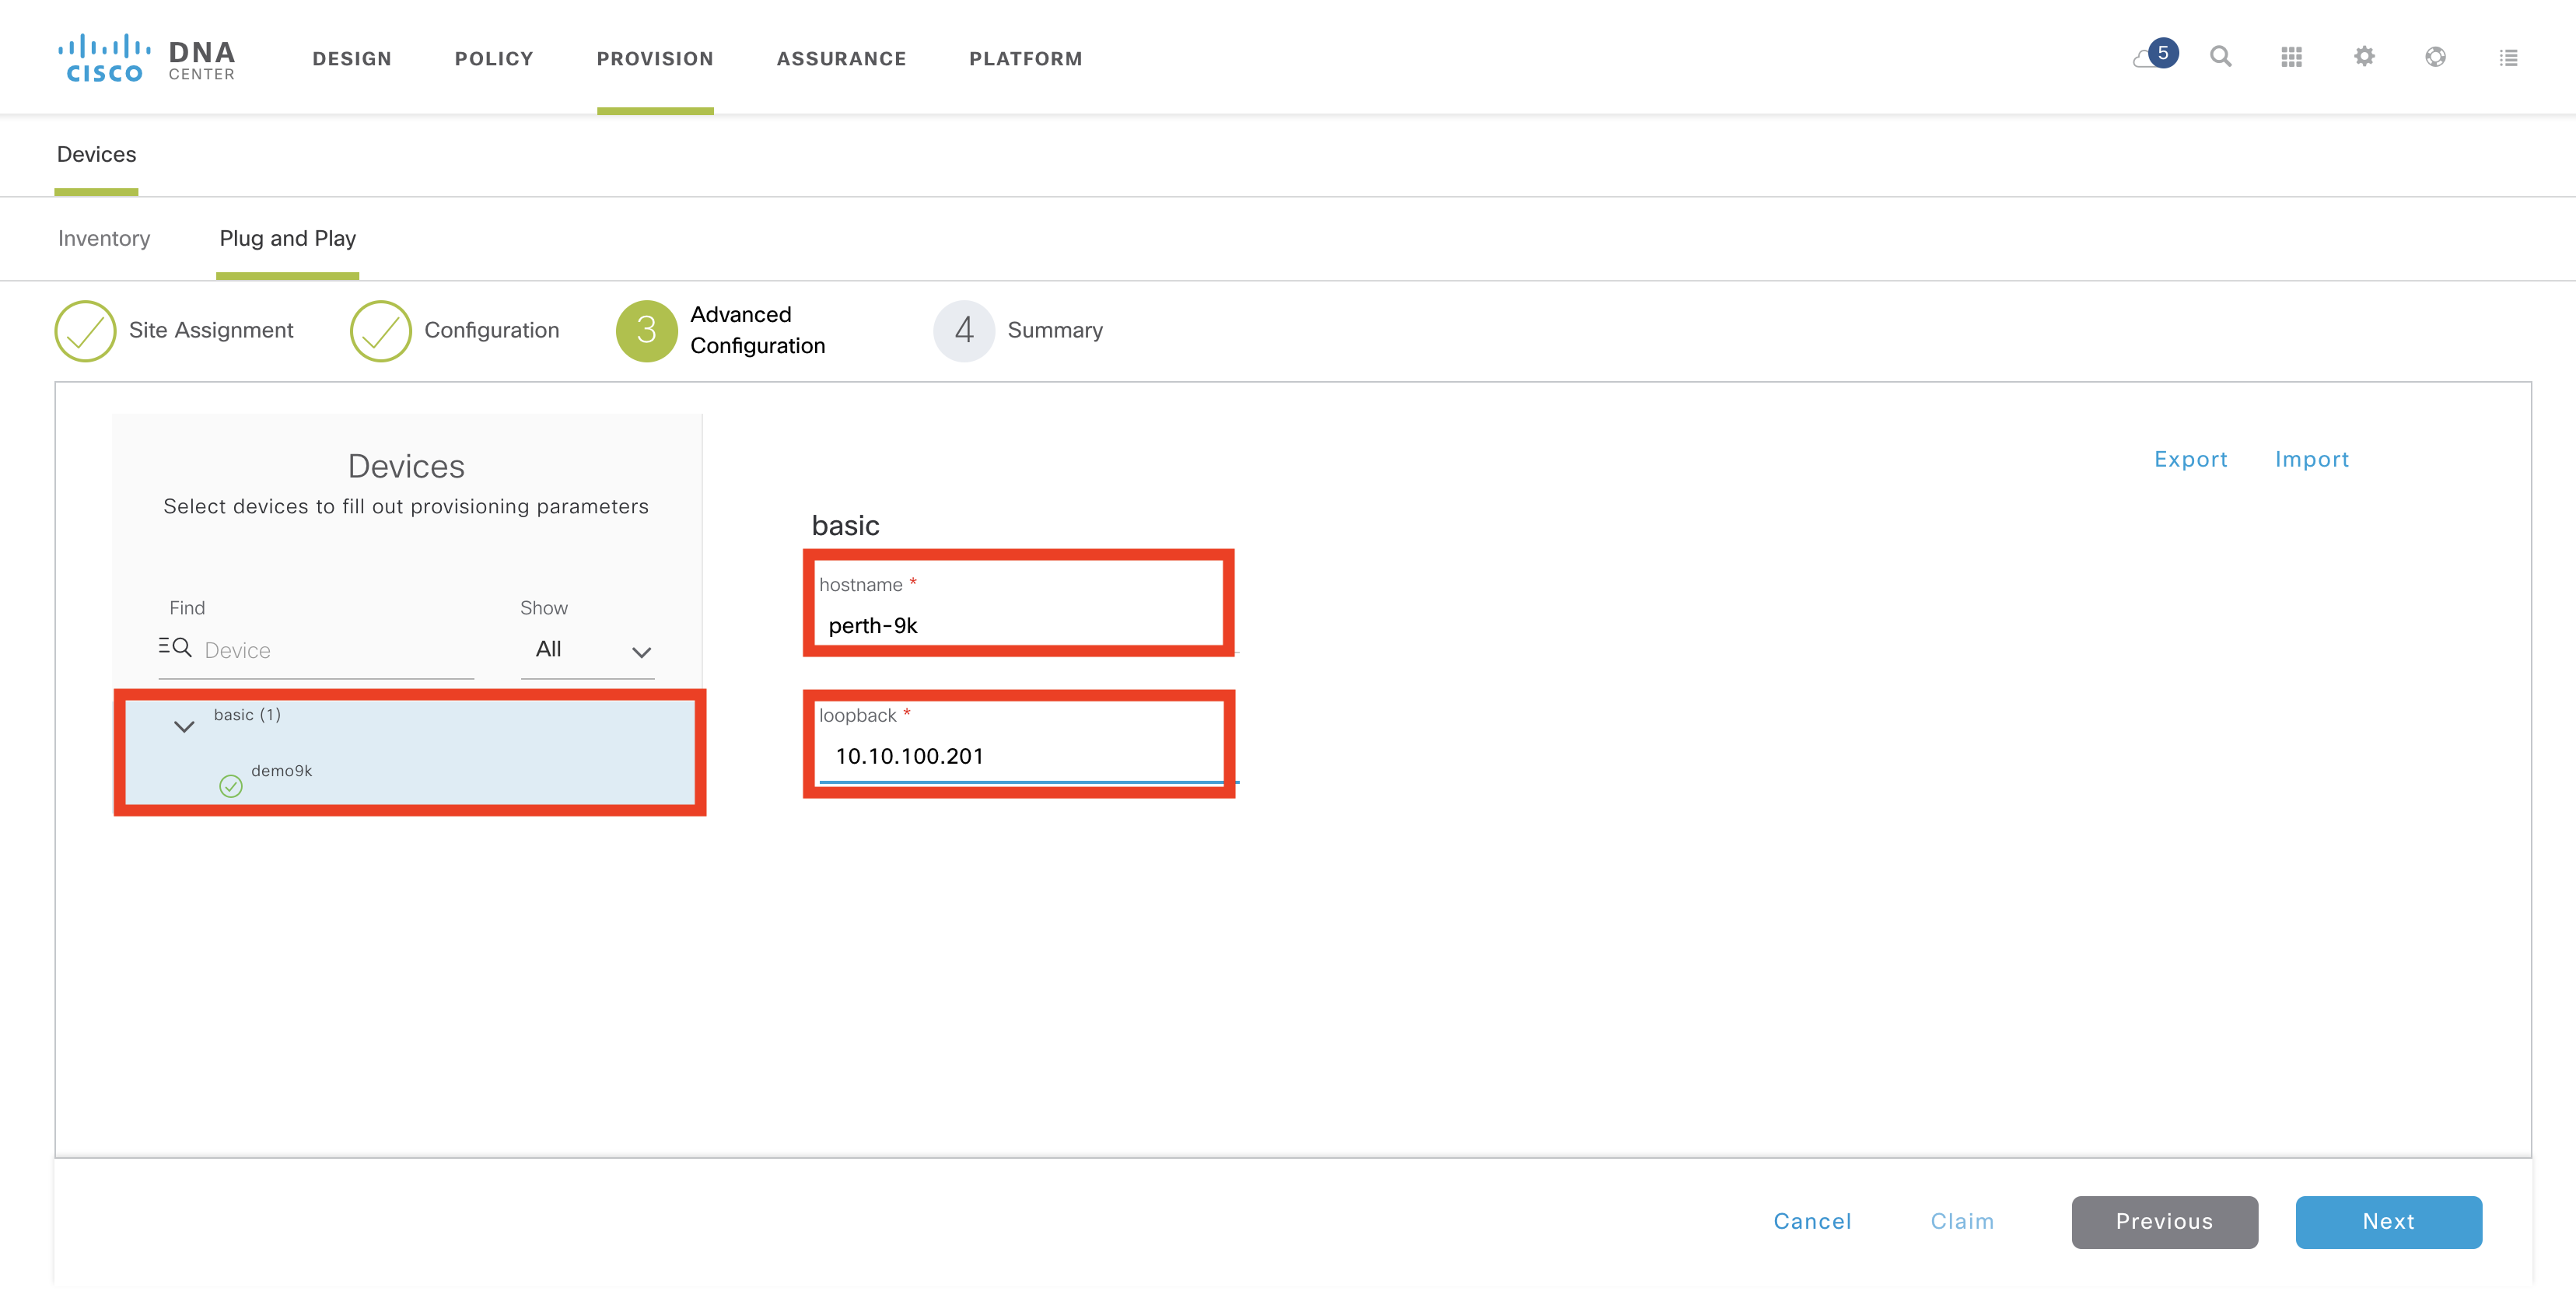
As there are variables for the template, variables need to be provided. First click under the “basic” template name and the name of the device. Then the values for “hostname” and “loopback” can be provided. Click Next.
The summary page shows what will be configured on the device. I have expanded the “Day-0 Configuration” and “Template CLI preview” panes. This shows a base set of credentials and the Day0 template.
I need to select “claim” to continue

.
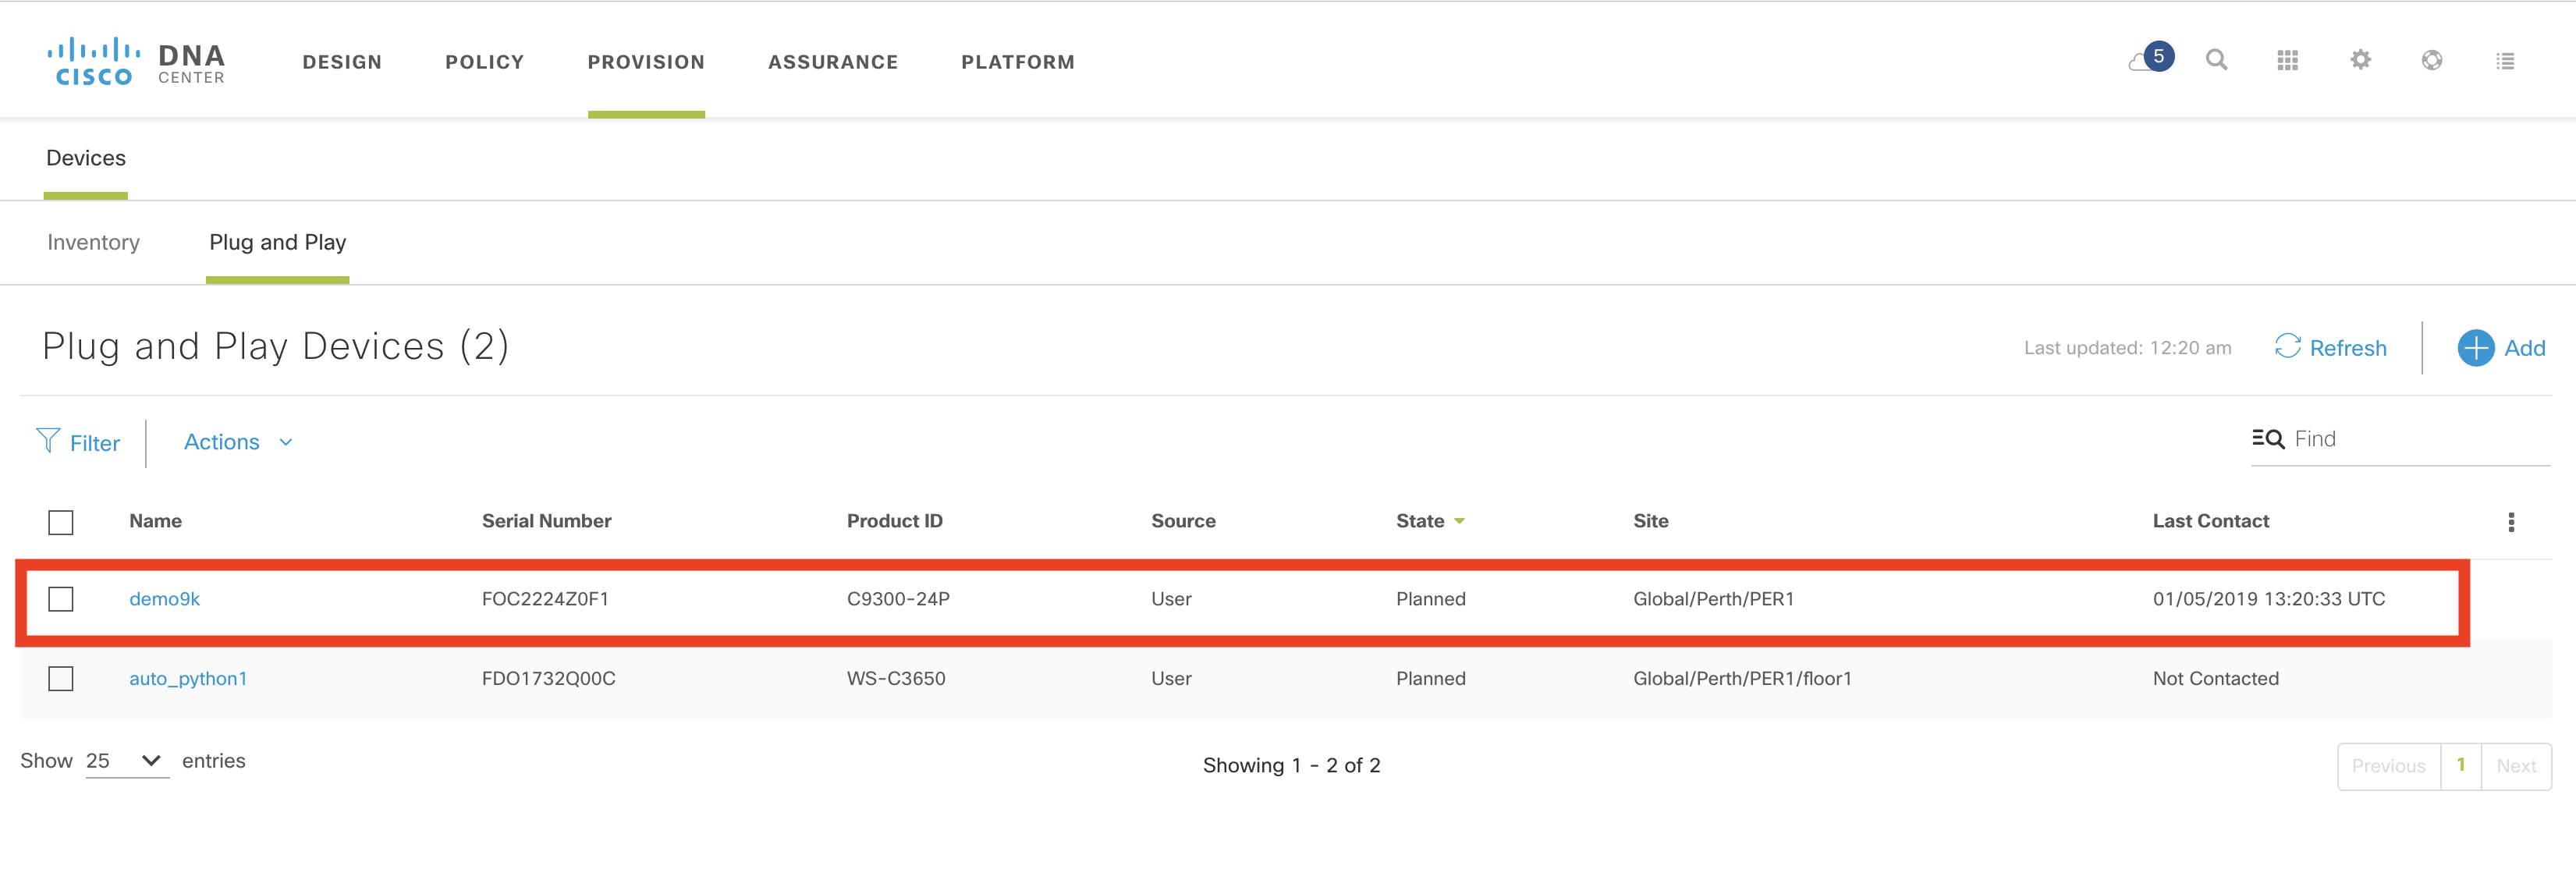
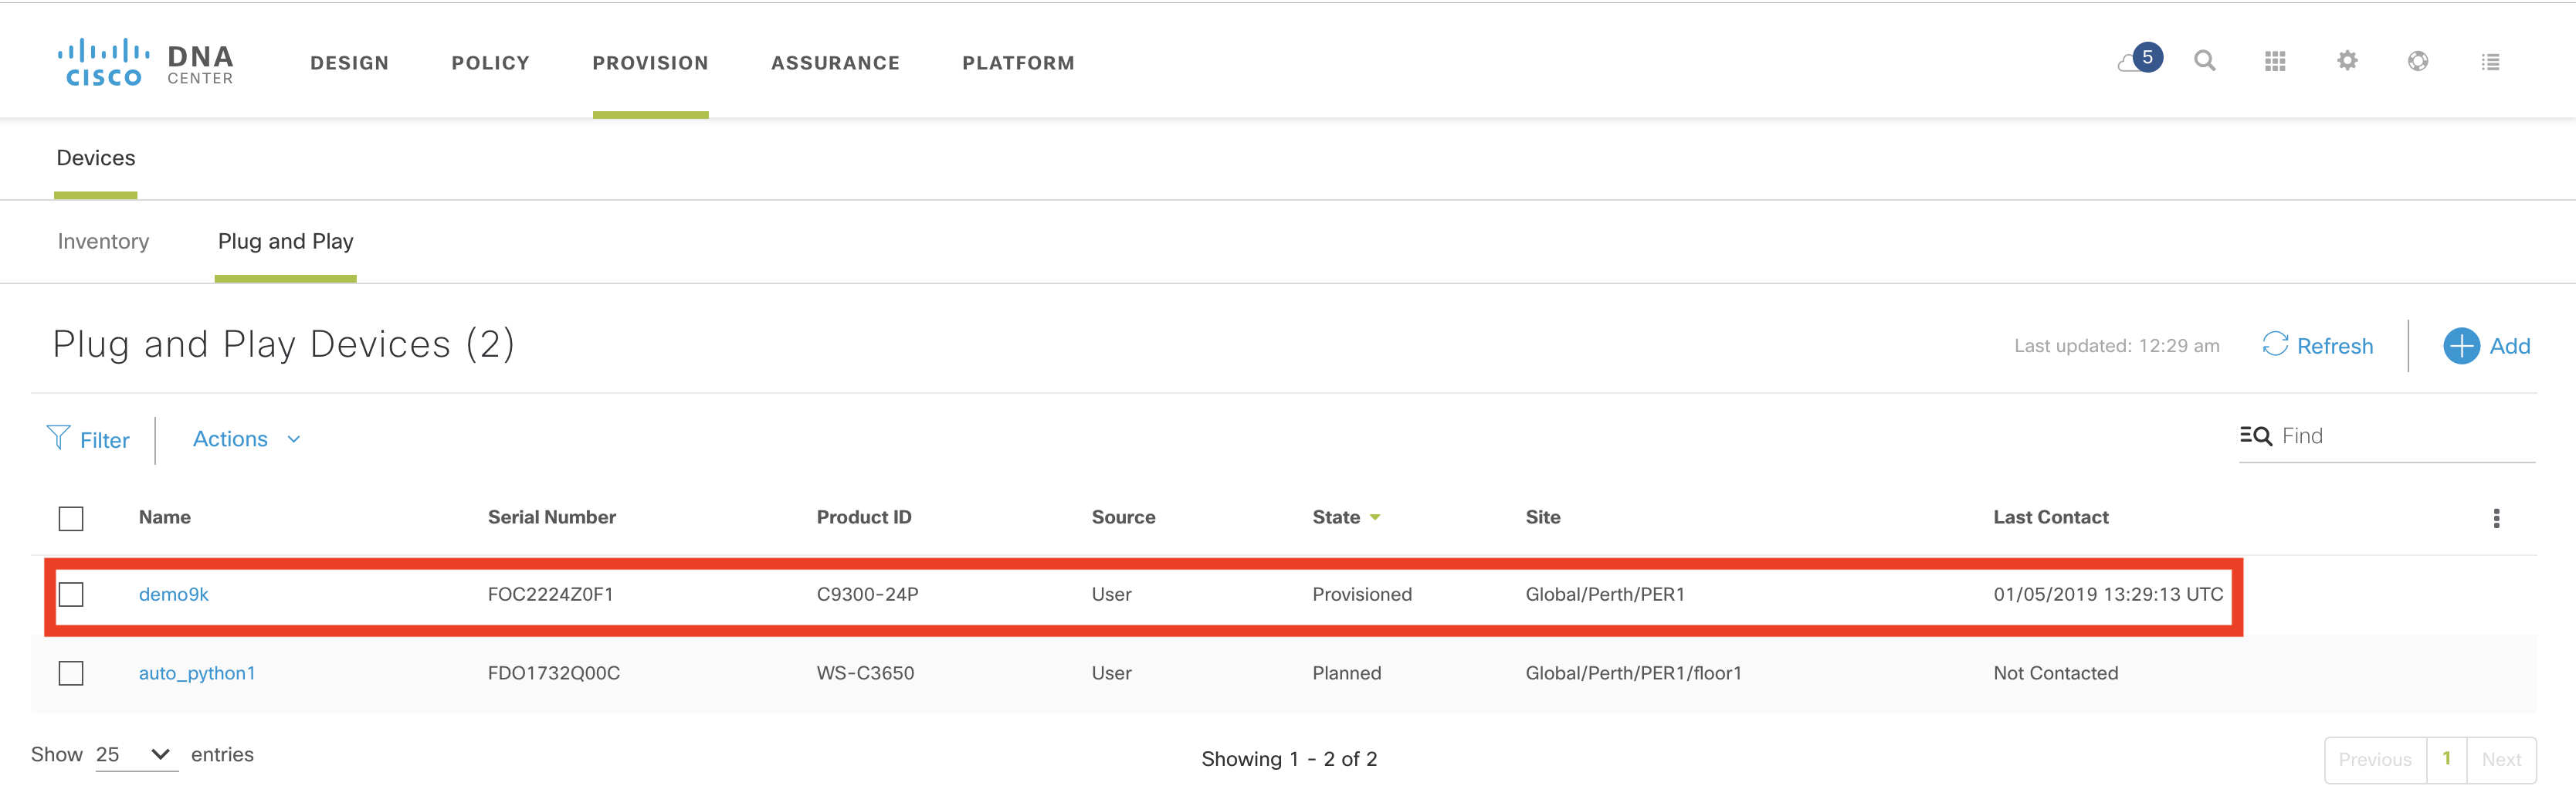
The device moves into the “Planned” state.
Once the device has booted up, it will contact Cisco DNA Center and be provisioned and added to the inventory. The state of the device is now “Provisioned”.
What Next?
Although it is possible to do a bulk upload of devices, and a bulk claim of devices, if you are using Day0 templates, you still need to step through the UI to provide variables for each device. In the next blog I will show how to automate this via API, similar to the workflow approach.
In the meantime, if you would like to learn more about this, you could visit Cisco DevNet. DevNet has further explanations about this. Also, we have a Github repository where you can get examples related to PnP.
If you are going to be at Cisco Live Barcelona, make sure to drop into the DevNet Zone for lots of great sessions and workshops on Cisco DNA Center. I will have a specific workshop on PnP.
Thanks for reading.
We’d love to hear what you think. Ask a question or leave a comment below.
And stay connected with Cisco DevNet on social!
Twitter @CiscoDevNet | Facebook | LinkedIn
Visit the new Developer Video Channel


you stated that:
Once the device has booted up, it will contact Cisco DNA Center and be provisioned and added to the inventory. The state of the device is now “Provisioned”.
Our DNA 1.2.8 appliance is discovering the devices and provisioning them, but they never get moved into inventory. They just stay in the plug and play tab and I cannot do anything with them. Is there another step that I have to perform that I'm missing?
Hi Nelson,
i expressed that poorly.
The device will still be in the PnP tab, so that you can re-do the process if required.
They will also appear in the inventory tab too.
The provisioned switch is not showing up in the Inventory tab automatically it is just sitting in the Plug and Play tab and it isn't actionable in other modules such as command runner. I've tried 2 different switches and neither automatically show up in Inventory.
I believe you are saying it should appear in the Inventory tab automatically. Is there another step I'm missing to make it available in the inventory tab and other modules like Command Runner? If not maybe I'm hitting a bug?
I forgot to put my email in the post above. The anonymous post was from me.
There should be no other step.
The device should discover DNAC (using Option 43 or DNS).
The device will move into the provisioned state under PnP, and as a part of that process be discovered.
The only thing i can suggest is you do not have the correct credentials configured under the network settings? Design -> NetworkSettings -> Device Credentials. You need to have a valid privilege 15 username and password as well as SNMP RO
With TAC help I was able to solve the issue. We were using SNMPv3 with Authentication, but no privacy in the Design/Network Settings/Device Credentials/SNMP Credentials. DNAC as of 1.2.8 will not completely authenticate the device unless you are using Authentication with privacy. We created a new SNMPv3 credential with privacy and the device successfully onboarded and moved into the inventory.
This doesn't affect our "Discovered" devices, only the ones we are attempting to onboard with Plug and Play.
There is a Bug ID for this issue (Cisco didn't provide it to me) so they know it is an issue and will hopefully correct the issue in a future release. I hope this helps someone else…