
Introduction to DevDash Demo
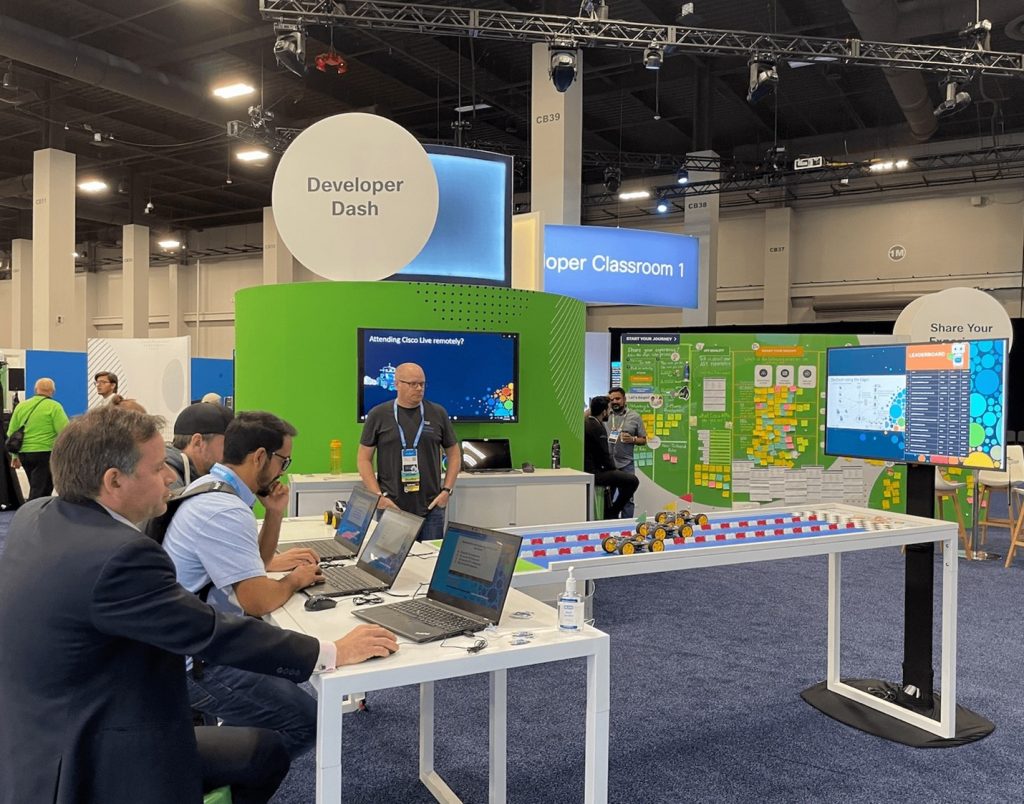
It all started with Paul Z suggesting that we make some cool and fun demo for Cisco Live 2022. A scavenger hunt perhaps. A few months later, it became a full-blown web application with DevOps deployment interacting with IoT devices. Our first DevDash demo went live at Cisco Live 2022 Vegas.
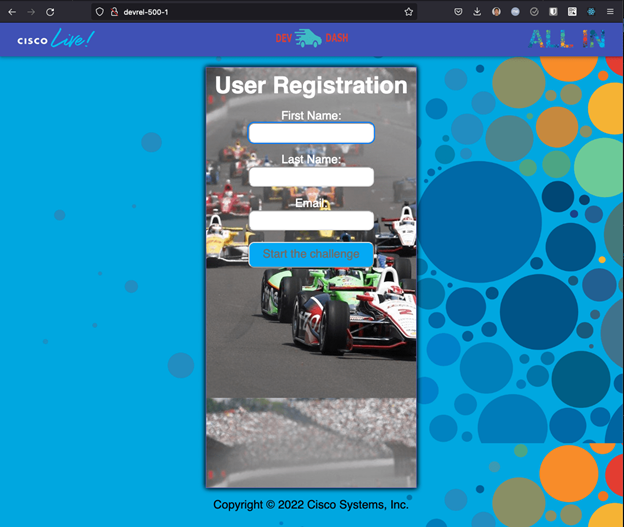
 Here’s how the DevDash Demo works. To accept the challenge, users are assigned to IoT race cars. Users take on the challenge to answer fun, developer, computer related multiple choice questions. Every time a user answers a question correctly, their car moves toward the finish line. Answer the question incorrectly, and it sets the car backward. Race results are recorded and posted to our “hall-of-fame” leaderboard. Users with the fastest time won some cool prizes at the event. And of course, the bragging rights.
DevDash is a fun project that showcases:
- How to build a real world microservices-based web application using the F.A.R.M stack framework: FastAPI, React JS, and MongoDB
- Build a production-quality, bare-metal Kubernetes cluster on Raspberry Pi to host the web application
- Build IoT 4WD race cars using the Freenove car kits integrating with Raspberry Pi
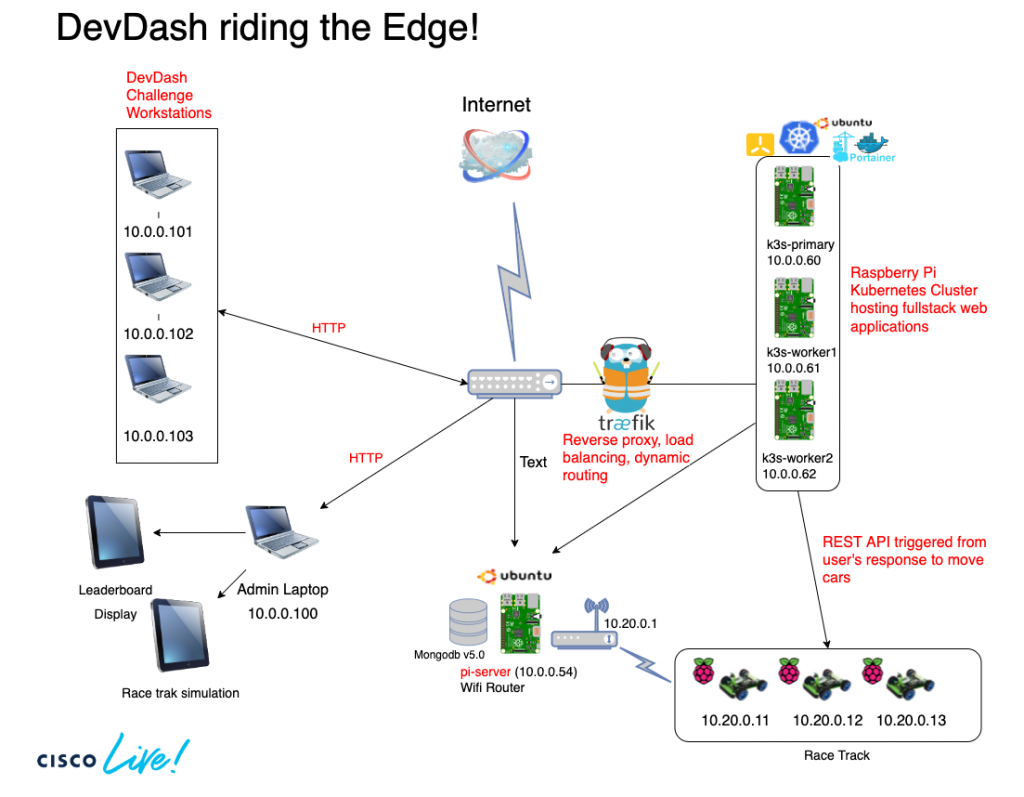
The frontend web application is written in Javascript with ReactJS library, backend web services in Python with FastAPI, persistent data stored in the MongoDB. All software are packaged as containers running on the Kubernetes cluster. The web services send REST APIs as commands to control the race car IoT devices.
Below is the network diagram:
Let me walk you through the process of how I put together all of the pieces that made the DevDash Demo…
Kubernetes cluster on Raspberry Pi
I’ll be walking you step by step on how I build this bare-metal 3-node Kubernetes cluster running on Raspberry Pis, the 4th Raspberry Pi on the cluster will be running as a Wifi router (routing traffic to the IoT race cars in the 10.20.x.x subnet) and MongoDB Database server for data persistence.
The Hardware
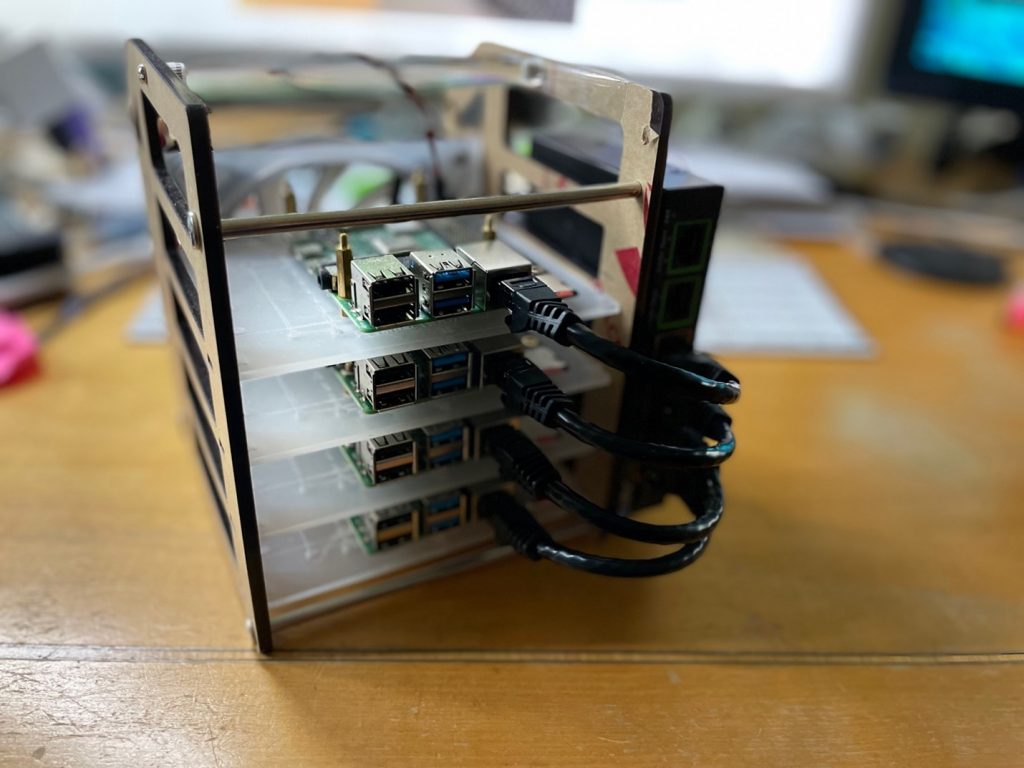
- GeeekPi Raspberry Pi Cluster Case with Cooling Fan
- Three Raspberry Pi 4B (2GB), One Raspberry Pi 4B (4GB)
- Short Cat6 ethernet cables
- Class 10 Micro SDHC cards
- Six ports Ethernet switch
- Power Strip with USB C ports
- USB Type C cables
Initially, I wanted to power the Raspberry Pis with Power Over Ethernet (POE) from the switch. Adding the POE Hat to the Raspberry Pi made space too tight in the GeekPi case, so I used power from USB C ports in the power strip instead. I think this option is a lot cheaper and simpler because you don’t need to buy the POE Hats for the Raspberry Pi. I taped the mini switch on the side of the case for easy cable management. I used the bottom Raspberry Pi to power the cooling fan, so I connected the USB C cable to a 9W adapter to make sure there is enough power for the fan. It is a straightforward process to assemble the cluster. The instructions from Geekpi are easy to follow.
The base OSes
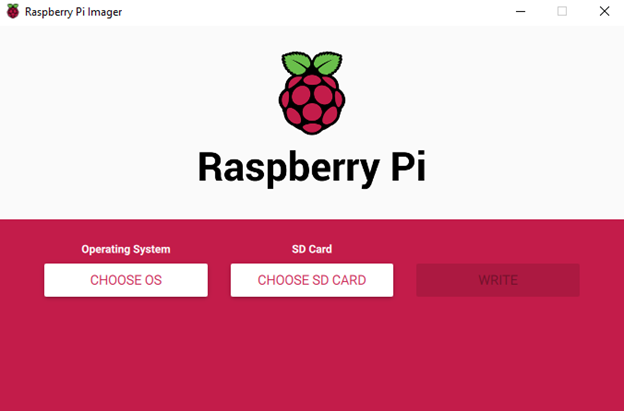 I used Raspberry Pi Imager to flash all 4 of the Raspberry Pi SD cards with Ubuntu Server 20.04 LTS 64-bit (headless). I chose Ubuntu since it’s well supported and I was pretty familiar with the OS. There may be newer, more stable Ubuntu releases by the time you read this. With the RP Imager utility, you can preset the hostname, enable SSH and set username and password, locale settings. I did not enable wireless LAN during this process. I will describe the steps later how to enable wireless for one of the Pi and make it a Wifi router.
Set the hostname for these Pis as follows:
- pi-server – This will be configured as the Wifi router and MongoDB database server
- k3s-primary – This is the Kubernetes controller node
- k3s-worker1 – This is the Kubernetes worker node 1
- k3s-worker2 – This is the Kubernetes worker node 2
Refer to the network diagram above for more information. Configure each node once it boots:
- Set the hostname, enable SSH, set default username, password when flashing the SD card. This makes it easy to identify each node once it joins the network using my router admin interface.
- Pre-authorize the SSH key with ssh-copy-id to facilitates automated, password-less logins
- Configure sudo without password
- Configure static IP address with netplan
I update /etc/hosts file on every node in the cluster to include hostname of all nodes. I also added them to the SSH config file (~/.ssh/config). SSH to each node and make sure you can ping other nodes in the cluster. You can use ansible to automate all of the above processes with a YAML config file.
Make sure you run apt update command to update the package index before installing Kubernetes and other software packages.
$ sudo apt update
K3s Kubernetes
Now I am ready to install K3s Kubernetes to the cluster. Why K3s? K3s is a lightweight Kubernetes distribution, optimized for ARM. It also features a simplified install and update process. K3s is also a highly available, certified Kubernetes distribution designed for production workloads in unattended, resource-constrained, remote locations or inside IoT appliances.
I use Docker to build and deploy containers to the K3s cluster so first I need to install the Docker engine to all nodes.
- Install Docker to each k3s node with instructions here.
- Instructions to install K3s to Kubernetes cluster here. It takes literally minutes to install K3s to all nodes. Make sure to check if K3s is installed properly with all nodes in Ready state and you’re good to go.
$ kubectl get node

One of the cool features of K3s is that it includes traefik by default, so you don’t need to install a load-balancer, nor an ingress controller. Everything is included and ready for you to use!
Build DevDash web application containers
High-level architecture
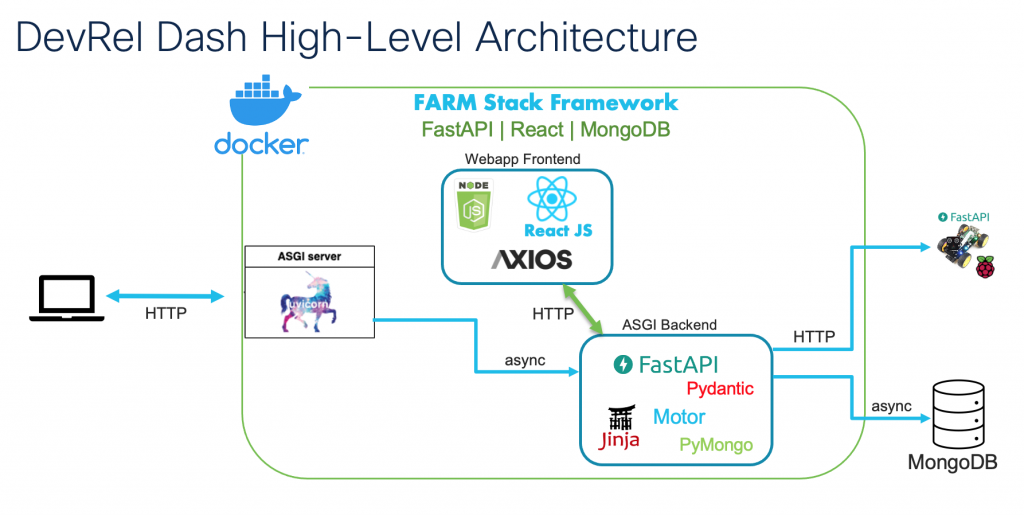
All sources for this project are available in a github repository here. I use the FARM stack to implement this demo because it seems like a good, full-stack framework for web application development. You can use the basic framework of this web app as a template for almost any web application.
Here is a high-level architecture of the DevDash demo app using the FARM stack.
The webapp has 4 main components in the git repository:
- backend – Backend services written in Python
- frontend – Frontend GUI application written in Javascript with React JS library
- deployment – YAML scripts to deploy app to Kubernetes cluster
- devrel500 – Python app using FastAPI and Freenove python library to process REST APIs sent from backend services to control the IoT race car.
DevDash is composed by several different micro-services, developed in ReactJS + Python, and packaged with Docker containers.
Setting up your development environment
To start building this microservices-based application, you will need to install Docker, Node, Python, and kubectl on your workstation:
- Visit Docker download and get Docker Personal Edition. When you are done open a terminal in your workstation (ie. terminal or iterm for Mac, Command Prompt or PowerShell on Windows), and please check that Docker is correctly installed in your system with docker version.
- Visit Node download and follow instructions to install Node
- I use kubectl on mac to install kubectl tool on my Mac. After the installation, copy /etc/rancher/k3s/k3s.yaml from primary node (k3s-primary) to ~/.kube/config on your workstation
- I use Python 3.9.10 to build the backend micro-services but any python 3.x should work. Visit python to download and install python.
All the required code to build your DevDash application is stored in GitHub, a repository hosting service that supports Git Version Control System. You can easily register for a free GitHub account, and you will need to install the Git CLI in your workstation.
Once installation is complete, go and check that Git is correctly installed in your system by running the following command in a terminal window:
$ git version
Now create a directory in your user home directory, where you would like to store all DevOps content related to this tutorial and enter it.
$ mkdir devdash
$ cd devdash
Inside this new directory you will now clone the content from GitHub repositories (aka repos) that host all required code to build and deploy devdash containers.
$ git clone https://github.com/davidncsco/devdash.git
Build DevDash containers
Let’s start with backend container.
$ cd backend
Check out the python code in this directory:
- model.py – define data model for DevDash
- database.py – all database operations (CRUD)
- main.py – REST APIs routes that can be called from frontend web app
- utils.py – Utility functions
- leader.py – Leaderboard display.
Dockerfile in the backend directory defines how to build the backend container. Here, I define DB_URL environment variable for the URL to connect to MongoDB which I will describe later in the DB server section. Because we also deploy the same application virtually on a sandbox, I use VIRTUAL environment variable to differentiate different build environments.
FROM python:3.9.10-slim as backend

COPY ./utils.py ./main.py ./database.py ./model.py /app/
COPY ./requirements.txt /app
COPY ./data /app/data
ARG DB_URL="mongodb://davidn:cisco@10.0.0.60:27017/"
ARG VIRTUAL=0
ENV DB_CONNECT_URL=${DB_URL}
ENV VIRTUAL_EVENT=${VIRTUAL}

WORKDIR /app

RUN pip3 install -r requirements.txt

EXPOSE 8000

CMD ["uvicorn", "main:app", "--host=0.0.0.0"]
Execute the Docker build command to generate the container image for backend server. Since we’re building for Raspberry Pi running Linux with ARM processor, we need to specify the target platform. Here, I used xitrum/backend as the container name and 3.0.1 as the tag.
$ docker buildx build --platform linux/arm64 -t xitrum/backend:3.0.1
You will see output similar to this from docker buildx command:
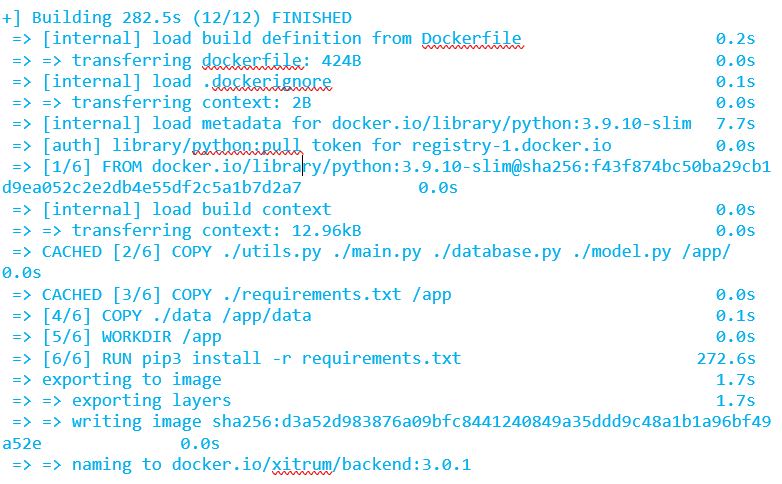
It takes almost 5 minutes to build the backend image on my Macbook. Next I want to push this image to Docker Hub so I can deploy it later. You can sign up for a free personal docker hub account, click on Docker Hub link for more info.
$ docker push xitrum/backend:3.0.1
Similarly, you can use the same process to build the frontend container.
$ cd ../frontend
Check out the code and resources in this directory that make up our Frontend UI for the webapp:
- src – The React Front End javascript source code.
- static/questions – Database of questions used in the challenge. Each question is a PNG image.
- package.json – store the metadata associated with the project as well as to store the list of dependency packages.
Let’s examine the content of the frontend Dockerfile used to build this component. Building the frontend image is a 2-stage process. First, we use node to build the frontend Javascript application. Then, in the second stage, we package these scripts with nginx as our web server to run these Javascripts. Here I use API_URL to define Ingress public route for Traefik reverse proxy which I’ll describe in more details in the deployment section.
# Dockerfile - build the base image
FROM node:17.8.0-alpine as build-frontend
WORKDIR /app
ARG API_URL=http://devrel-500
ARG VIRTUAL=false
ENV PATH /app/node_modules/.bin:$PATH
ENV REACT_APP_API_URL=${API_URL}
ENV REACT_APP_VIRTUAL_EVENT=${VIRTUAL}
ENV WDS_SOCKET_PORT 0
COPY package.json .

RUN npm install --silent

COPY ./ /app/

#RUN npm install react-scripts@5.0.0 -g --silent
RUN npm run build

# Build for production with nginx
FROM nginx:1.20.2-alpine

COPY --from=build-frontend /app/build/ /usr/share/nginx/html
COPY ./static/questions /usr/share/nginx/html/static/questions
$ docker buildx build --platform linux/arm64 -t xitrum/frontend:3.0.1
You will see output similar to this from docker buildx command:
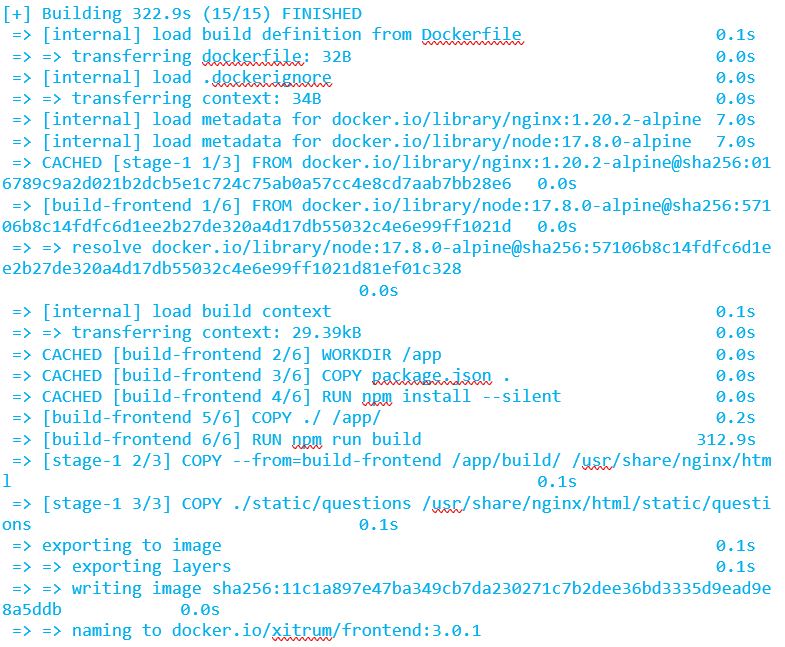
It takes a little over 5 minutes to build the frontend image. I also push this image to Docker Hub along with the backend image.
$ docker push xitrum/frontend:3.0.1
Now that we have built both frontend and backend docker images, we will need to build our MongoDB server for persistent data.
Build MongoDB database server
MongoDB is the leading NoSQL database management system. It’s based on what we call the document model or collections of documents. These documents are like files in JSON format makes it really suitable for our data model and python dictionary. There are different ways of building the MongoDB server for our application. We could use prebuilt MongoDB container from docker hub and deploy it using the sample configuration YAML scripts in deployment directory utilizing Kubernetes volumes for data persistence.
A simpler way is to build our MongoDB server using pre-compiled distribution for linux/arm platform like the Raspberry Pi. I follow the instructions here to install MongoDB Server v5.0.5 to the K3s primary node k3s-primary. Note that the MongoDB server can be installed on any of the Raspberry Pi in our cluster. The installation process only takes about 5-10 minutes.
Once the DB server is up and running, you can use any NoSQL client to connect to the MongoDB server. I use Robo 3T, a free MongoDB Client, to test and connect to our DB server. I then use it to create a user with admin privilege to perform database operations from our application. This will be used to define our DB_URL db connection string.
DB_URL=”mongodb://davidn:cisco@10.0.0.60:27017/”
Make sure that you enable the MongDB service at startup on the installed node k3s-primary
$ sudo systemctl enable mongodb.service
Deploy Webapp containers
Now that we have built our web app containers, it’s time to deploy them to the kubernetes cluster.
$ cd deployment
Check out the 2 yaml files that I use to deploy the backend and frontend containers:
- devrel500_backend.yaml
- devrel500_frontend.yaml
kind: Deployment
apiVersion: apps/v1
metadata:
  name: backend
  labels:
    app: backend
    name: backend

spec:
  replicas: 2
  selector:
    matchLabels:
      app: backend
      task: backend
  template:
    metadata:
      labels:
        app: backend
        task: backend
    spec:
      containers:
        - name: backend
          image: xitrum/backend:3.0.1
          ports:
            - containerPort: 8000
              protocol: TCP
---
apiVersion: v1
kind: Service
metadata:
  name: backend
spec:
  ports:
    - name: backend
      port: 8000
      targetPort: 8000
  selector:
    app: backend
    task: backend
---
kind: Ingress
apiVersion: networking.k8s.io/v1
metadata:
  name: backend
  annotations:
    kubernetes.io/ingress.class: traefik
    traefik.ingress.kubernetes.io/router.entrypoints: web

spec:
  rules:
    - host: devrel-500
      http:
        paths:
        - path: /
          pathType: Prefix
          backend:
            service:
              name: backend
              port:
                number: 8000
I use traefik built-in Kubernetes ingress controller to manage access to cluster services by creating the Ingress spec in the backend yaml file. This yaml creates the backend deployment with ReplicaSets to bring up 2 backend pods for load balancing and high availability.
To create the backend deployment:
$ kubectl apply -f devrel500_backend.yaml
Similarly, to create the frontend deployment:
$ kubectl apply -f devrel500_frontend.yaml
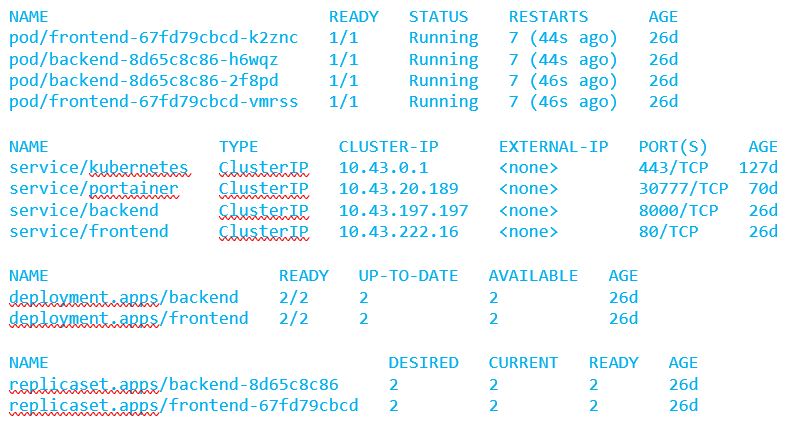
Use this command to check if backend and frontend are deployed and running:
$ kubectl get all
Everything will be ready when every pod appears as running and READY 1/1.
Execute this command Will give you more details about the path to backend and frontend services
$ kubectl get ingress

You can add these hosts and IPs entries to /etc/hosts on the local workstations that will be used to run DevDash web application. To run the frontend web app, simply enter this URL in a web browser http://devrel-500-1 (as defined in the devrel500_frontend.yaml ingress section).
Build IoT Race Cars
The last piece of the puzzle is to build the IoT race cars and to communicate with them. In the DevDash webapp, user must answer a series of questions to complete the challenge. Answer the question correctly, the car will march toward the finish line. Answer the question incorrectly will set the car backward. So there need to be some communication between the webapp and the IoT race cars.
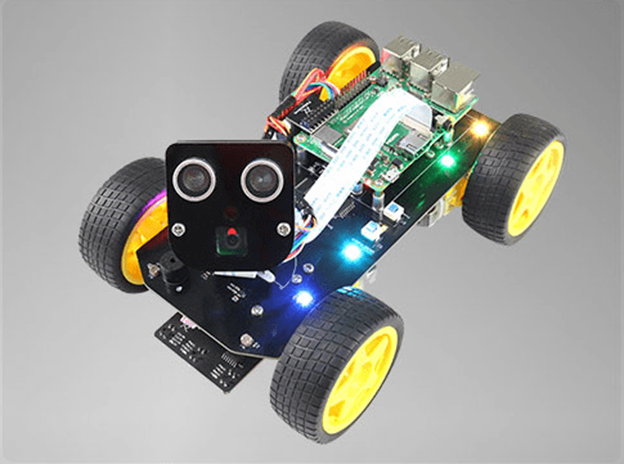
Install base OS and configure the race car
First, flash the Raspberry Pi with Raspberry Pi OS Lite (64-bit) using Raspberry Pi Imager like we did with the cluster nodes.
- Set hostname to pi-car-x (where x is the car number). This will be the same as set in the backend DB.
- Enable SSH
- Set username/password
- Set SSID for the wireless network and Wireless LAN country to your country code (EN)
We use the Freenove python library to communicate with the I/O board and FastAPI and to create web services so we can communicate from the backend server using REST APIs. You can find these python library files in the devrel500 folder.
Reboot and SSH to the RPi on the car. You need to do some basic configuration on your RPi.
$ sudo raspi-config
Select Interface Options then choose to Enable automatic loading of I2C kernel module. This will allow the python library to communicate with the IO board on the car and to control those motors that spin the wheels as well as reading values from the infrared sensors.
Assign static IP address to the wireless interface on the RPi by adding the following lines to /etc/dhcpcd.conf (change the last octet for each car)
interface wlan0
static ip_address=10.20.0.xx/24
static routers=10.20.0.1
static domain_name_servers=10.20.0.1 8.8.8.8
Install web services and python library
Reset power on the car to reboot the RPi. Raspian OS comes with Python 3.x by default, you only need to install some python modules required to run FastAPI web services. Temporary connect the RPi ethernet port to your router so you have access to the internet to install dependency packages.
The devrel500 folder in the Git repository contains all the files you need for our python library. Use scp to upload these files to the RPi default user home directory under a new folder name devrel500
- Buzzer.py, Motor.py, PCA9685.py are Freenove python libary to control the car
- requirements.txt contains a list of required modules to run FastAPI
- car.py implements web services to communicate with the car from the backend server.
- devrel500.service is the startup script to enable our services at boot time.
Install all dependency python modules and enable the service at boot time. Because we are going to run this service as root so we need to install all dependency python modules with sudo
$ cd devrel500
$ sudo pip install -r requirements.txt
$ sudo cp devrel500.service /lib/systemd/system/
$ sudo systemctl enable devrel500.service
You can check to see if the service is running after the service is enabled.
$ sudo systemctl status devrel500.service
Now the IoT smart car is ready to take command from the backend server.
Configure a Raspberry Pi 4 as a wifi router
We need to route traffic from our kubernetes cluster network to the wireless network so we can run DevDash web app from the workstations and also sending REST APIs to the race cars. We could use a commercial router but why not use a raspberry pi in our cluster? In this section, I will show you how to turn a Raspberry Pi 4B into a wifi router. Raspberry Pi 4B wireless chip supports both 2.4Ghz and 5Ghz spectrums.
Flash the Raspberry Pi with Ubuntu Server 20.04.04 LTS (64-bit) using Raspberry Pi Imager.
- Set hostname to pi-server
- Enable SSH
- Set username and password. I use devnet as username on all RPi in the cluster.
- DO NOT configure wireless LAN at this time.
Reboot and SSH to the RPi.
Assign static IP address to the RPi by creating create a new file /etc/netplan/00-config.yaml with this content
network:
version: 2
renderer: networkd
ethernets:
eth0:
addresses: [10.0.0.54/24]
gateway4: 10.0.0.1
nameservers:
addresses:
[10.0.0.1, 8.8.8.8]
wlan0:
dhcp4: false
addresses:
– 10.20.0.1/24
Execute this command and reboot to apply the changes:
$ sudo netplan apply
$ sudo systemctl restart system-networkd
After reboot, check if both eth0 and wlan0 interfaces are up and assigned with the correct IP addresses.
$ sudo ip a
Now we’re going to install some new packages:
$ sudo apt update
$ sudo apt install hostapd
$ sudo apt install dnsmasq
Create /etc/hostapd/hostapd.conf and add this content for our AP configuration. Note that we are setting the access point to use:
- 4GHz 802.11g, channel 6
- SSID = routerpi, passphrase = devrel500
You can change this base on this frequency bands table
- 4GHz – b/g/n/ax with up to 14 channels, depends on the country
- 5GHz – a/n/ac/ax with up to 37 channels, depends on the country
country_code=US
interface=wlan0
ssid=routerpi
hw_mode=g
channel=6
macaddr_acl=0
auth_algs=1
ignore_broadcast_ssid=0
wpa=2
wpa_passphrase=devrel500
wpa_key_mgmt=WPA-PSK
wpa_pairwise=TKIP
rsn_pairwise=CCMP
Add the following lines to the end of /etc/dnsmasq.conf for DHCP configuration
interface=wlan0
dhcp-range=10.20.0.20,10.20.0.30,255.255.255.0,300d
domain=wlan
address=/gw.wlan/10.20.0.1
Note: I reserved the IP address range 10.20.0.11-19 as static IP addresses for the race cars.
Enable IP forwarding and IP route between wireless LAN and wired network by un-comment the following line in /etc/sysctl.conf
net.ipv4.ip_forward=1
And execute the iptables command
$ sudo iptables -t nat -A POSTROUTING -o eth0 -j MASQUERADE
Reset and enable AP and DHCP services
$ sudo systemctl unmask hostapd
$ sudo systemctl enable hostapd
$ sudo systemctl enable dnsmasq.service
$ sudo systemctl daemon-reload
$ sudo reboot now
Wait a few minutes and you should see the routerpi wifi network appears on wifi network list then check if you can connect to this wireless network from your smartphone or laptop.
Voila! You now have a portable wifi router in your cluster. Well done!
Epilogue
Thank you for going on this long journey with me! We have covered quite a bit of different technologies:
- Build a bare metal, portable Kubernetes cluster with Raspberry Pis
- How to use the FARM framework to implement a client/server web application
- Build a wifi router on a Raspberry Pi
- DevOps in action – built and published docker containers, and deployed them locally to build a real microservices-based application.
- Assemble and build IoT devices, create web services for wireless communication
Hope you have as much fun as I did with this project!


