
One of the strongest components of the Meraki platform is the consistent and simplified operational management of the network. The modern API, as an extension to the cloud managed service, makes it amazingly simple to programmatically control and manage all aspects of your network. There are customers that fully automate the onboarding of devices via the Meraki portal using routine automation scripts. Or, front-end systems or operational teams with lookup tools that pull analytics or data from the API. Thus, greatly streamlining operational processes required to support an organization.
This blog will showcase some of the techniques that can be used and built upon to integrate the Meraki API programmatically. To do this we will use the DevNet always-on sandbox lab. With this we will only be making read (get) requests into the always-on sandbox. And to make this easy to use, we are going to use the Google Collaboratory environment, which allows you to use Google cloud to run these examples.
Explore the Meraki API using the DevNet Sandbox
To begin exploring the Meraki API using the DevNet Sandbox, I have created a Collaboratory on Google at the below link. To use this, you will need a few things,
- A personal Gmail account. This will share a copy of the example that you can modify in drive. If you use your corporate account, it will only allow this if your corporation has drive access.
- You will then access the link below and file/save a copy into drive, from which point a read only copy will become writable, and modifiable to you.
Here is the link:
https://colab.research.google.com/drive/15qs6TFn8gtsTM0PTUUbuubGLYwHJw8hV
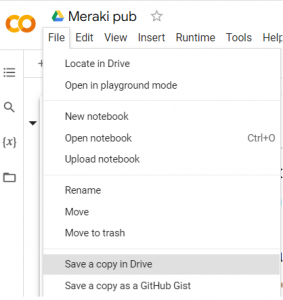
The first thing we will do is save a copy of this read only sheet into your drive, which will make it read/write. From the file menu you can click “save a copy to drive”
Once this is done you can evaluate the sheet. Within this sheet there are text blocks, code blocks, and results blocks. The code blocks are fully modifiable, and represent code running in a real python environment located in the Google cloud. To execute the code within a block, you can click the play button to the left of the block. When you do this, any results will show up.
Where this becomes particularly interesting is when we pair this cloud based development environment with the DevNet always-on Meraki Sandbox. This is a functional Meraki instance sponsored and managed through the DevNet organization. For a list of all Sandboxes, you can evaluate devnetsandbox.cisco.com.
For our particular sandbox, we will be using the always-on sandbox. This is available at the below link, but should this link change, you can find it by selecting networking sandboxes from devnetsandbox.cisco.com. (or searching Meraki, or many other ways :)).
Setting Variables
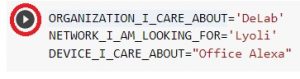
What we will do in the below code segments, is we set a few variables we can use further on in the code. This makes it so that you can take your real Meraki environment, and change a few URLS, and search for meaningful information in these variables (such as YOUR device, or YOUR network), and use the code to create tables and graphs that you can modify as you see fit.
After setting the variables, we do a very simple get request from Meraki, that we will do many times for different information throughout the sample on Colab.
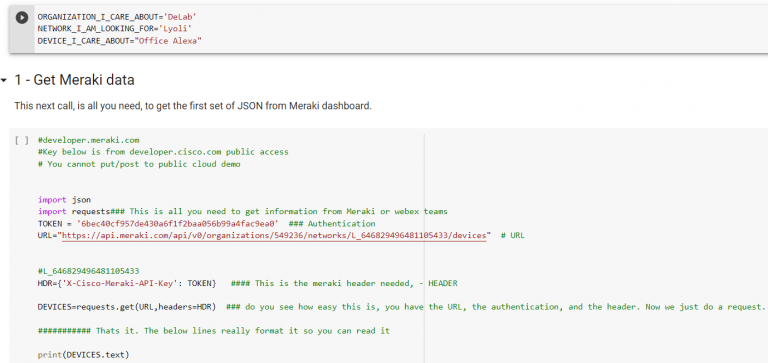
We then print the results, which will show up in a text string of JSON data.
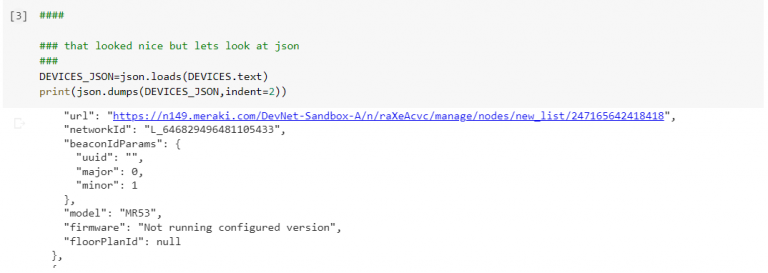
To translate this into real JSON we can use, we use the below command and then print it so we can see.
This is exceptionally useful as we have useful data formatted as JSON. Building upon this, we can use a library called Pandas which is well known in the data science and ML communities, and is essentially “Excel on Steroids for Python.” What becomes interesting is its native support for reading in our JSON, into a table.
Using the Pandas module
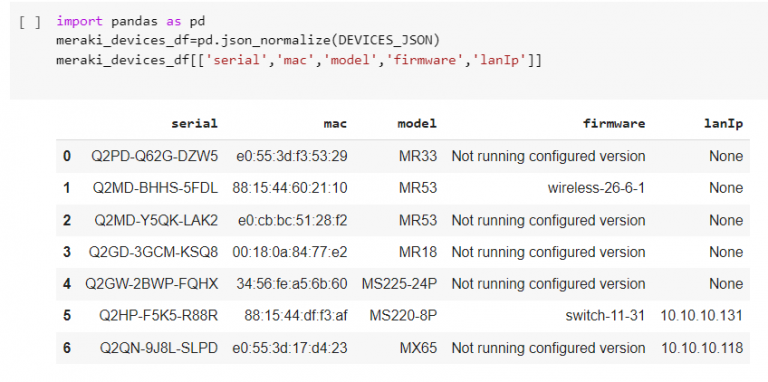
Below we load the Pandas module as the name pd, which we can reference. We then import the JSON, and print out a table with the columns we are interested in. What is elegant about this is the simplicity, we import the module, read in the JSON in a single intuitive command, and create a table with the headings we are interested in.
After doing a few more operations in the code, following through the colab sheet, we make a few more get requests, store as a few different tables, and do different things. (You can explore the sheet.) We search out the network in the organization that we referenced at the outset of this sheet, and we get the top talkers for this via doing a get on the URI and storing it as JSON. Then importing into Pandas (like below), and spitting out the table.
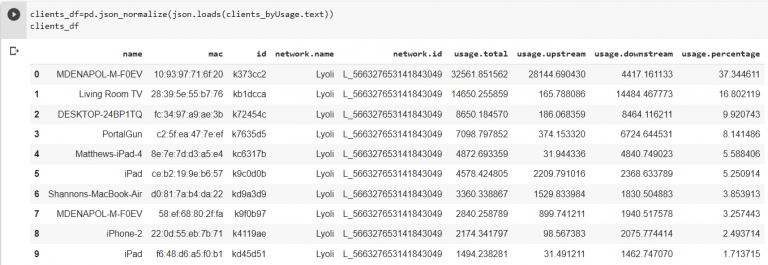
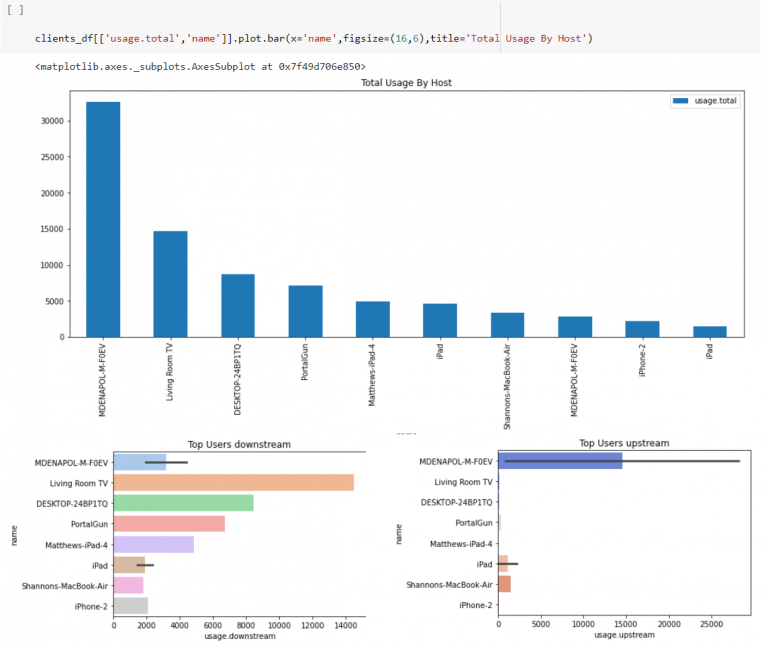
We now have a list of clients and their bandwidth usage. We can then very easily create graphs for usage. This can also all be done easily via a webapp for your network teams. We do this using the Pandas built-in graph capability, as well as an example of using Seaborn, which is used for data visualization.
This is just a high level of some of the capabilities that can be exposed easily via the Meraki API. The purpose of the colab sheet that was created, as well as the DevNet sandbox, is to enable you to be able to play with and evaluate the API. The examples in the colab sheet are intended to be functional code, and stepping stones that reduce the barrier to leveraging programmability to create meaningful results.
I hope this blog was helpful. It explored using the Meraki API via using the always-on DevNet Sandbox. When you have an always-on sandbox, creating, sharing, and reusing examples in Google Colaboratory is a natural fit.
Related resources
We’d love to hear what you think. Ask a question or leave a comment below.
And stay connected with Cisco DevNet on social!
LinkedIn | Twitter @CiscoDevNet | Facebook | YouTube Channel


insightful lab,still learning apis
Great examples and lab! Thank you!