Before my career in information technology, I was an educator. I began teaching inner-city kids in a summer camp, where I learned, practiced and taught many valuable lessons, including the importance of having fun and in keeping a positive daily routine. Later, I taught for the government and was inspired by the use of technology to save lives (both government and civilian). This was a catalyst for leading me back to computer technology (I was a programmer and technophile as a child). Finally, after earning a Master’s in Education and while teaching aboard, I learned how to utilize Information and Communications Technology (ICT) in a daily routine, in order to transfer knowledge to students. Essentially using some of the very technologies which serve to distract them, to teach them. And, to provide them the tools to teach themselves.
Daily, incremental presentation of relevant and challenging information is efficient, fun and provides a foundation for learning, communication and confidence which extends beyond the walls of classroom and corporate office alike.
Purpose
This project describes how to create a Webex bot which posts to a Webex space you have created. Adaptive Cards will be used to design the message the bot will post. Knowledge of Python is necessary in order to program the bot, message, and space details. GitHub Secrets, Actions, and Workflows will be utilized to automate exactly what and when the bot posts.
Layout and Functionality
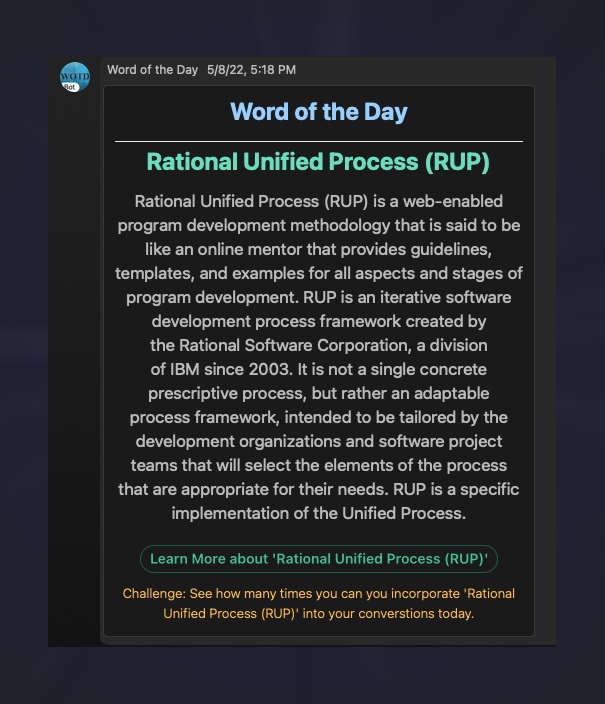
A card similar to the above is posted on a regular schedule to the ‘Word of the Day’ Webex room. A random word is chosen each time from hundreds of the most cutting-edge and interesting terms relevant to development, coding, networking, cloud computing and the sociology of technology. The word is in green font. A multi-word/sentence definition is provided below that. Below the definition is a button with green font that is clickable and will take the user to the source and/or more information on the word of the day.
Write Code that Posts to a Webex Space / Room
Create the Webex Room
Click on the + sign at the top of Webex and select ‘Create a Space’. Then name it and click ‘Create’. Now the room is created and you should see it appear in the rooms column on the left of Webex. Now, we need the Room ID of the new room. We can get it by using the Webex for Developers interactive Rooms API call. Make sure you’re logged in and select to use your personal access token. In the ‘sortBy’ field, type ‘lastactivity’. Click the ‘Run’ button and a list of the most recent rooms you’ve interacted with should be returned.

The room you just created will be on top. Save the id of the room. Later, we will use that as the value of our ‘teams_room’ variable. You can save the other values somewhere as well. It’s good practice to keep notes when creating things; you never know when you’ll need them.
Craft the Template of the Message to Be Posted to Your Webex Room
I prefer using Adaptive Cards when posting to Webex spaces. If you’re starting from scratch, you’ll definitely need the Buttons and Cards Designer found on Webex for Developers. Play around with it using ‘Preview mode’ until it looks right and then copy the code with ‘Copy card payload’. Save it somewhere.

Next we want to create a message to post in the Webex space that will contain the card we just created. You can test this out with the interactive Create a Message on the Webex for Developers page under the ‘Try it’ tab. Don’t forget to paste your Adaptive Card code you saved into the ‘attachments’ field, as well as the roomID you saved from the previous API call. Click ‘Run’ to create the message. When you get it working, click the ‘Example’ tab and copy the code. You will use this to build your request.
Building the App in Python
Okay, we have our Webex Room and the core of the message, based on the adaptive card. Now, let’s write some Python code that will make everything come together and run. I use the Visual Studio Code IDE.
Create a virtual environment and start building your code inside of it.
I use Python and the requests library to do all the work for this app. You can see that the code is pretty simple -> https://github.com/xanderstevenson/word-of-the-day-bot/blob/main/chatops.py. The main ingredients are the adaptive card we created, some if/else statements and a simple requests function for posting to a Webex room. I import ‘return_word’ function from a file in the same directory called ‘terms’. This is also a Python module and basically picks a random term from a list to post with the card to the Webex room each time the chatops.py module is run.
Create a Bot to Post the Message to the Webex Space
So far you have your Webex Room and you have Python code to post messages to your room. But who will post the messages? That’s where the bot comes in.
Go to Webex for Developers / My Apps and ‘Create a New App’ (You’ll need to be logged in to do this). Choose ‘Create a Bot’. Follow all the steps and create the bot. You’ll then get a Bot Access Token. Save this as the TEAMS_ACCESS_TOKEN variable in the ‘~/.bashrc’ file with the line export TEAMS_ACCESS_TOKEN=””. Use the command ‘source ~/.bashrc’ to load the variable into the environment. You can check this worked with the command ‘echo $TEAMS_ACCESS_TOKEN’. In my main module, chatops.py, you’ll see the line ‘access_token = os.environ.get(“TEAMS_ACCESS_TOKEN”). This sets it up so the bot is the one doing the posting in the Webex space. Cool, right?
Running the App from your Local Console (for debugging)
Now I can run the command ‘python chatops.py’ or ‘python3 chatops.py’ to run the app locally (since the Python verrsion is 3.8.10). Every time I run this command, a new random word of the day will appear in the Webex space. I only use this for testing purposes.
(venv) alexstev@ALEXSTEV-M-FCUD wod % python chatops.py
your message was successfully posted to Webex Teams
Running the App on Schedule (Using GitHub Workflows and Actions)
In order to run the app on a schedule, we use GitHub workflows. In order to do that, you’ll need to create a GitHub repo named ‘.github’ and create a directory in it called ‘.github/workflows’. So that structrure will look like this: ‘.github/.github/workflows/’.
Next, you want to create a workflow file in the workflows directory. It will contain a name, a trigger, a job, and basic steps (including checkout and run). To learn more about what all this means, check out this tutorial: How To Build Your First GitHub Actions Workflow. I also have a ‘workflow templates’ directory in the ‘.github’ repo that contains the workflow as a template, as well as a properties.json file describing everything.
This is what mine looks like –> https://github.com/xanderstevenson/.github/blob/default-branch/.github/workflows/wod-workflow.yml
It’s only 29 lines of code! Automation all day!

One key component in my workflow is this line ‘TEAMS_ACCESS_TOKEN: ${{ secrets.TEAMS_ACCESS_TOKEN }}’. I store that in the repo you’re reading now under Settings -> Secrets -> Actions.
Now we want to connect the Workflow we created with the repo and the code we want to run. In my word-of-the-day-bot GitHub repo, I click on the Actions tab and click on ‘New workflow’ and find my workflow listed amongst all the recommended and prebuilt workflows in a section titled ‘By Alexander Stevenson’. If you’ve already done this, you can go back a step to Actions and click ‘Select workflow’ to pick the workflow you want.
If everything is setup correctly, the code will run completely and the Webex space will receive a new message. If not, you’ll get an email to the address associated with your GitHub account. You can also click on the ‘Actions’ tab in your code repo and you’ll see a detailed description of why your code failed.
Other Considerations
Word Choice and Sources
For this project, words were chosen which are relevant to modern and future technologies. I also deliberately chose words which have cross-functional use in network and software development. Additionally, I chose a mix of words which will be of interest to a wide range of IT professionals, i.e., engineers, managers, human resources personnel, testers, programmers, developers, cybersecurity, etc..
I used a variety of resources to find the most cutting-edge terms but without getting too deep or technical. Neither did I choose words which would be too common or simple. Last but not least, I tried to compile a list of words that will make anyone who uses them sound smart. Well, not really. Actually, humor is a common theme. Trying too hard to sound smart usually has the opposite effect.
Sources (not all-inclusive)
- Network Programmability and Automation Fundamentals from Cisco Press
- PCMag Encyclopedia
- TOP 50 IT & TECHNOLOGY BUZZWORDS 2022 YOU MUST KNOW
- Software development: Glossary
Transform Wikipedia Article to MP3 Files
By clicking on the ‘Learn More’ button on each Word of the Day message, users are taken to a webpage which will provide an even deeper definition. The vast majority of the time, this will be a Wikipedia article. Personally, I plan on reading the entire article so that I can truly grok each term.
A colleague of ours at Cisco, John Capobianco, has developed a package called wikitrola, which will transform any Wikipedia page into an MP3 file.
- wikitrola: package on PyPI
- wiktrola – Transform Any Wikipedia Article into MP3: instructional video on YouTube
If you have neither the time, patience, nor desire to read the Wikipedia article, just use wikitrola and you can listen to it while multitasking or relaxing.
Codebase Updates
I had created an empty init.py file in the root directory out of habit. Before Python 3.3 this was done to to make Python treat the directories as containing packages and facilitate importing between modules. From Python 3.3+ Implicit Namespace Packages are supported which allows the creation of a package without an init.py file. This however only applies to empty init.py files. So empty init.py files are no longer necessary and can be omitted.
Anyone with a Cisco domain account and Webex can join the Word of the Day.
We’d love to hear what you think. Ask a question or leave a comment below.
And stay connected with Cisco DevNet on social!
LinkedIn | Twitter @CiscoDevNet | Facebook | YouTube Channel


CONNECT WITH US